There are so many talented crafters and creaters out there in the blogosphere! I confess that I have a computer file entitled 'cool stuff & ideas' and whenever I see something that inspires me, I shove it in that file for future reference. This fun project falls into that category... 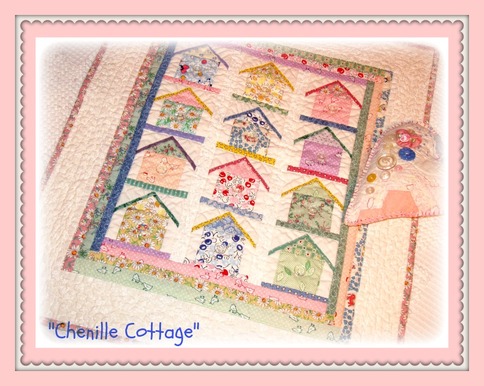 I fell in love with this little quilt from Carolynn at Chenille Cottage--isn't it adorable? She was featuring her guest bedroom and this little beauty was peeking out from the top of a dresser where it was part of a display... I love the mix of colors and patterns, and the quasi-log cabin perimeter.
You all know how I love my modified log cabin pattern! You can click on the photo and it will open a link to her post so you can see it for yourself!
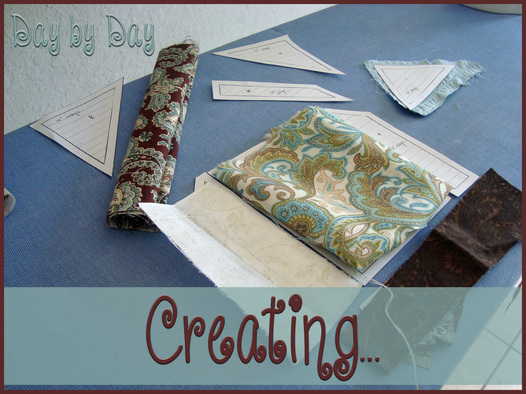
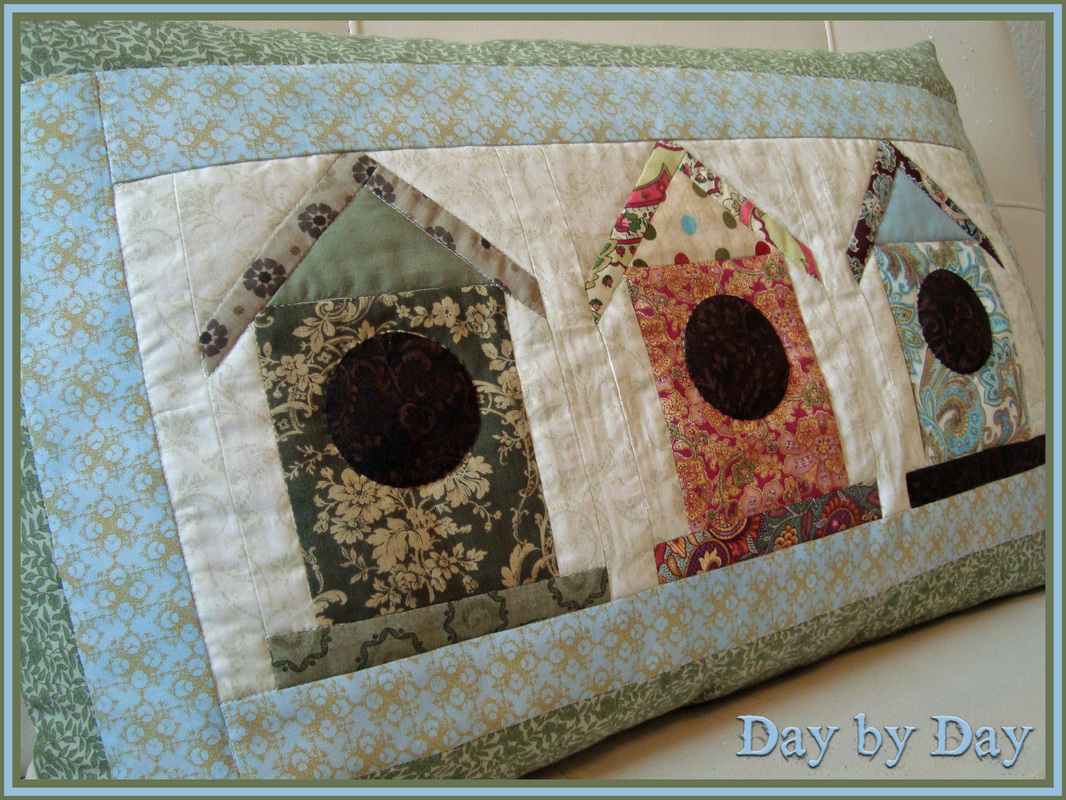
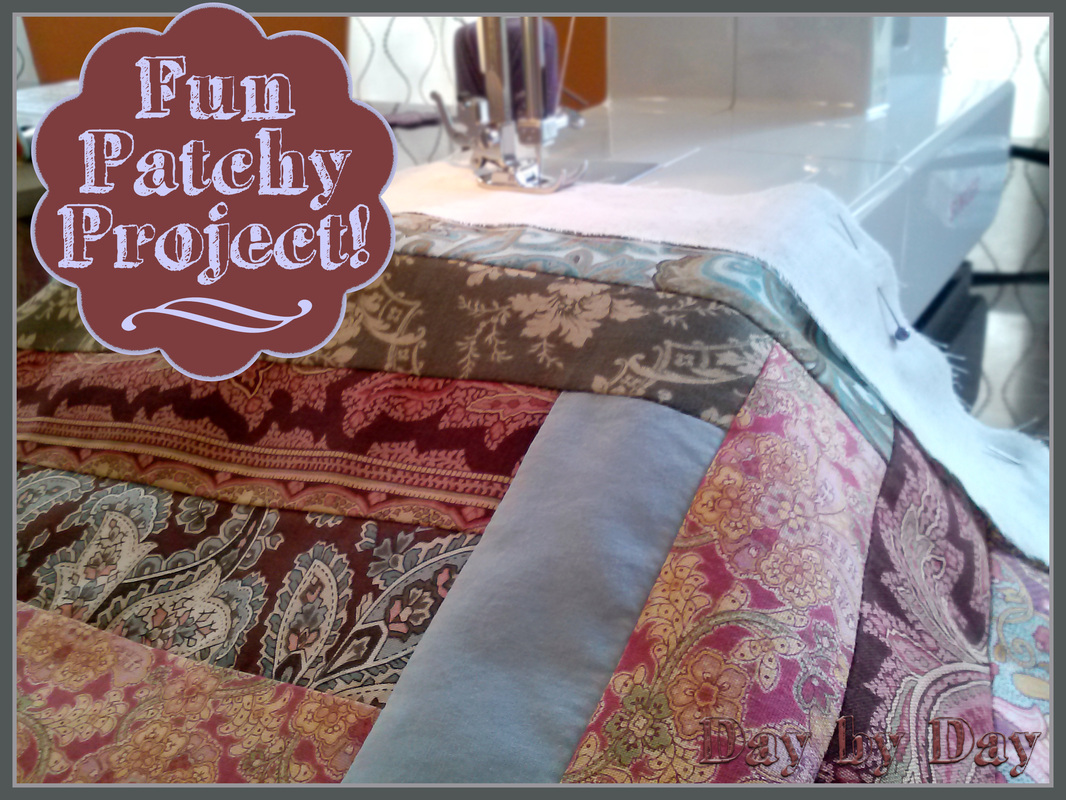
I drooled over the quilt for about a week and decided that I needed to attempt something similar, so one morning I sat down with a cup of coffee and my ideas and drafted out my own version of the pattern... Yet another project to use up some of my favorite fabric scraps! For this project I actually took the time to draft the pattern, add inlays, and keep a copy of it so I could replicate it at some point in the future. Something you need to know about me is that I often start out a project with just an idea in my head and no set pattern. I play around with fabrics and make things... handbags, coin purses, accessories, you name it. More often than not I don't have a solid pattern. I've done that all my life--and it's a bad habit that I really need to break for the sake of consistency. And here it is! A sister for my modified log cabin cushion to cover the world's ugliest pillow #2. They're happy to hang out together side-by-side on the sofa in my new sewing/work room, and they add a bit of color and charm to my workspace. I am so happy with the way the pattern turned out! I may just make a wall hanging using my pattern and add in a little appliqued birdie... stay tuned for a creative update on that! The finished result is a combination of traditional piecing, hand applique, machine quilting, and hand quilting. If anyone is interested in trying the pattern for themself, feel free to leave me a comment and I'll share my pattern with you.
Happy Tax Day!
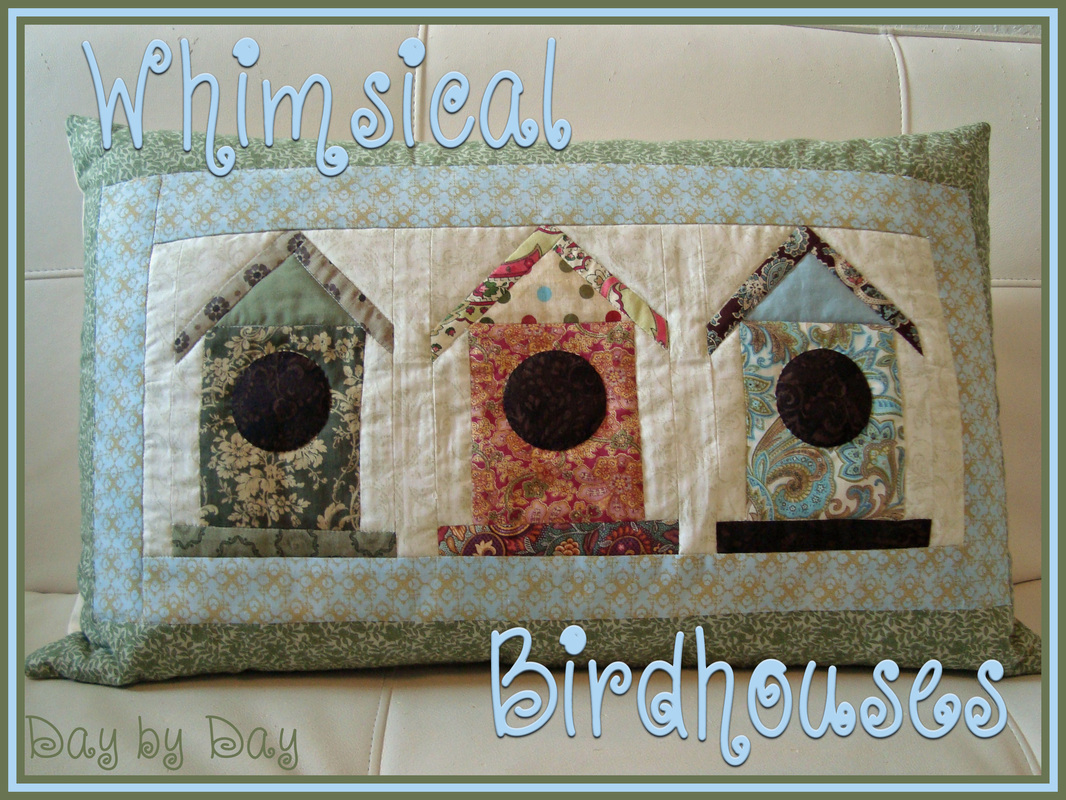
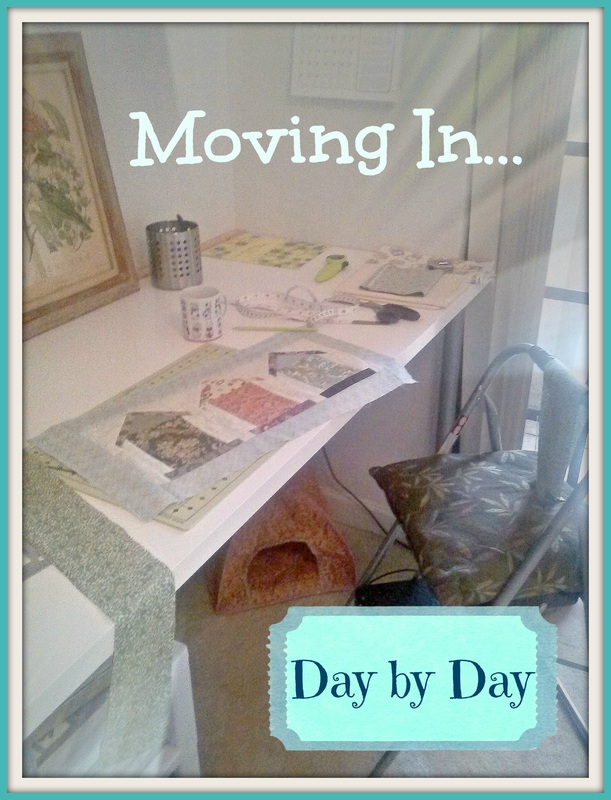
I'm almost there! After much relocation and rearranging of my many stashes (fabric, beads, yarn, paper.....) I am almost settled into my new sewing/work room! I really have to get everything into its proper place and then take a few decent photos--the above pic was snapped with my cellphone, so forgive the quality. Better to come! See the panel on the worktable? I was completely inspired by a quilt I saw online and decided that my next pillow cover (to cover the world's ugliest cushion #2, brother to the world's ugliest cushion #1) would be birdhouses. I sat down, drafted a pattern, tweaked it, added inlays, and broke out my fabric scrap stash. Have I mentioned recently how much I love my fabric scrap stash? Notice the stepladder that I'm currently using as a stool? Yup. A stepladder. I have to find a stool that is just the right height for the worktable, so I'm improvising for the moment. As I said, this is a work in progress... but I love it!
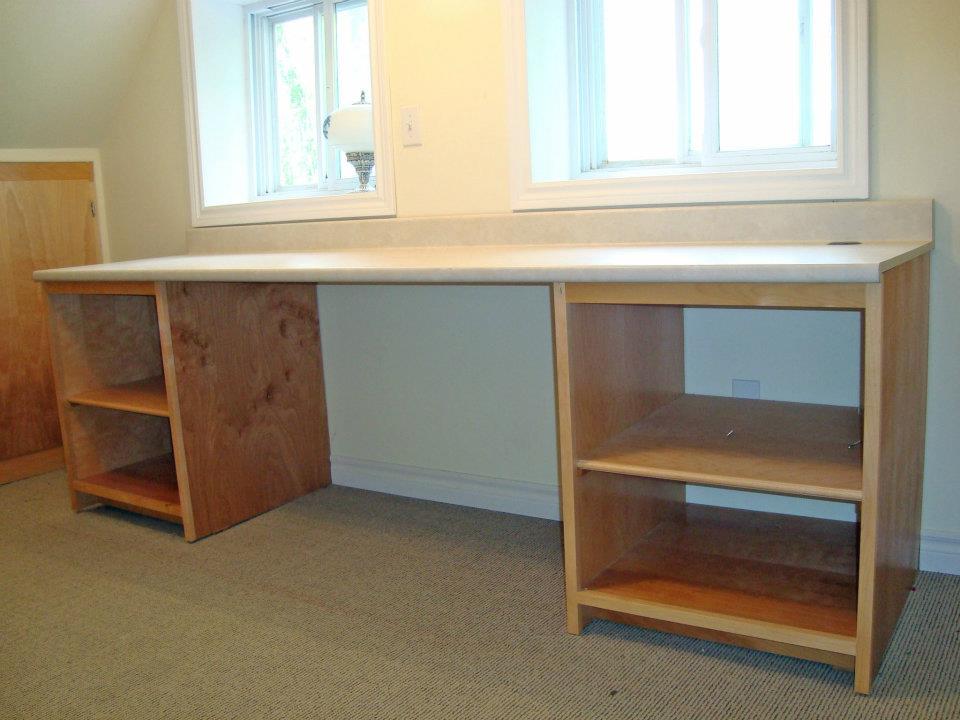
My worktable was just over 8' long and flooded with natural light from the big windows. My sewing machine and serger had a permanent home at one end and I used the other to do everything from cut out patterns to wrap Christmas gifts.
|
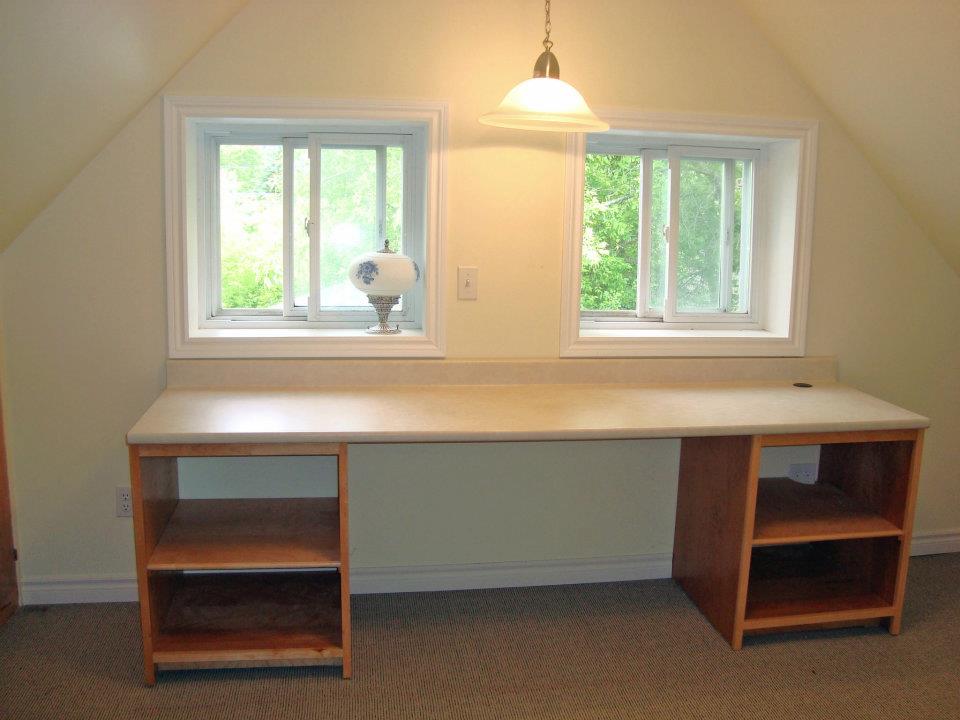
The beautiful windows were bigger than they appear in these photos, and my kitty girl Bingy could usually be found lounging on the wide window ledge of the left hand window--her blanket stayed there permanently. The squirrels in the overhanging trees were constant entertainment for all four kitties!
| Many of you will remember me talking longingly about my sewing room in my home back in Canada. Sadly, my house was contaminated with furnace fuel in a flood a year ago and the beautiful old lady who was built well over 150 years ago had to be demolished.
It broke my heart.
Literally.
When I think about that house my eyes well up and I feel a heaviness in my chest. It's something I work on every single day.
The above photos were taken after everything was cleaned out of the house shortly before it was demolished. I had the room custom-built into an existing attic space above the kitchen, and my carpenter worked with me tirelessly to create a workspace exactly as I wanted it. There were custom storage cabinets built into the space under the eaves where the ceiling sloped down to almost meet the floor. The space under the eaves of the opposite wall was empty... waiting for cabinets that would never be built.
My carpenter's name was Jim and he was the most marvelous man--a tireless worker who carefully and quietly constructed amazingly beautiful pieces with his calloused hands. His father had been a builder as well, and he took after him in his ability to take rough wood and nails and create spectacular pieces of furniture and cabinetry constructed from the blueprints in his mind. His talent was astrounding and yet he was humble. Such great ability in such an unassuming individual. If anyone asked Jim how he was doing on a particular day, he would smile and say, 'The very best!' His love for his wife, children, and grandchildren was as well-known as his love of Pepsi and Worther's Originals candies. He was truly a lovely human being.
Sadly, we lost Jim to a tragic hunting accident in late September, 2010. The loss was shocking and the event sent a ripple through the whole community. Everyone knew and loved Jim, and his death made us all stop and evaluate our lives. Our reality can completely change in a split-second, and that is a frightening realization.
On a sun-drenched Friday afternoon I spoke with him for a few minutes before he walked out to meet the weekend head-on. He was looking forward to heading out with his wife and friends for a weekend spent in the woods--hunting season had just opened. I wished him a happy weekend and we said we would see each-other on Monday. The next morning a friend's truck pulled into my driveway, and he came walking up the pathway with tears in his eyes. The unthinkable had happened... Jim was gone. I honestly think that everyone in our circle was in shock. I walked through the house, touching the cabinets made lovingly by his hands just months before, feeling the cool tile of the bathroom that he had laid just that past month. I stood in my almost-finished sewing room and looked around me, pictured him standing by the window painting the woodwork carefully, his hat casting a shadow down over his face as he concentrated on his work.
I cried uncontrollably and wondered why... There was a box sitting in the corner where the last set of cabinets should have been until the day more than two years after his death when I cleaned out that room before demolition. Jim had left the paint for the room in a box with other odds and ends that he would use later to finish and touch-up everything. I couldn't bring myself to move it. Silly, but somehow with that box still sitting there Jim wasn't really gone--he would be back to finish my room. The box contained half a can of pale yellow wall paint, a container of ceiling paint, woodscrews, a paintbrush, a cloth rag... and an empty Pepsi can as well as an assortment of shiny golden candy wrappers. Simple little reminders of the man he was, and the legacy he left behind. The very best, Jim... you'll always be the very best.
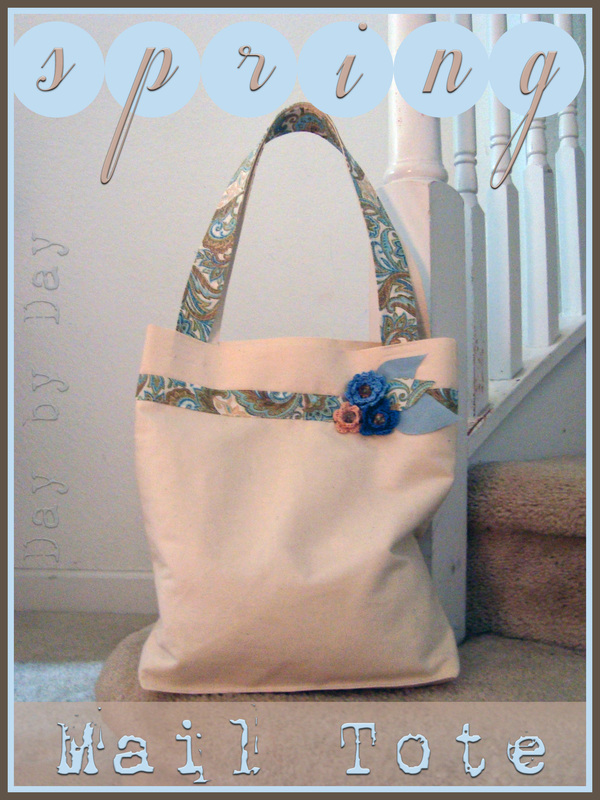
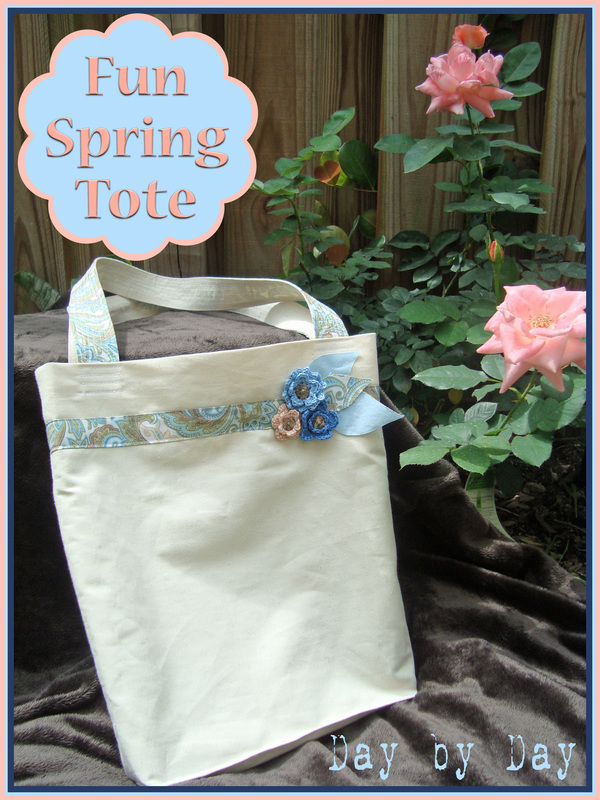
I've been meaning to make this tote for ages now, and last week I finally dove into my fabric stash and came up with enough odds and ends to make it! There is such a great sense of accomplishment when you finally finish a project that you've been procrastinating over for a long time, isn't there?
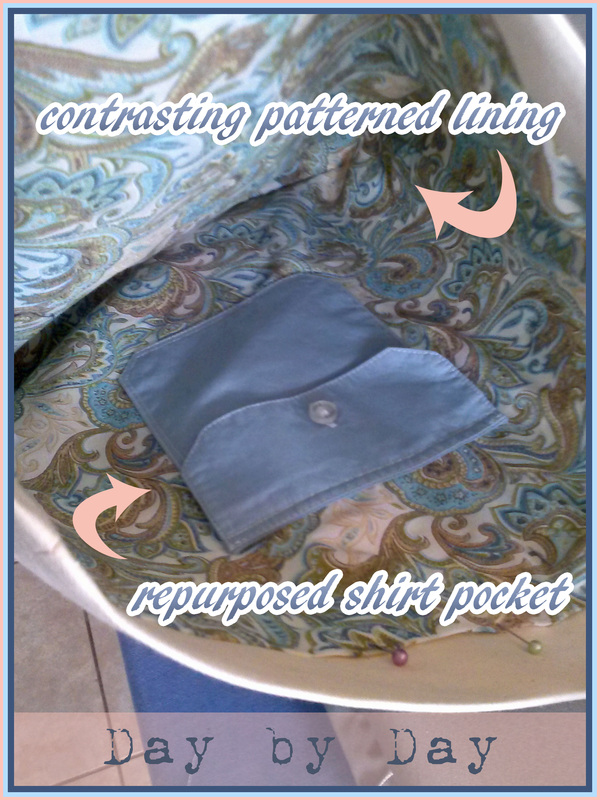
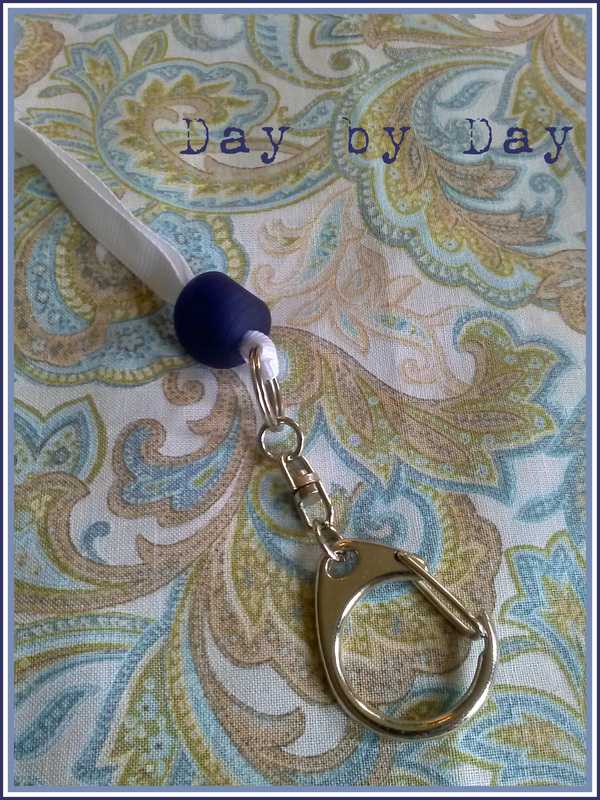
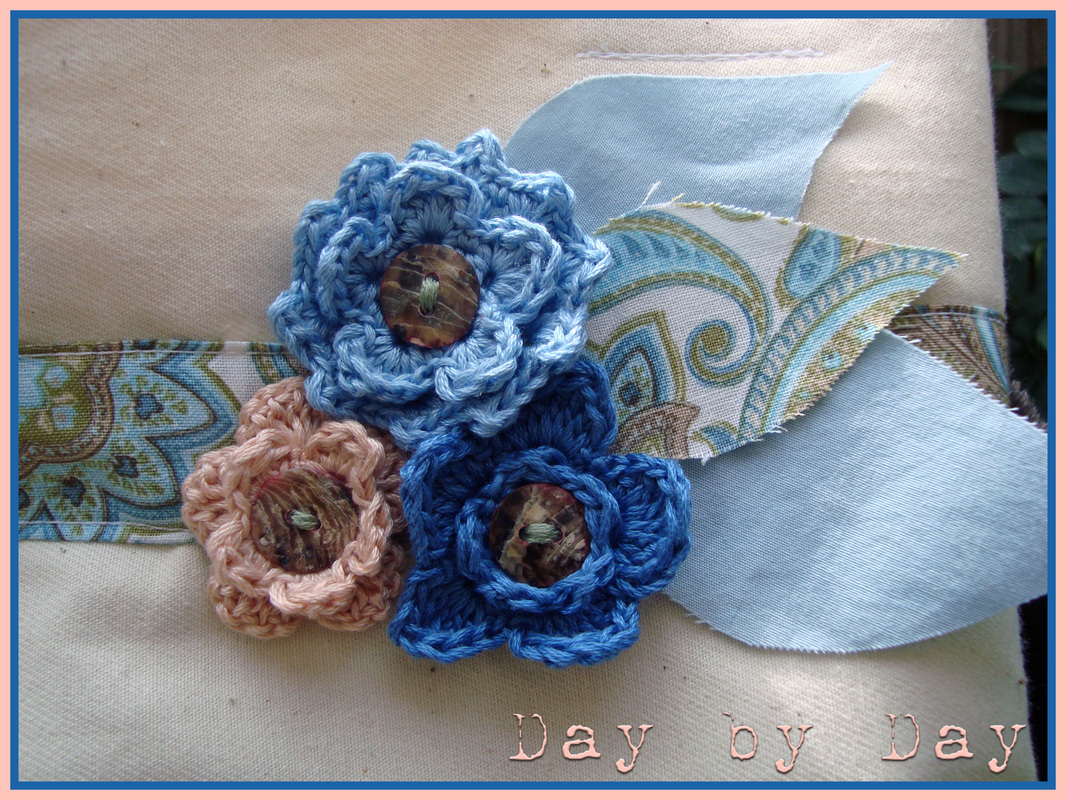
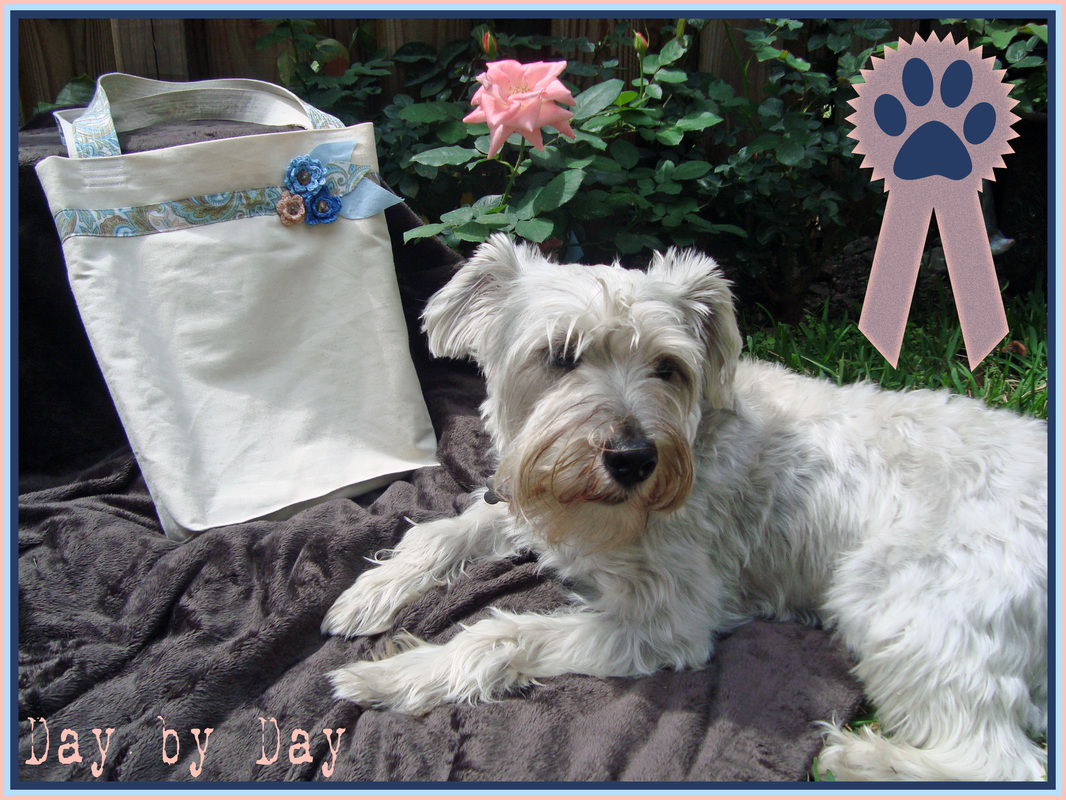
This little beauty is actually a mail bag--I swear, we receive more mail than anyone in the country, and I always go to collect it when I go for a stroll around the neighborhood with my Charlie Dog. I'm all about multi-tasking, but we run into problems when I have Charlie's leash in one hand and my phone, mail bag, and keys in the other one. If it is really hot and I'm wearing a skirt or shorts, I usually don't have a pocket to use, so I was in dire need of a multi-functional tote where I could stash my phone and keys as well as the mail. And here it is! I used a natural heavy cotton twill for the body of the bag and lined it with a pretty summery blue paisley, then added a contrasting stripe of the lining fabric around the outside. I liked the blue paisley so much that I ended up using it as contrast for the handles as well, and placed them so they would be visible on the right side of the tote. Inside I used a repurposed blue shirt pocket (my husband's old shirt has been reincarnated in countless projects now!) and also attached a long grosgrain ribbon with a key fob to attach my keys. I had originally planned on using pink floral scrap fabric from Sophie Kitty's little tent, but when I went to cut out the lining, I realized that I didn't have enough of it for this project... so I had to set aside my crochet cutie flowers in shades of pink and purple and whipped up a few new ones in blues and peach with some embroidery floss I had hidden away. My sewing and crafting stash never ceases to amaze me--I swear, I have things in it that I'm sure I have long forgotten! I'm so pleased with this tote--I debuted it last week, and it makes my life so much easier when it comes to mail time! I love the fact that it's kind of pretty and girly without being too 'every little girl is a princess'-esque. I confess I have issues with that. I have to admit that I've had a terrible time trying to photograph it... the colors just aren't coming out true to shade, and every shot seems to look dull and lifeless. Apologies for that. As Charlie is my constant mail-collecting companion, when he decided to photo bomb my little snapshot session, I decided to include him--he gives this project his seal of approval! Here we are in another week again... what are you working on this week?!
Happy Crafting!
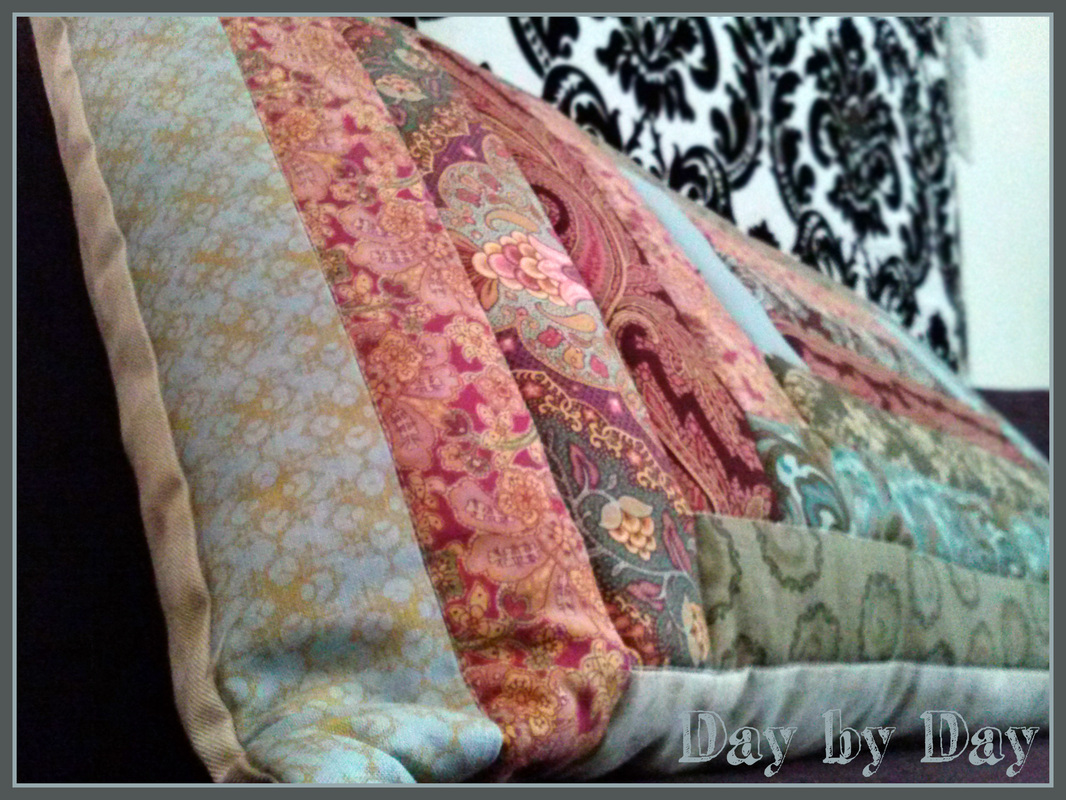
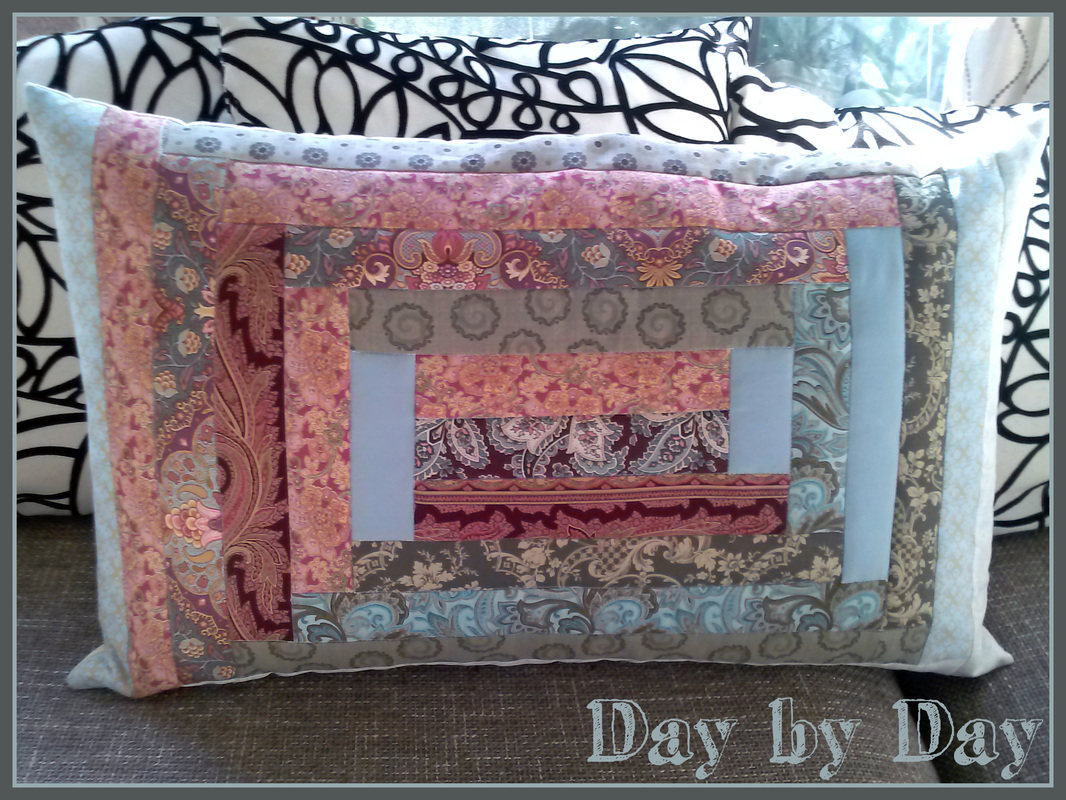
Any of you who have been with me for a while will be aware of my love of all things patchwork. I have been doing a ton of projects lately that involve enjoyable ways to use up some of my fabric scrap stash, and this week I've completed two projects that I am so pleased with! I have always loved playing around with a modified log cabin pattern, and I put that motif to good use in making a beautiful quilted pillow cover. The backstory of this unassuming pillow is a turbulent one... it belongs to a set of three comfortable feather pillows that came with our big 4-piece sectional sofa two years ago. Sadly, the aesthetic of the pillow coverings just didn't match their comfort factor, and I kept hiding them away in a closet never to come out unless we absolutely needed them. Here it is, the before: See, I told you! The ugliest pillow covering ever made. It doesn't even deserve photo embellishment. So finally, after two years of procrastination and trying to decide how I wanted to cover those sad pillows, I pulled out my fabric scrap stash and went to work. (Totally off-topic, but I've been eating a lot of oatmeal lately, I chalk up my sudden burst of creative energy to that.)
The pillow is 27" x 17" and I used 2" fabric strips and made a random pattern. I confess that I ran out of scraps that were long enough to finish the last few rows of the patchwork, so I broke down and bought a couple of quarter yards to finish it off.
It'll be our secret. I used polyester batting and a plain cotton backing and machine-quilted (stitch-in-the-ditch style) the pattern. I had some natural cotton twill kicking around, so I used that as the pillow cover's reverse side. It's very durable and will wear nicely. I am ridiculously happy with the end result--even though our household aesthetic is neither shabby nor cottagey, I snuck in my own little bit of rustic charm and it makes me smile every time I glance over at it... which I have been doing a lot since I finished it several days ago.
Am I the only crafter who does that? Glances lovingly at their creations... leaves them out in a conspicuous spot just to be able to catch sight of them...?
I think not :-)
Happy mid-week-day everyone!
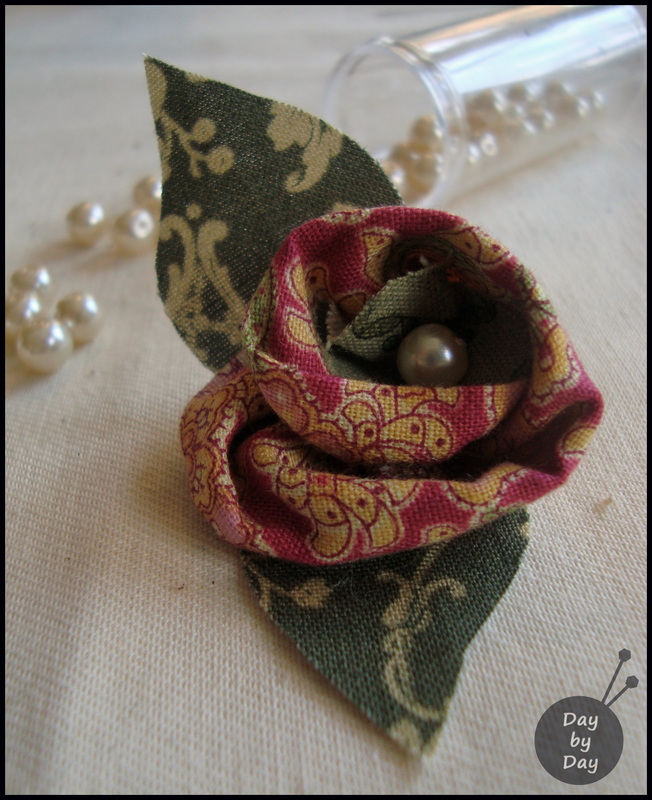
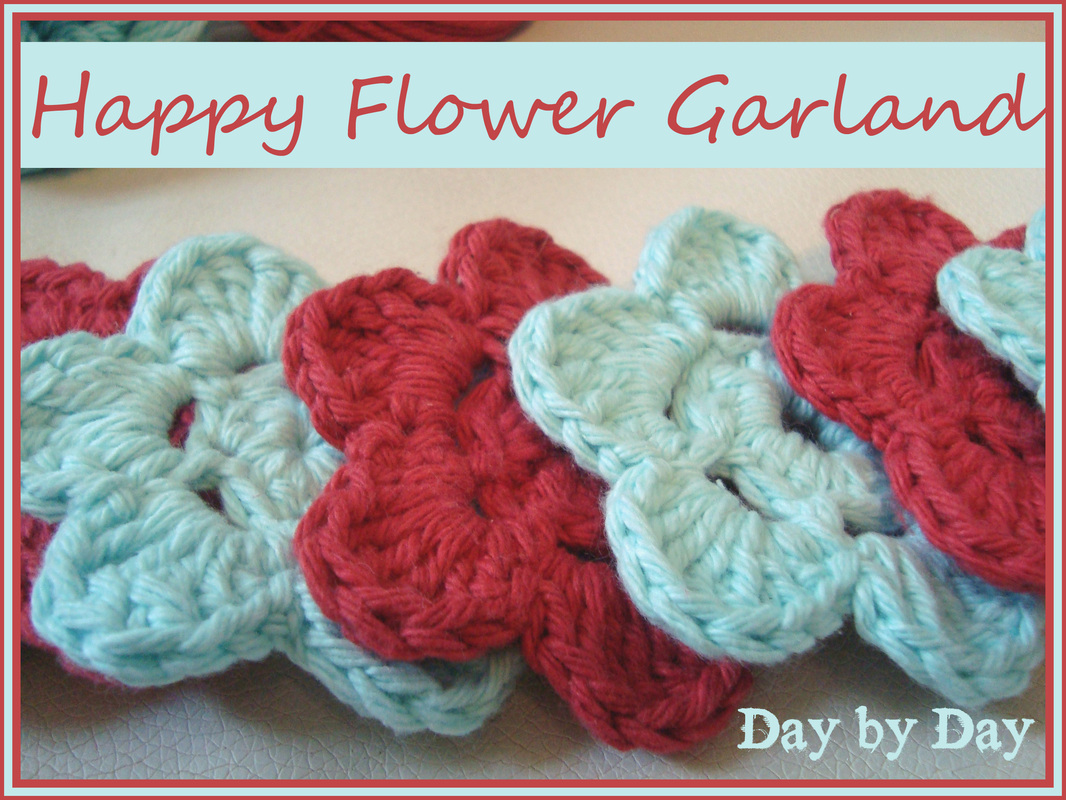
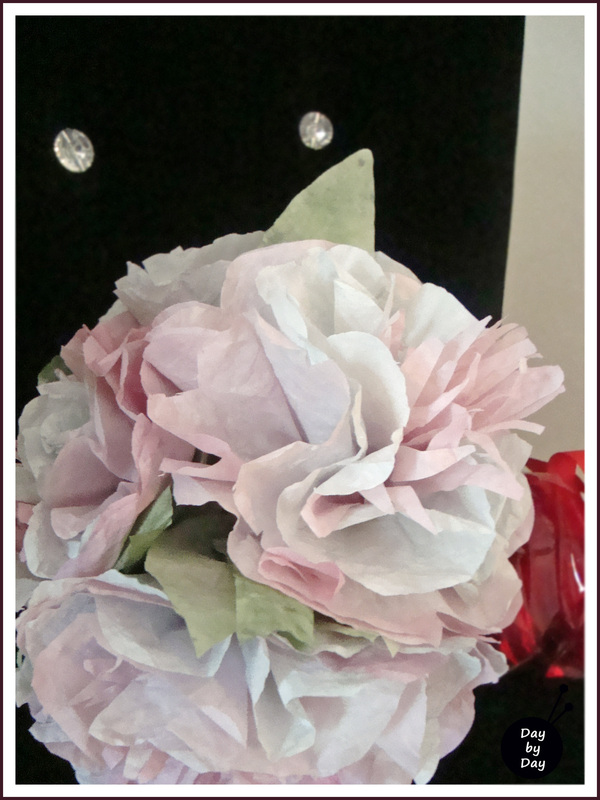
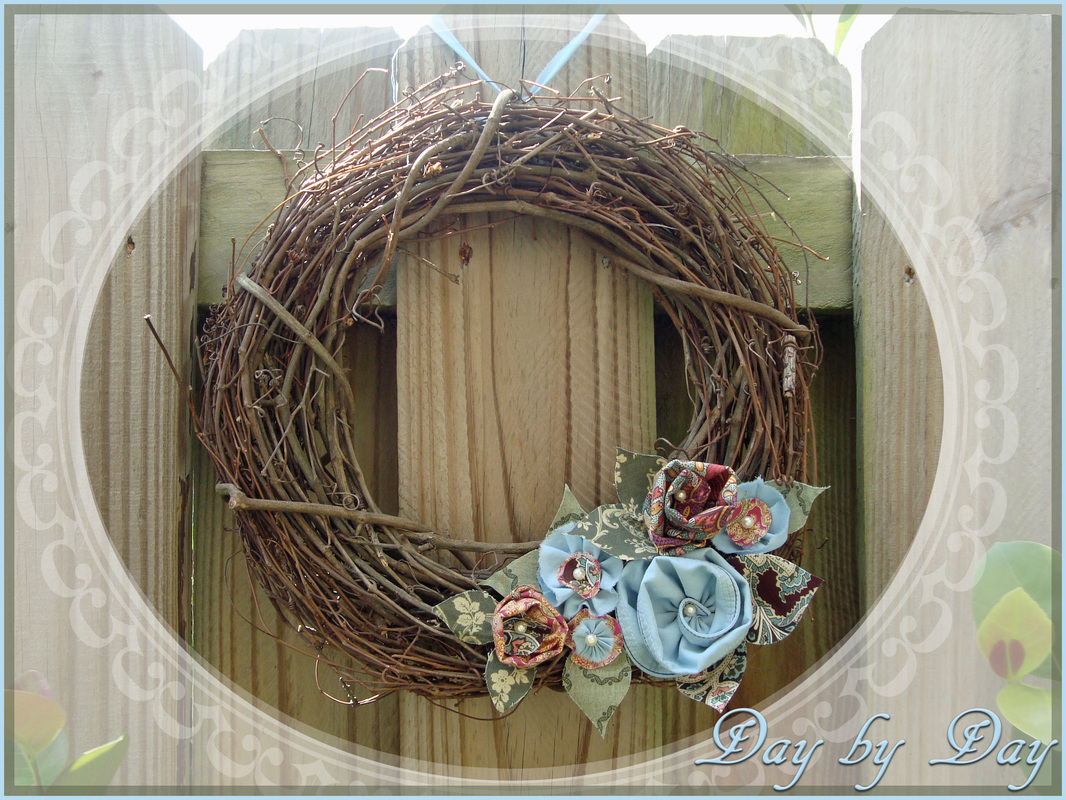
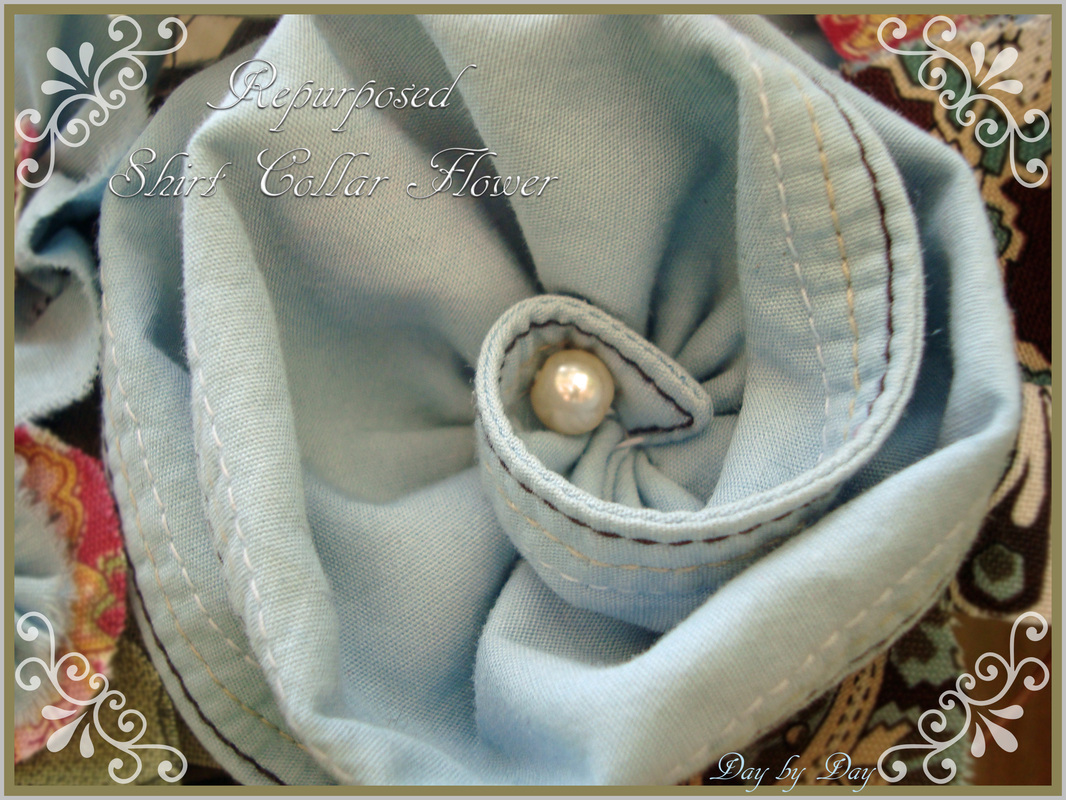
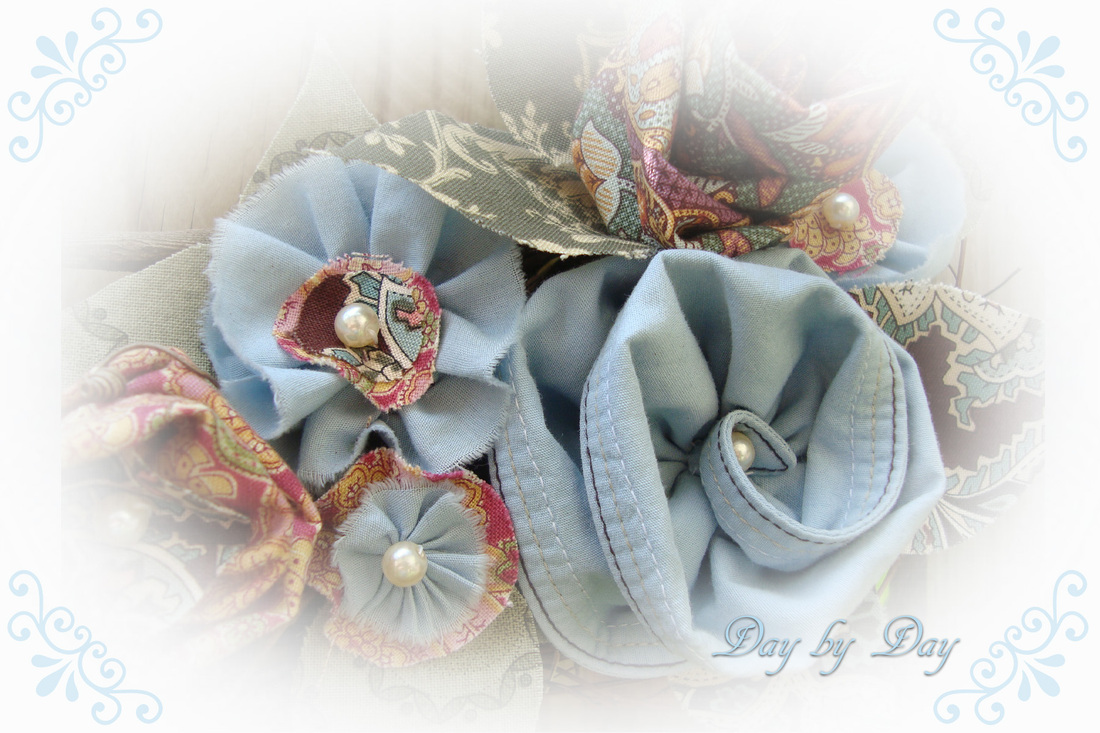
Lately I'm really loving flowers... the beautiful bougainvillea are flourishing all around our neighborhood and their cheery shades of pink bring a big smile to my face as Charlie and I take our daily strolls. He seems unimpressed by their tropical hues, but I find them enchanting. My recent Happy Scrappy Flower endeavor sent me into fanciful imaginings of a garden of fabric scrap flowers, blooming happily indoors to be enjoyed year-round. I've been coming up with new projects to create using my fabric scrap stash so that I can look at the pieces I so loved when I bought them, and enjoy them every day. During the past week I've squeezed a bit of creation into my endless days spent in the digital realm, and I picked out my very favorite prints to be used.While getting all the prints together, I ran across the remains of my husband's old shirt that I have torn up and used for everything from Sophie's Kitty Quilt to my favorite Framed Patchwork Memories. It was still sporting its collar, which had lovely multi-colored stitches at its edge... perfect for a unique fabric flower! It's amazing what you can make when you look ordinary things with just a bit of imagination! My stolen handwork moments added up to a whimsical garden of fabric flowers, and I decided they would fit beautifully on the grapevine wreath I had kicking around crying out for embellishment. 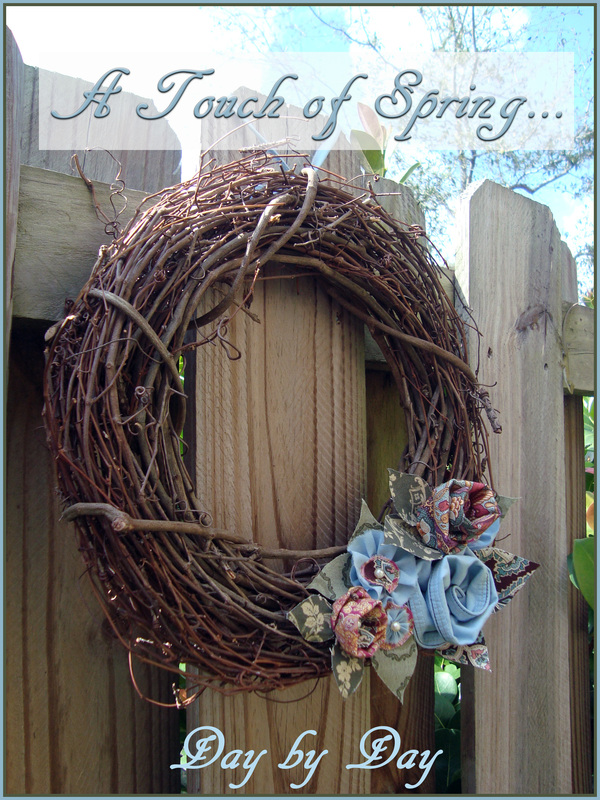 I didn´t realize it when I posted this pic.... but can anyone spot the lizard? I am so pleased with my 'breath of spring' wreath--it makes me happy to see so many of my favorite fabric prints all snuggled together where I can see them every day! If anyone is interested in creating their own fabric flower wreath, you can take a look at my scrap flower tutorial and just let your imagination run wild--make a bunch of the flowers in different sizes and colors, and attach them to your own wreath. A great weekend project to brighten the winter days. Voila--instant spring! Happy Crafting!
Confession: I am a fabric hoarder.
Well, not technically a 'hoarder' because I have no problem entering and walking through my house... but I have a massive fabric stash (a situation which I'm sure more than a few of you have in common with me?).
I have fabric from all sorts of sewing endeavours that I put away to do something with later... and some pieces are so very special to me. There are certain favorite pieces that I periodically take out and look at, wondering how I should use them. Then after much deliberation I end up putting them away because I like them too much to put them into just a 'so-so' project.
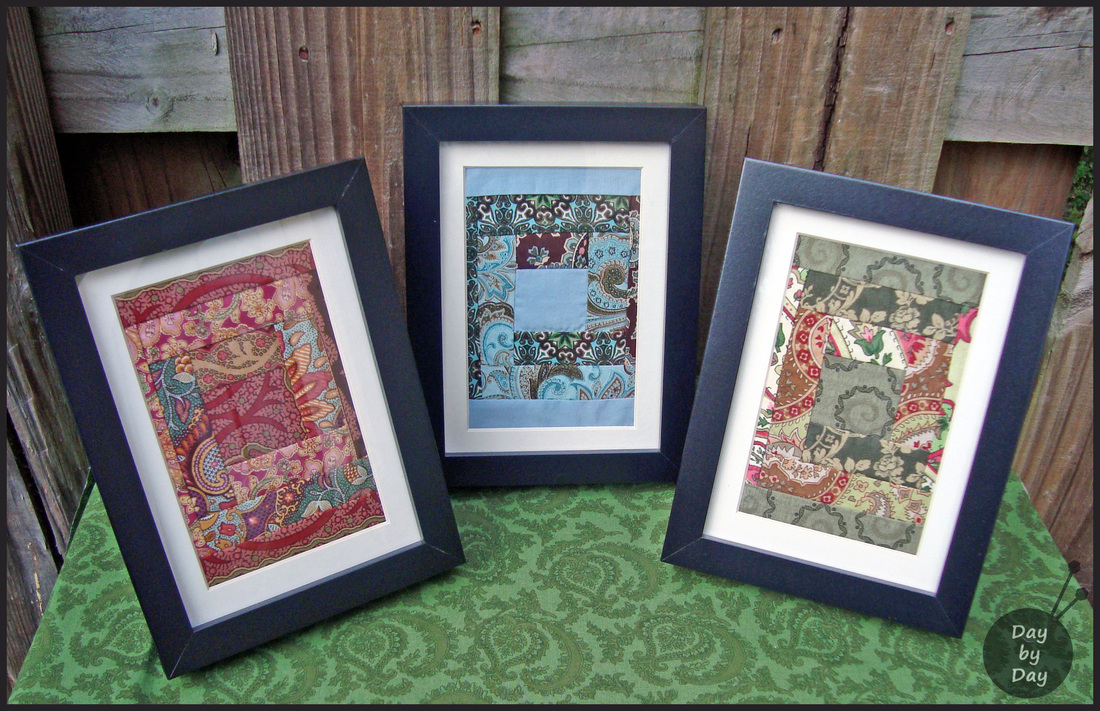
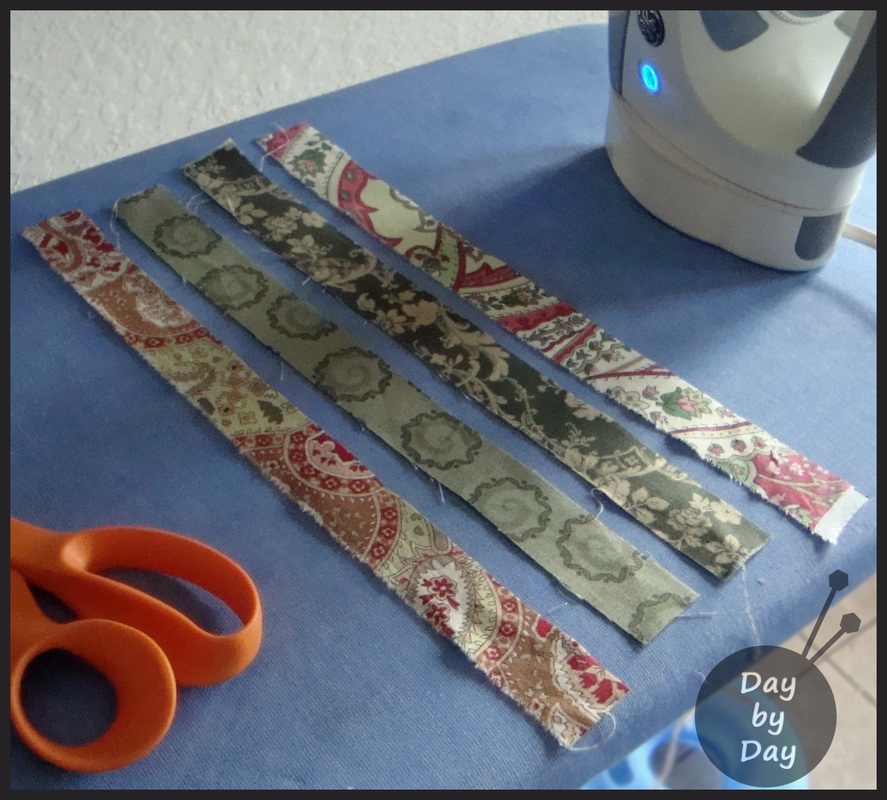
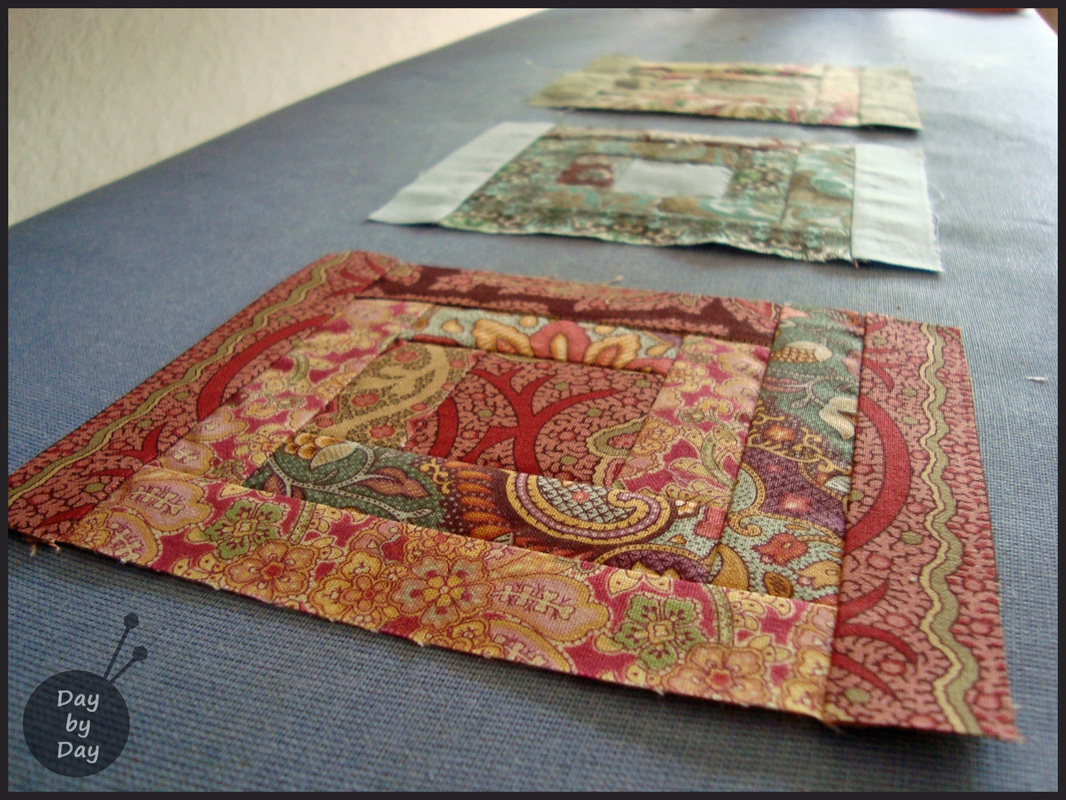
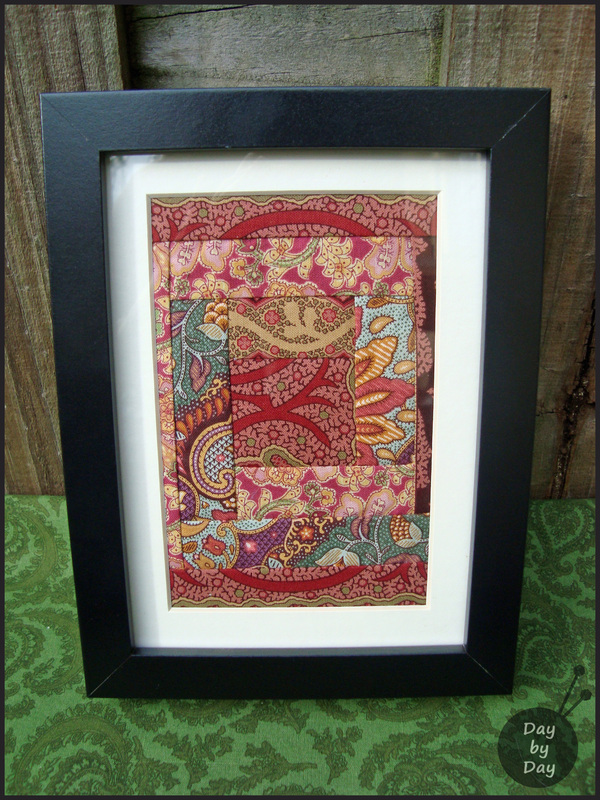
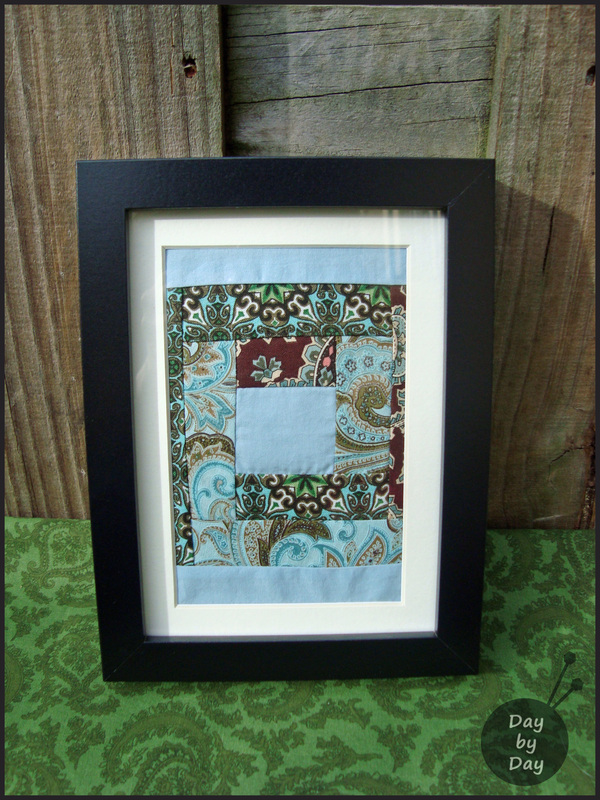
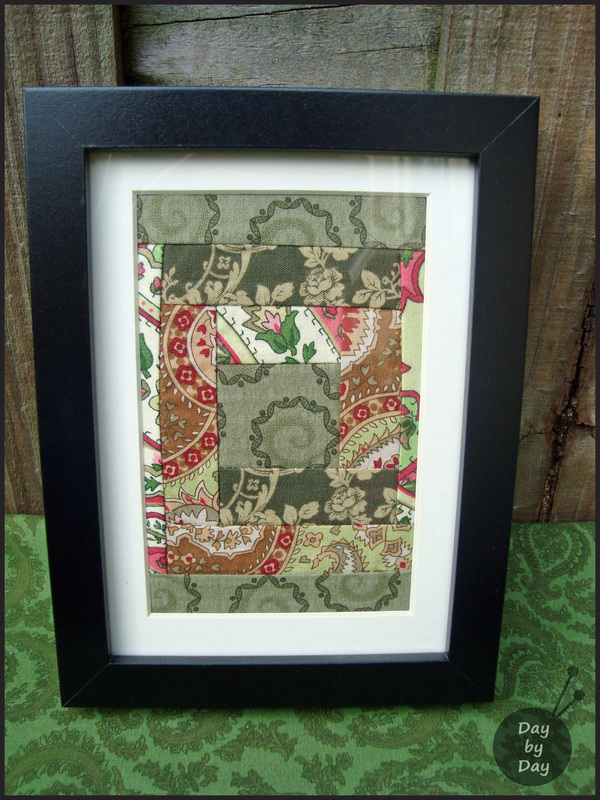
So, the other day I took out my pieces again... and decided to make something pretty that I could look at and enjoy all the time! I started out with 1 inch strips like these, and started adding them onto a 'base' block measuring 4.2cm x 4.8cm.
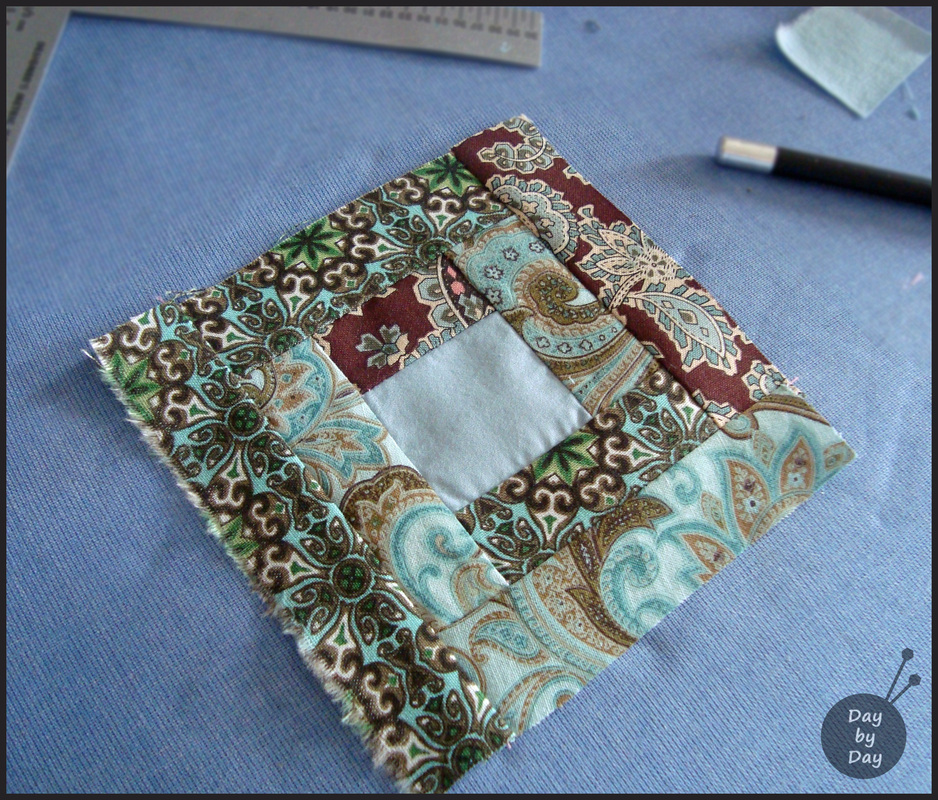
(...yes, that is a kitty ball-in-a-donught toy in the background... that's how we roll here!) And before long I had 12cm x 12cm squares. See that dark brown and blue paisley print fabric? It's my all time favorite! I assembled three color themes: pinks, blues, and greens. I had three RIBBA frames from IKEA kicking around, so I added strips to the top and bottom of my modified log cabin blocks to allow them to (kind of) fit into the matted openings. Overall I'm delighted with the results. There is left-over fabric in these from everything from clothing for myself to shirts for my husband, and even Sophie's little kitty hidey hole. And some much-coveted fabric that I saved from my sewing room in Canada after the flood. The darker greens in the above shot are a couple of those pieces. I love the fact that I can look at these and recognize all of the different patterns and it brings back memories of many happy projects, and the happy times associated with them. They are now living in the downstairs bathroom (which accounts for the weird lighting in the above photo), and I smile every time I look at them. As Martha would say... these are a 'favorite thing'!
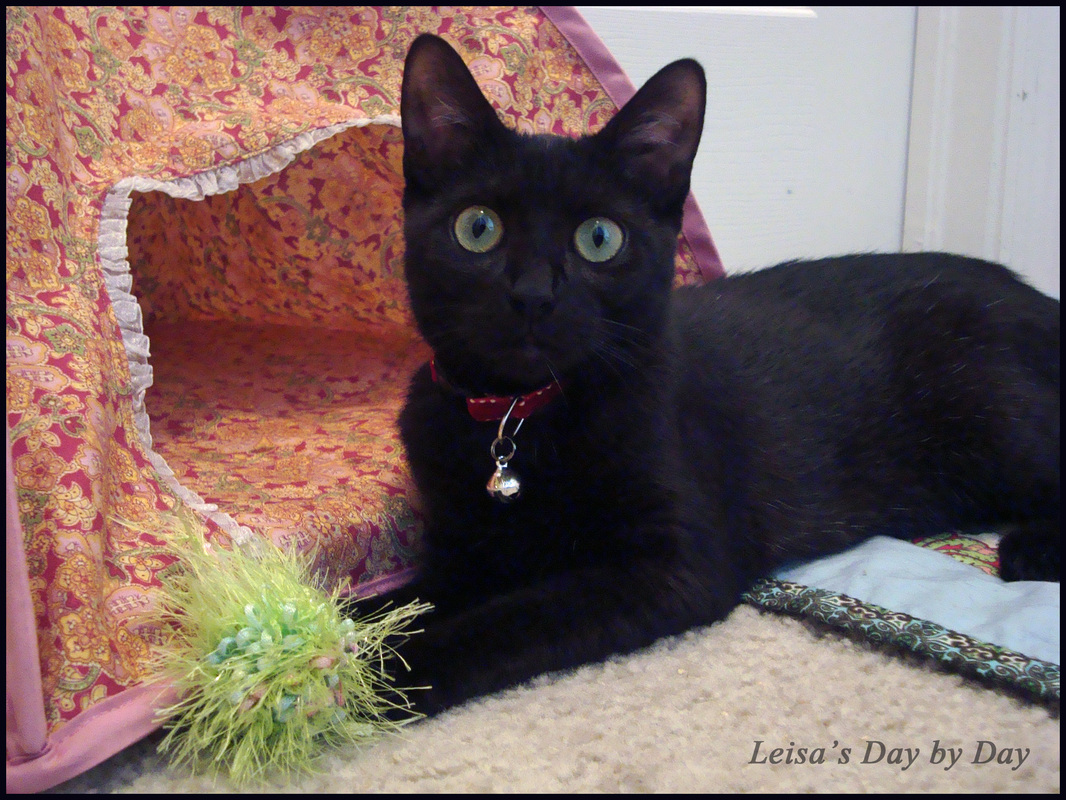
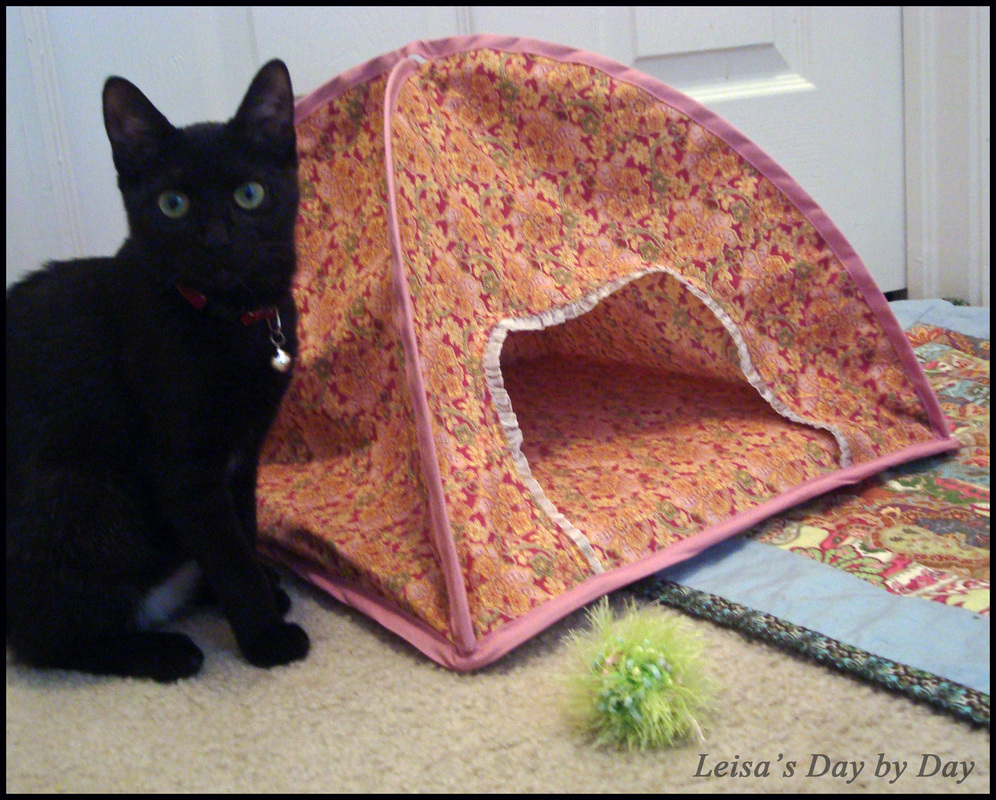
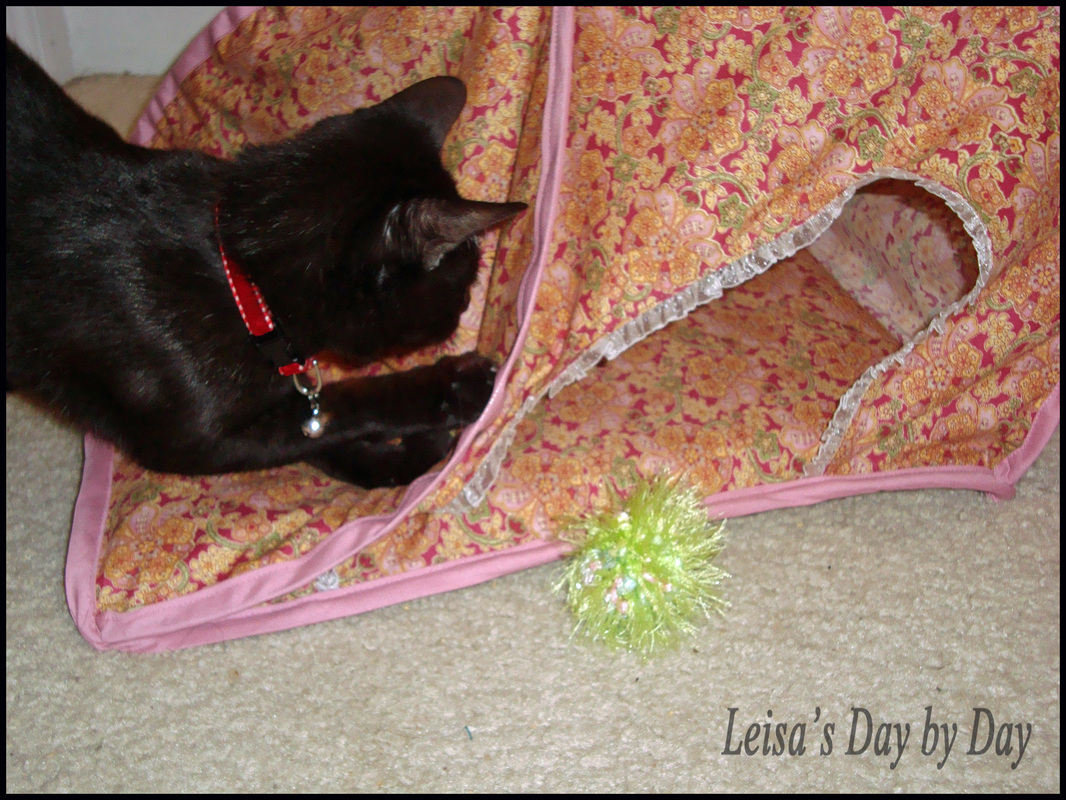
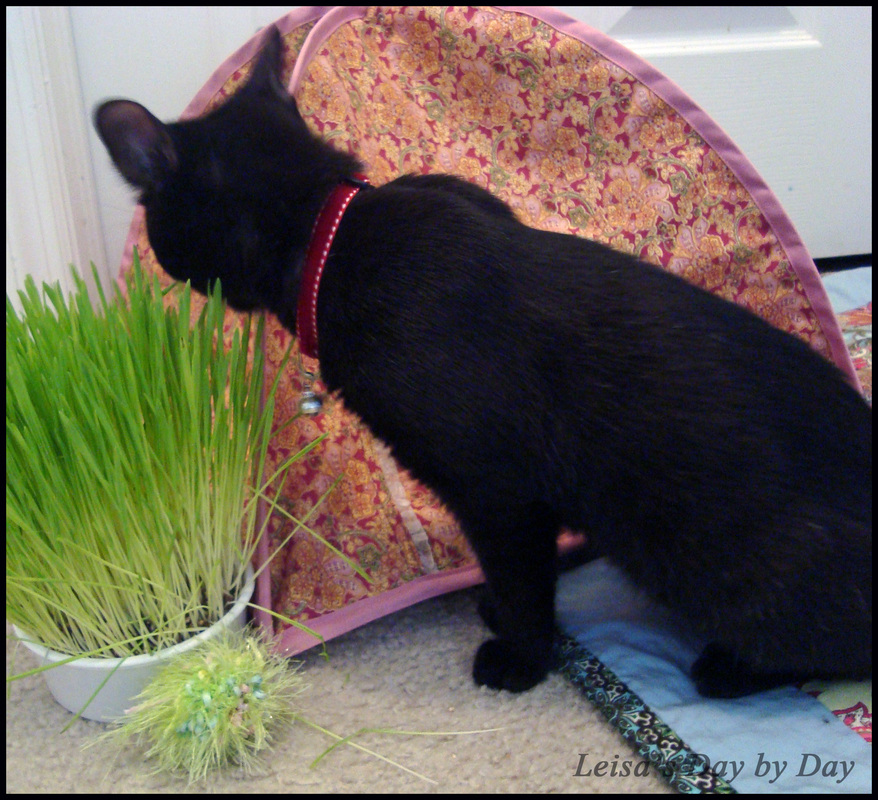
Sophie hanging out by her new tent!
Hi Everyone! My name is Sophie and I'm the newest furry member of the household. I'm somewhere around 6 months old but my Mummy doesn't know exactly how old I am--the vet told her I was around 3 months old when I found her--I've been with her for three whole months now! We are a family of five--there's Mummy, Daddy (he plays with me... we had a great laser pointer session just this morning!), Charlie (he's kinda big and when he gets excited he runs in circles... I have to be careful that I don't get run over by his stamping paws, but otherwise he's cool. The humans call him a 'dog', whatever that is...), and Oliver. Oliver has a lot of nickames, but he tends to go by 'Pussito'. He's a big kitty--Mummy tells me that he turns two in April, and that he was just a little baby at three weeks old when they rescued him. He's not really too sure about me at the moment and he hisses and growls a lot, but I want to be friends. I think he'll come around... eventually.

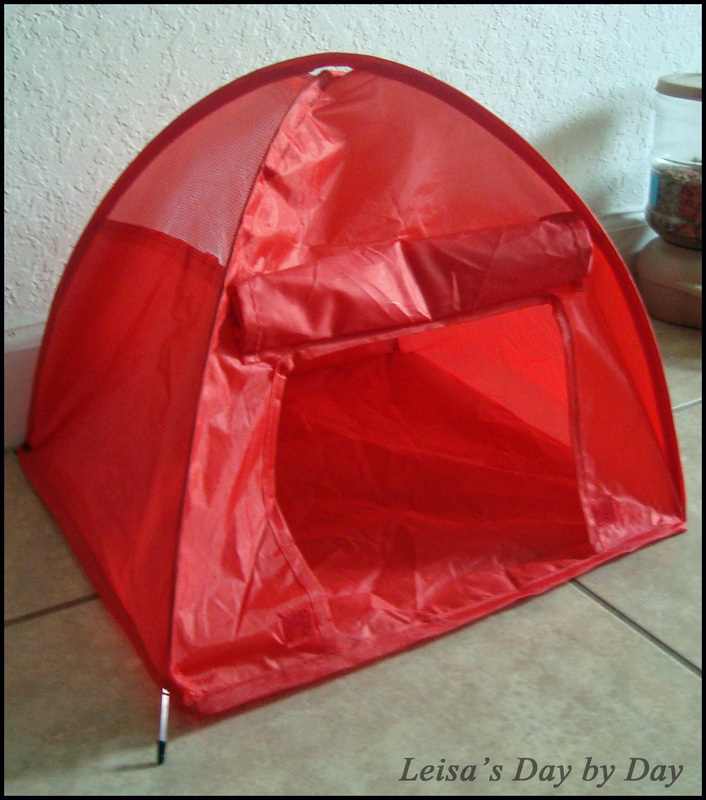
Oliver's old tent: the before shot.
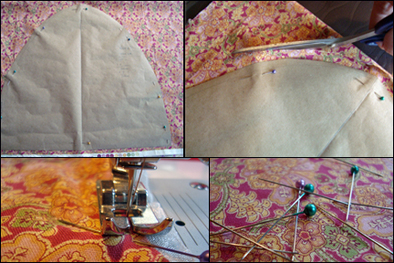
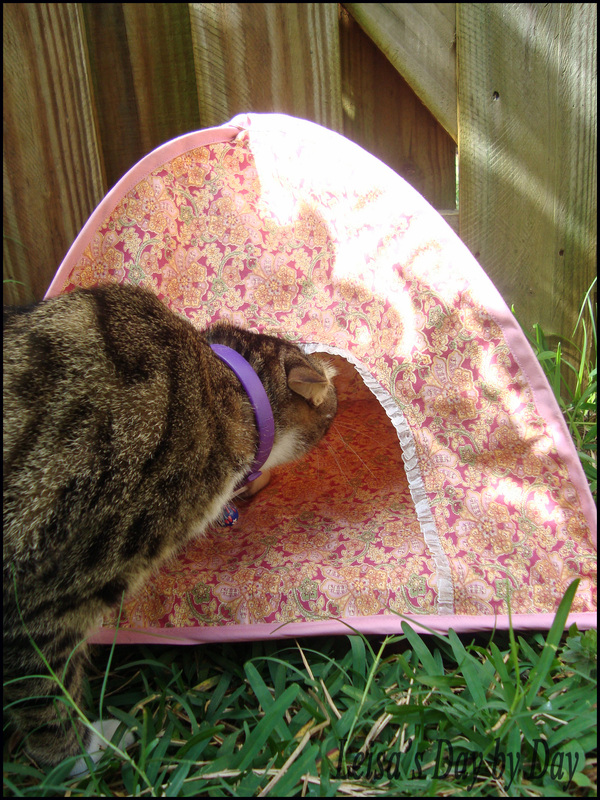
Because I'm new I get a lot of what Mummy calls 'hand-me-downs'. I guess that means that they belonged to the big boy before I came along, but that's okay--I enjoy playing with them anyway! Everything is new to me! See that red tent? That was Oliver's but he got too big for it. For a while he would play with me through the tent, so it got a bit torn up. So Mummy decided that I would get my very own version... yay! So Mummy did some stuff... not sure what everything was, but it involved a lot of cutting and sewing, and her machine scared me a bit at first but I was a big brave kitty. She told me I was a good helper. Pussito Checked it out first to make sure it was okay for me to try out. He said it was too girly for him... see the lace around the doorway? I really like that part. I love it!
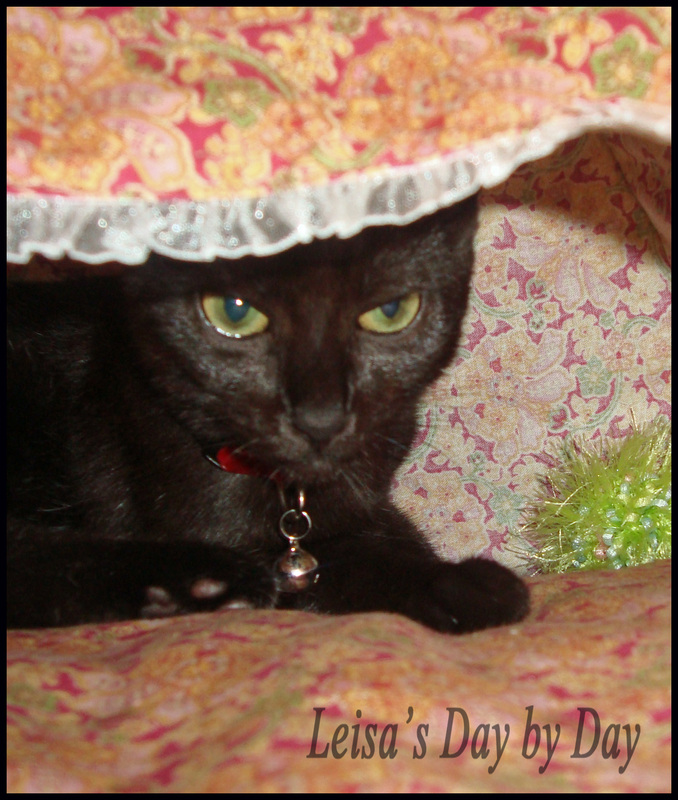
It's so pretty, and it's just the right size for me to curl up inside and take a nap. I did just that last night and it was really nice--Mummy put something called 'batting' in the bottom of it so it would be soft and comfortable for me. I'm so lucky!
Unfortunately I got a bit confused and tried to get on top of the tent. It didn't work so well. Mummy told me that I couldn't be like 'Snoopy'--does anyone understand that? I don't know what she meant, but she was laughing, so I guess it wasn't so bad. I'm kind of afraid that Pussito will change his mind and want his tent back. I make sure to check in behind it to make sure he's not going to ambush me... he's good at that. See? It's the perfect size just for me--and my toys.
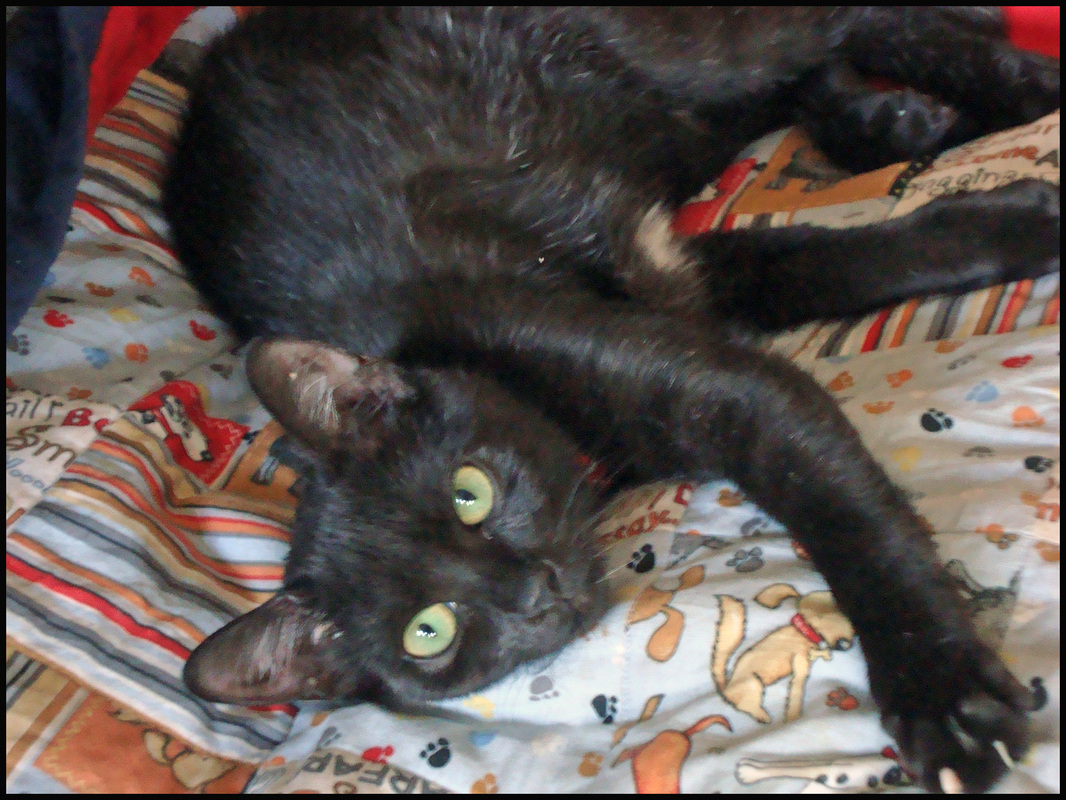
I'm not too happy with the photo because I know that black kitties don't photograph very well, but Mummy says I'm beautiful anyway. She always tells me what a good girl I am. I'm so glad I found her!
I think I'll go see what Mummy is up to before I go take a nap in my new tent...
Do any of you make special things for your fur babies? Believe me, it's worth the effort--we really appreciate them!
Have a great Sunday!
Love, Sophie >^^<
Talent and individual expression are not qualities that just other people possess.
You have it too! All of you have a capacity for creativity in your quilting.
Let yours happen and realize there are no boundaries to your unique expression.
~Anon.
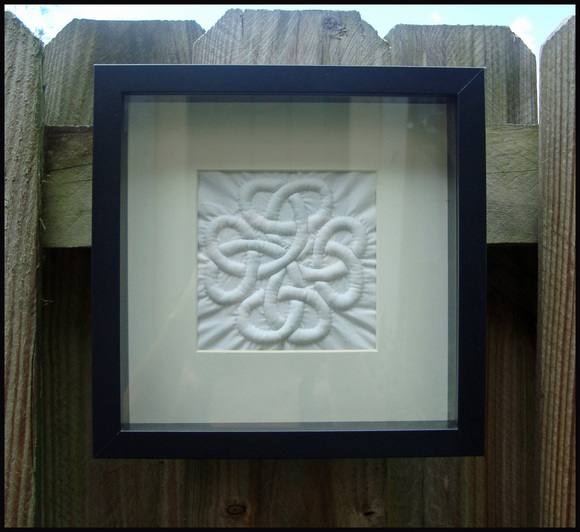
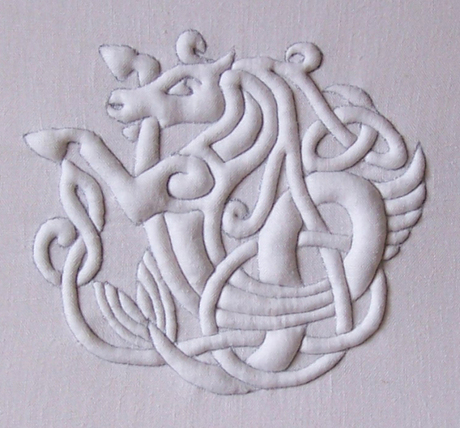
My own Trapunto-worked Celtic Knot
Trapunto. A fantastic word, wouldn't you agree?
In Italian it means 'to embroider', but in stitching circles it is a very specific type of Italian quilting that was very popular during the 1500s and was used to embellish everything from household items to garments. The technique migrated to the US in the 1700s and remained relatively popular up until the Civil War.

The Tristan Quilt at the Victoria & Albert Museum in London.
The above quilt is at the Victoria & Albert Museum and is apparently the oldest quilt known to be still in existence, having been made in Sicily sometime between 1360 and 1400. It is constructed from linen padded with cotton wadding and quilted with brown and white linen thread.
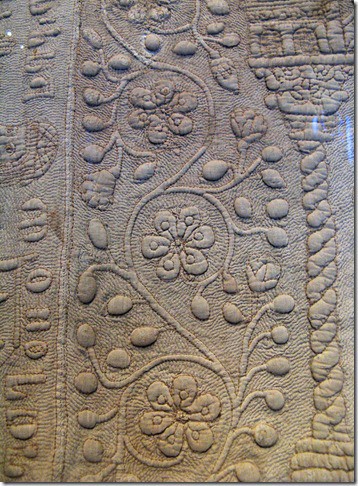
A detail of the Tristan Quilt circa 1360-1400
Back in my Costume Studies days (many, many moons ago) we studied the Trapunto technique. It can be a tedious and time-consuming endeavour, but the finished results are stunning. (It was made more tedious and time-consuming in my case because I used a piece of fronting fabric that had WAY too high a thread count, making the quilting part of the project difficult. It is generally advised to use a medium-weight fronting fabric and a light weight backing to make the stuffing part of the project much easier.)
There are a lot of new ways to produce the same look, but we were taught that the original technique was always done using white linen fabric (cotton in later times), cotton wadding, and linen thread. The materials were always white in color as the monochromatic palette accentuates the play of shadows and light on the design and creates a bas-relief of sorts, increasing visual interest and texture.
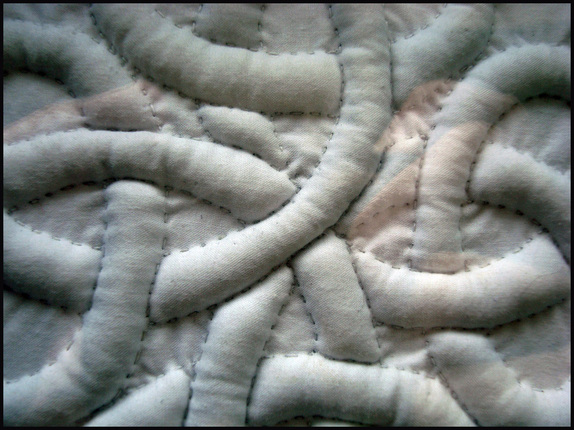
A modern interpretation of Trapunto work
The basic technique is to first lightly draw your design onto your fronting fabric, then add your backing fabric and quilt along the design lines (without any batting in between the front and back fabric layers. Once the design is completely quilted, small slits are made in the backing fabric in the area to be stuffed, then cotton wadding is carefully added to the area to puff it out and create the three-dimensional design. Once the section is suitably stuffed, the small slit is stitched back together, and you move on to the next section for stuffing.
Close-up of my Trapunto-worked Celtic Knot
It was also common to use cording in addition to the wadding, creating intricate designs. Any backing areas that will contain cording are slit in two areas at opposite ends of the design and the cord is fed (via a needle) through the quilted channel from the first opening to end at the second opening. There are tutorials online that will give you an idea as to the basic technique, but really you can just play with your design and do it as you like! There are very good quilting books as well, that give step-by-step instructions.
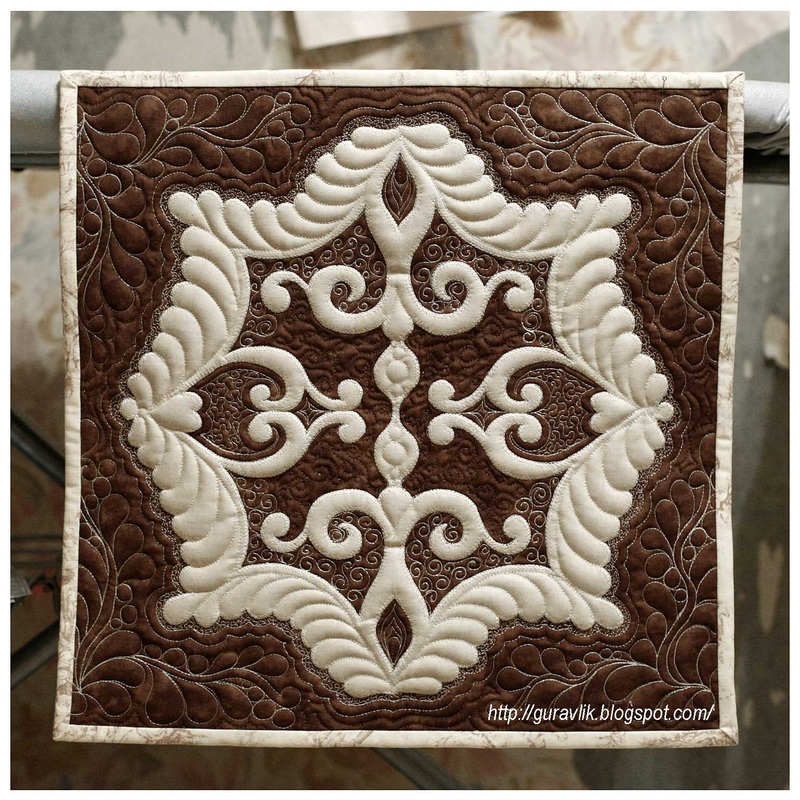
Check out the amazing modern trapunto work on this Russian (I think?!) blog...
If you choose to try Trapunto quilting, the key is patience. Take it slowly and understand from the start that this is not a one-evening project, but the end result is absolutely stunning and makes for a wonderful challenge!
Have any of you tried Trapunto Quilting? If you have, please share! :-)
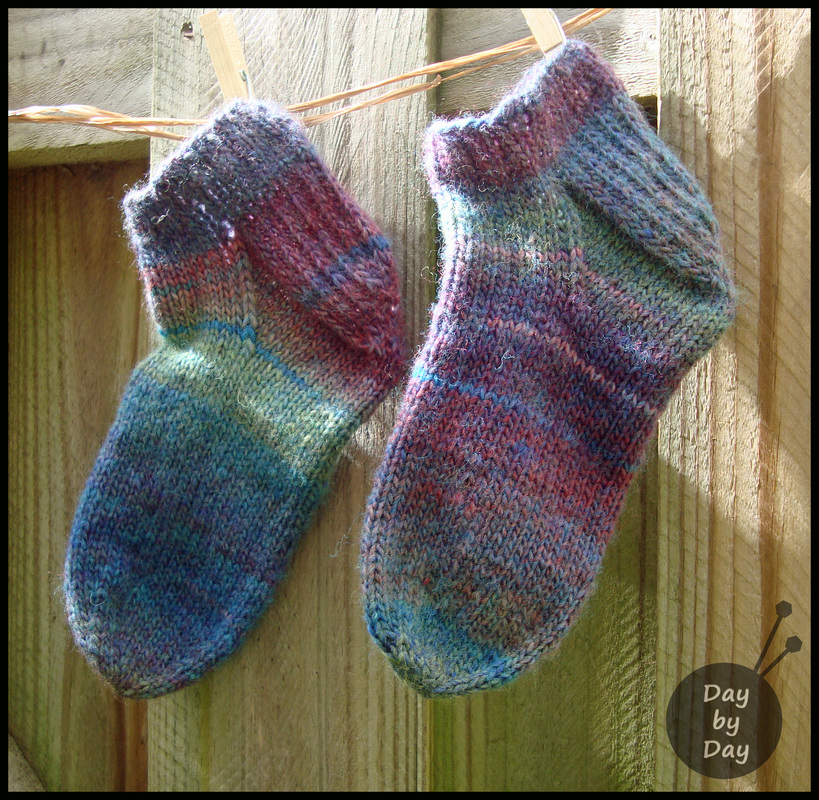
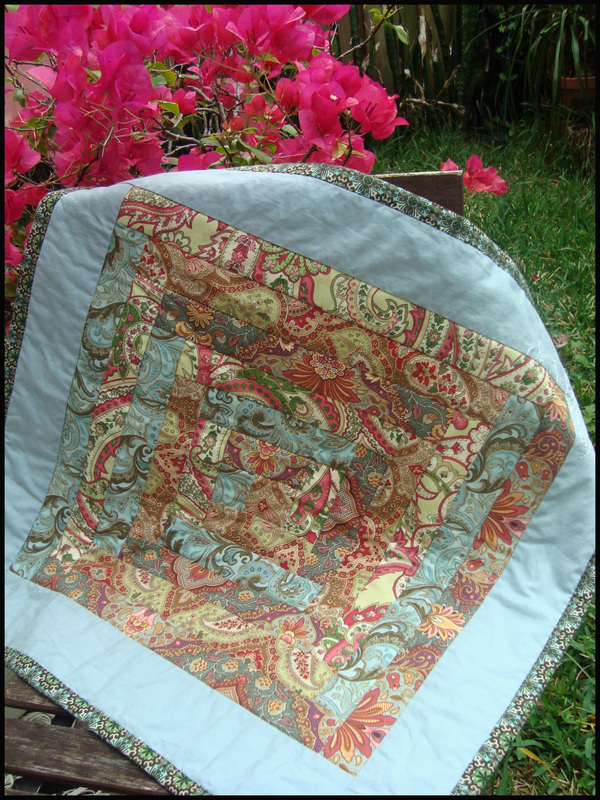
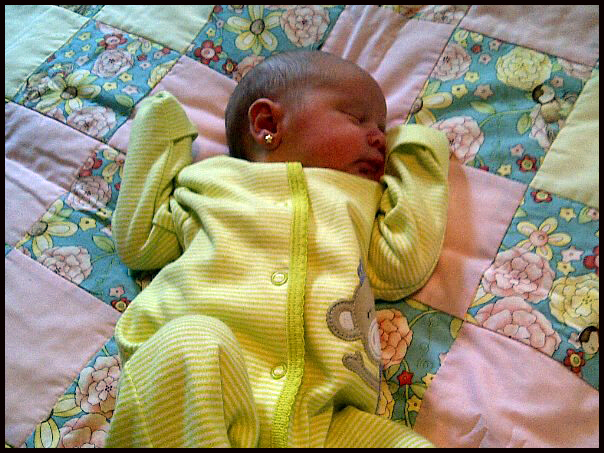
 There's nothing like the smell of line-dried fabric! Last August we had the blessing of welcoming a new little niece into the family! She had been long-awaited and greatly anticipated, and her arrival was a joyous miracle for her happy parents. They named her Francesca, and it was instant love.
Francesca is kind of special to me--she is not the only niece in the family by any means, but she is the first little one to be born after I became a part of my husband's family. I am an only child myself, so the only nieces and nephews I'll ever have are by way of my husband's brothers and their wives.
What better way to welcome our new little sweetie than making her a crib quilt?! It's an unofficial tradition in my family that all new little members receive a quilt (hmm... maybe that's why the new furry members also end up with cuddle quilts? I never made that correlation before...) So, I found some adorable lightweight cotton and got to work...
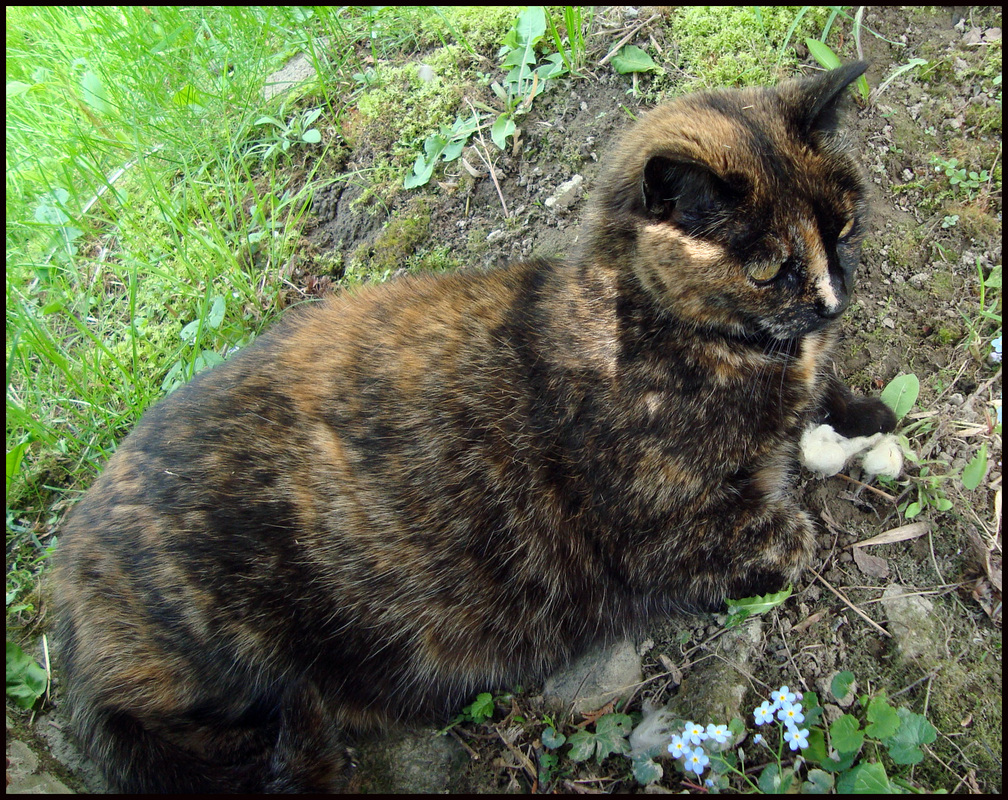
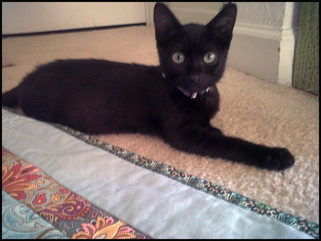
First I washed the cotton and hung it out in my Mum's back yard to dry... As you can see, I had a couple of feline backyard helpers:

Random black neighborhood kitty...
|
Baby puss, the neighbor's kitty--she's always a great helper!
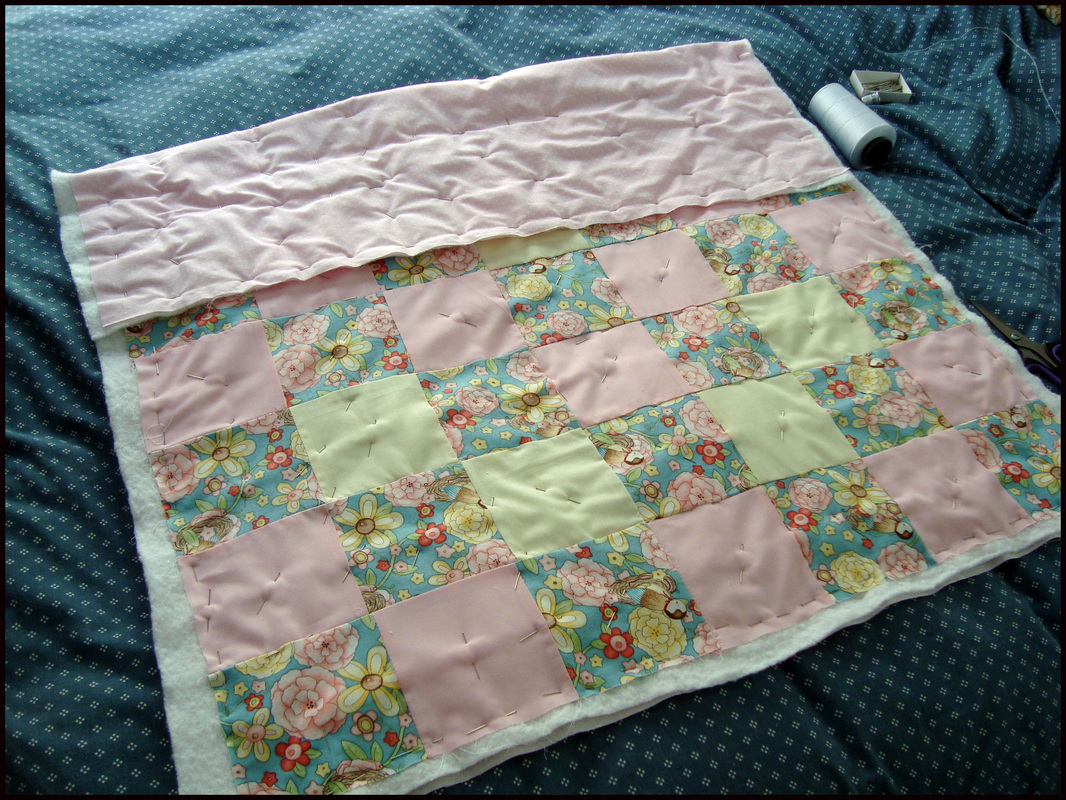
| I should mention that little Francesca lives in South America, so the quilt is more for comfort than warmth. I used a pink cotton with white dots as the backing and an adorable bee and flower patterened cotton and matching pink and yellow solids for the front. I used a lightweight cotton batting so it would not hold the heat as much as a synthetic material, and it was very basic and simple, something that could be washed frequently.

I was in love with this fabric--such cute little birdies and bees!
|
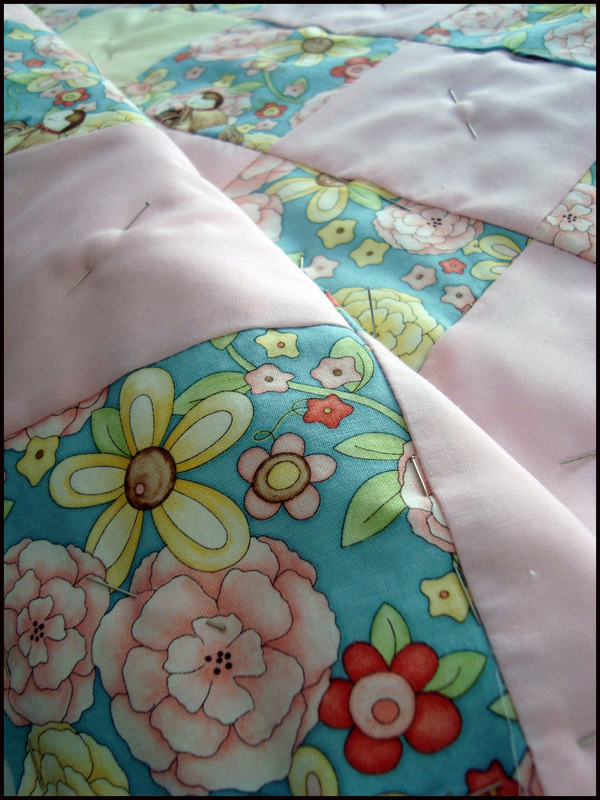
My Mum's failproof pinning method... it really worked!
| .It went together quite quickly and my Mum helped me sandwich it... | | 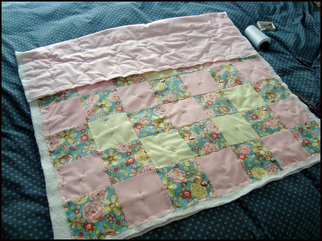 Sandwiching is the part of quilt-making that I always find the most tedious... so luckily my Mum was on hand to help. We sat stitching and talking and spent quite an enjoyable few hours together at her kitchen table. Mum has been a fabric master for most of her 70 years, but sadly arthritis has taken its toll on her poor hands, and she finds it hard to do very much hand-sewing now. You can see from the opposite photo the effects of rheumatoid arthritis.
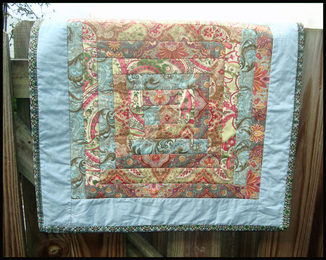
| Sadly, I never took any photos of my little corner of my Mum's front porch where I set up my old sewing machine and worked on the quilt. It was sunny and warm with a gentle breeze blowing through the window at my back, and I spent many happy hours working away in my hidey hole. I machine-quilted 'stitch-in'the-ditch' style between the squares, and I like the clean appearance of the finished piece. This is little Francesca Antonia enjoying her quilt--she was pretty much brand new when this shot was taken back in August, but she's growing quickly and we can't wait to spend more time with her soon!
~Blankets wrap you in warmth, Quilts wrap you in love~
If any of you are like me, you'll understand what I mean when I say that I'm a 'fabric hoarder'. Regardless of the amount of fabric in my stash, I always have room for more if it catches my eye... and that happens A LOT. Sadly, I not only accumulate tons of pretty fabrics, but I have issues with throwing away the scraps. I blame it on my childhood... really.
I spent my entire childhood in my Mum's fabric store. Some of my fondest childhood memories involve rainy afternoons in the fabric aisles, matching up colors and patterns, or sitting on my Mum's lap to 'help' her while she was sewing. It was an innocent, happy time and there is something in that which rubbed off on me and I now carry it with me as an adult.
Sophie Puss lounging on Charlie Dog's cuddle quilt.
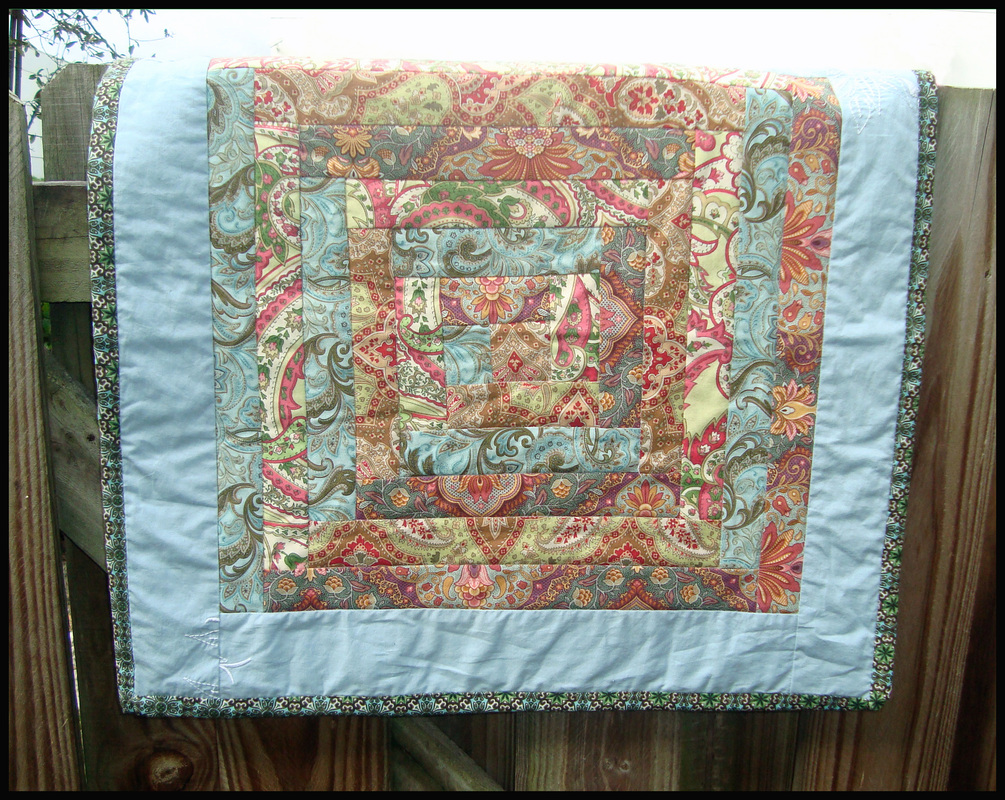
I've made quilts for Charlie Dog (see above) and Oliver Kitty (and actually bought the fabric specifically for them), so when little Sophie came into the household, I felt it only fair that she have something of her own too. I wanted to make her something pretty and special, and went for a wander through my fabrics to decide what to use. I found a whole bunch of scraps left over from a variety of projects--a dress, a skirt, a shirt for my husband--and decided to use them to make her something unique.
Here's the result:
Sophie's modified 'Log Cabin' kitty cuddle quilt.
I've always been a fan of the Log Cabin pattern, and I decided to create a modified version of the classic motif. My Mum tells me that the fabric strips should be lighter in color on one side and darker on the opposite... but I did this my own way. I've never been particularly traditional.
The quilt is great for a kitty, but would work beautifully as a table topper, or even a wall-hanging. Quoting my Mum: "That's way too nice for a cat--hang it up on the wall!"
|
The colors are a bit off in this shot, but it gives a general idea of the piece--I machine quilted it by doing a 'stitch-in-the-ditch' at the seams between the strips. Overall, I think it turned out really well!
| I didn't have any particular order in mind, I just prepared the strips and started it, making it up as I went along. I really love how it turned out--the colors and patterns are so different when they're placed in strips as opposed to a whole larger piece, and the overall look is happy and colorful in an understated way.
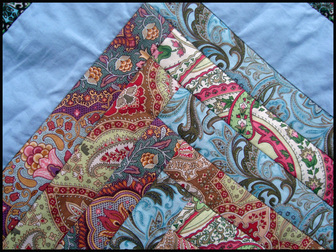
The pale blue border is repurposed fabric from one of my husband's old shirts--he was done with it and I loved the fabric, so of course I claimed it! It had embroidery on the back, so I worked that into the overall look of the quilt and it is visible at two opposite corners.
Sophie absolutely loves it, and is always cuddled up on it, or burrowed under it for a snooze.*
*Forgive the blurry cell phone shots--my blackberry sucks... I really need to modernize and go for a Galaxy :-)
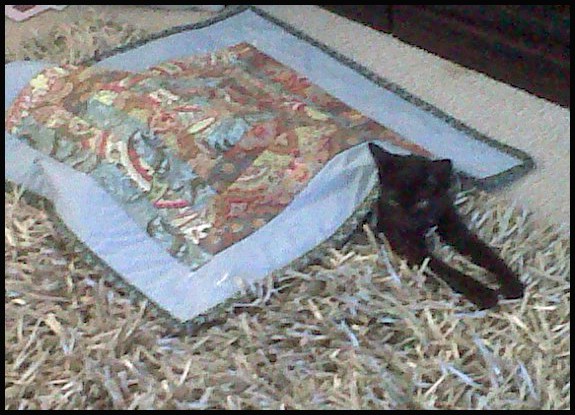
Sophie loves her quilt--she burrows under it all on her own and gets comfy!
|
Sophie lounging with her quilt.
| I made the little quilt at the beginning of November, and you guessed it--I had scraps left over.
Scraps of scraps....
So when it came time to make a Christmas stocking for the newest member of the household, out came said scraps (of scraps) and I whipped up something pretty for my girl.
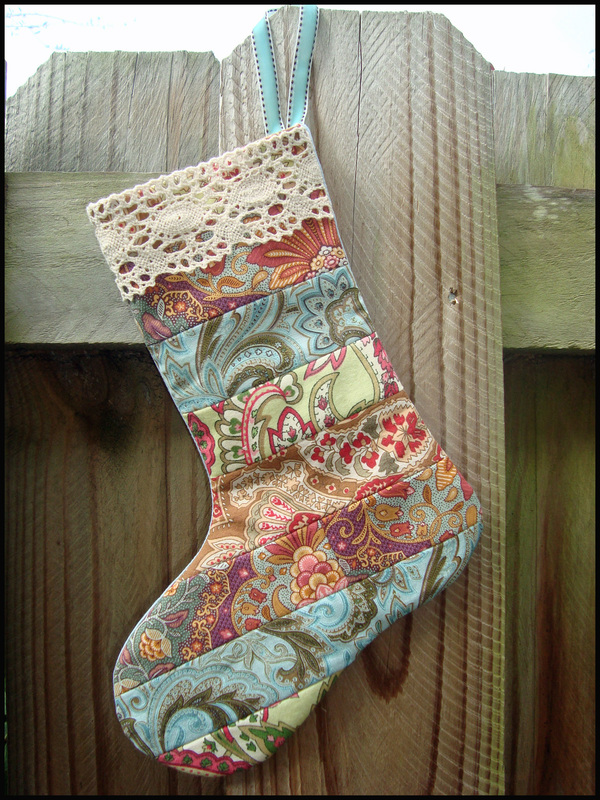
Sophie's Christmas stocking--using left-over scraps from her little Log Cabin quilt!
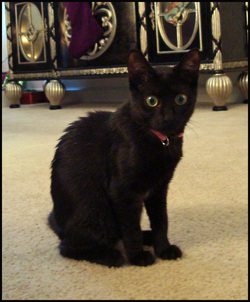 Christmas Sophie! Totally off topic, but overall it was a great Christmas--and one of the best gifts of all is that, after a long road to recovery for little Soph, she is doing so well! She just had her second set of vaccinations on Sunday, and is going in for her spaying on the 20th. She's come a long way from the sick, starving, emaciated little ball of fur that I found in mid-October, and I am so thankful to have her with us!
As I type this post she is laying in my lap asleep, paws and tail twitching as she dreams of chasing mice and cackling at birdies... such a sweet little scrap of life--I will always wonder where she came from, but regardless, I am so glad that she found me!
Black kitties never photograph very well, but isn't she the cutest little thing? The vet estimates her to be around 5 months old... and with so much personality and love already! She's going to be a beautiful girl!
One of my resolutions for the new year is that I plan to do a lot more sewing--in fact, I have my eye on some left-over fabric (of course) that I plan to make into some modified Log Cabin pattern pillow covers. Our beautiful modern sectional sofa came with the most hideous throw pillows I've ever seen, and I've been meaning to get rid of them for almost two years now (there's the procrastination I mentioned yesterday... ugh), so this is the year!
Update to follow :-)
Happy crafting, y'all!
|


 RSS Feed