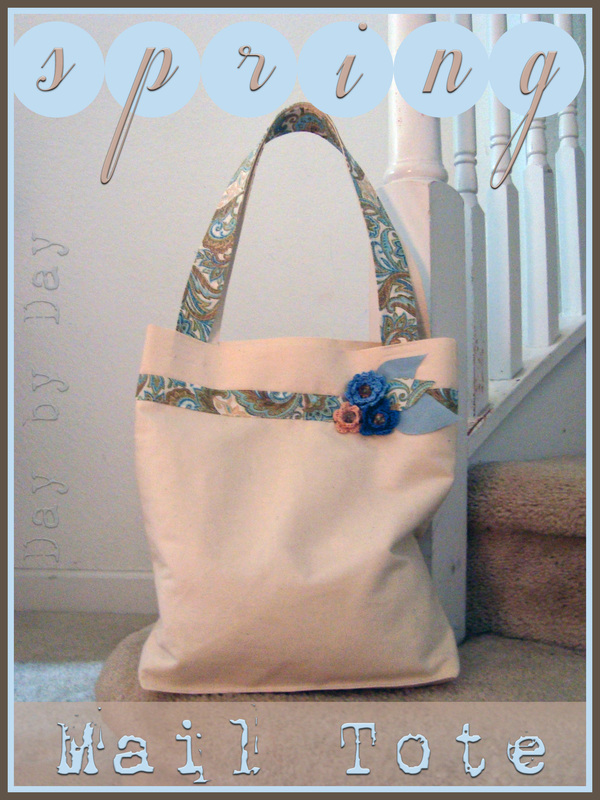
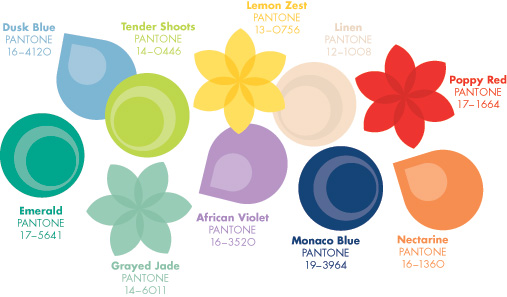
Spring fantasies have popped up all over the blogosphere in the past few weeks--everything from whimsical DIY and crafts for the home to light and frothy clothing confections. I confess that I too am guilty of looking toward the coming months with a silent anticipation of colorful flowers and longer days, even though I wake up every morning in the land of eternal sunshine. I think it must be a vestige of my Canadian heritage and many years spent living in a cold climate where spring meant a blessed end to the endlessly long, dark, chilly days of winter. I am still creating in the digital realm this week, and in the quest for the perfect Pantone gold color, I ran across their Spring 2013 trend color collection: I am enthralled with the Emerald and Grayed Jade tones, and definitely plan to incorporate those shades into my wardrobe in the coming months--probably with some custom-made accessories! It's been a while since I made a handbag...
Until I have a bit more time for more involved 'me' projects, I used the Pantone spring colors and made a pretty little homage to spring with a Carl Friedrich Gauss quote. It seems quite appropriate considering the context :-)
What colors are enthralling you this season? Please share--I so love to be inspired!
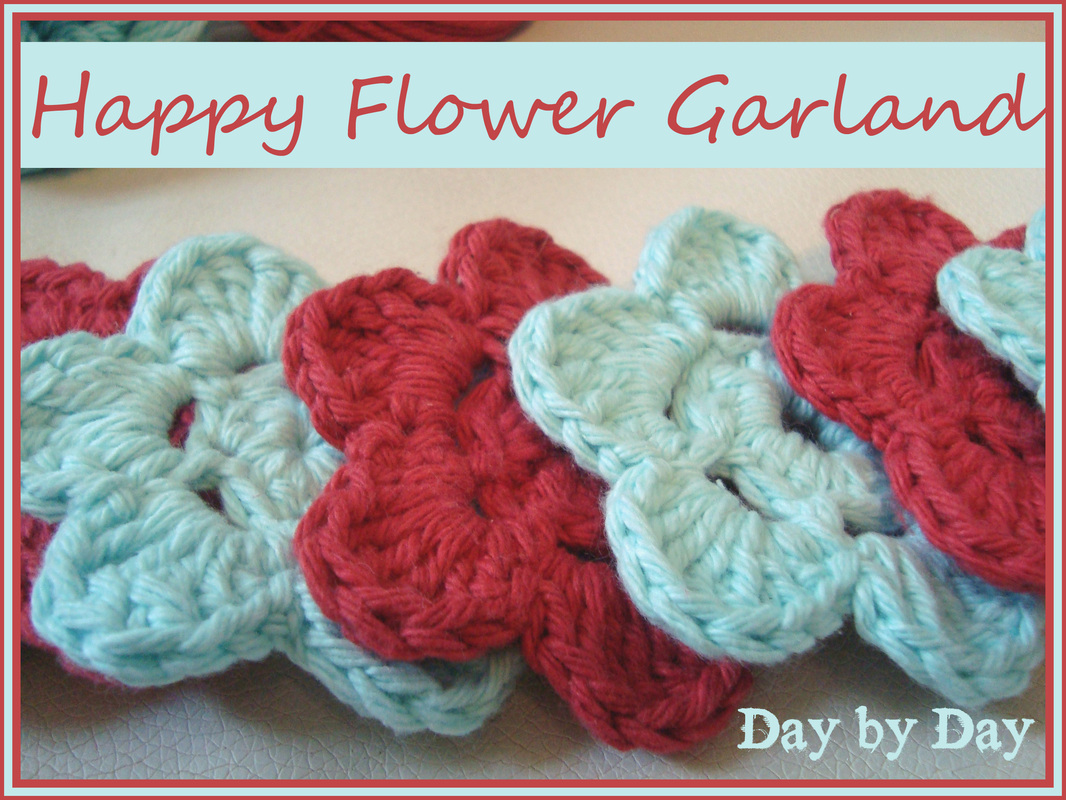
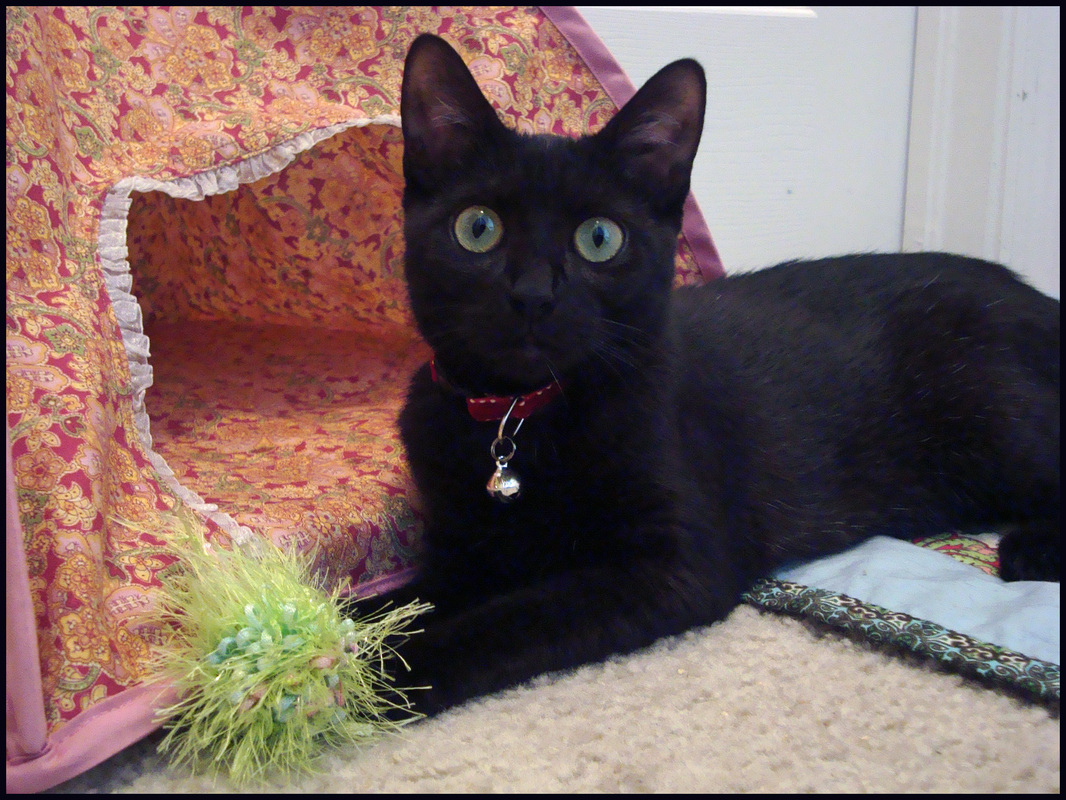
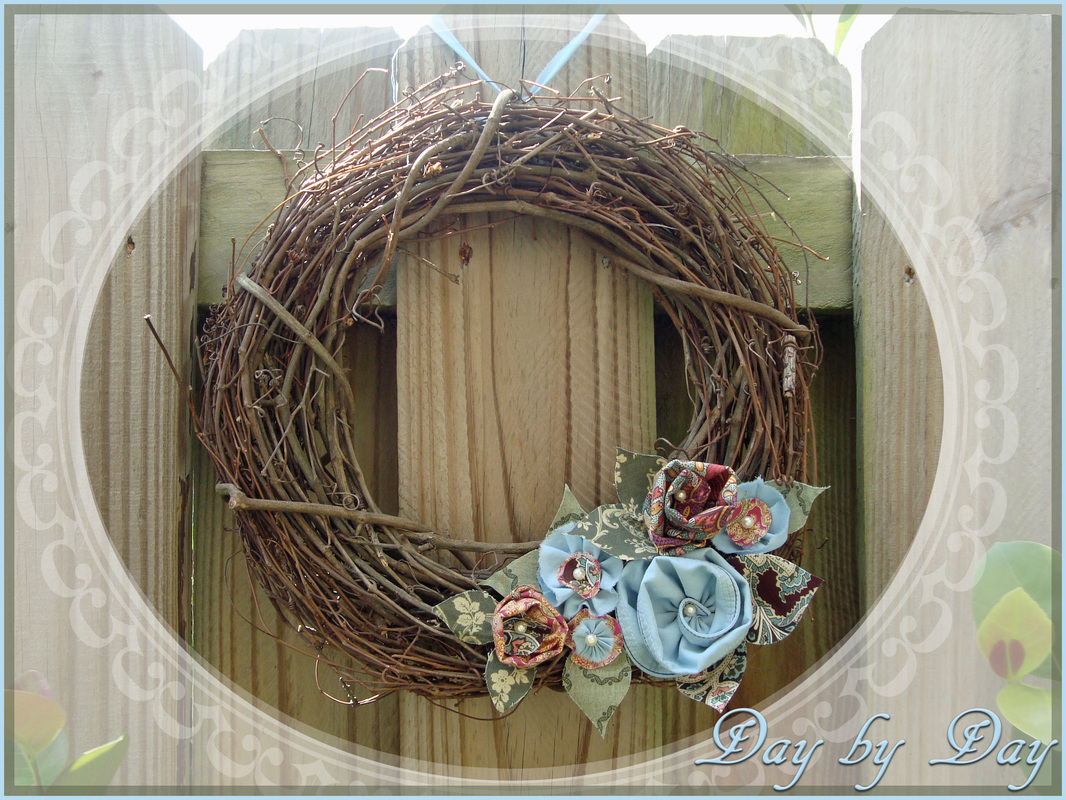
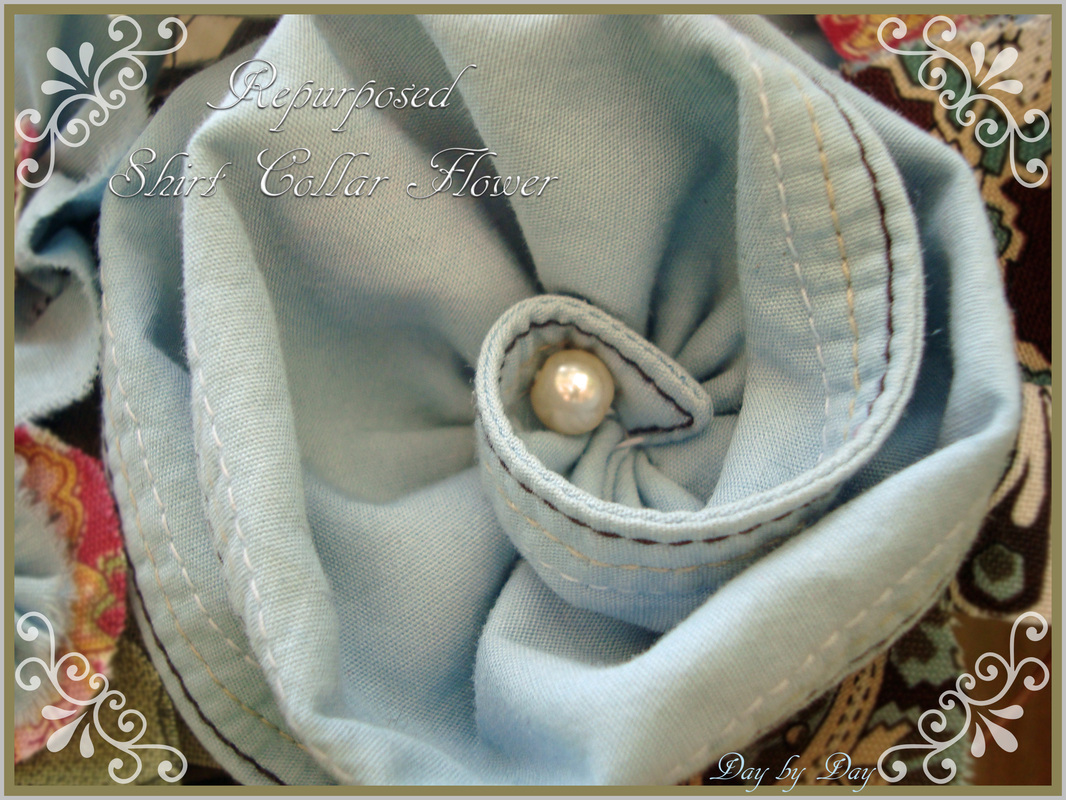
Lately I'm really loving flowers... the beautiful bougainvillea are flourishing all around our neighborhood and their cheery shades of pink bring a big smile to my face as Charlie and I take our daily strolls. He seems unimpressed by their tropical hues, but I find them enchanting. My recent Happy Scrappy Flower endeavor sent me into fanciful imaginings of a garden of fabric scrap flowers, blooming happily indoors to be enjoyed year-round. I've been coming up with new projects to create using my fabric scrap stash so that I can look at the pieces I so loved when I bought them, and enjoy them every day. During the past week I've squeezed a bit of creation into my endless days spent in the digital realm, and I picked out my very favorite prints to be used.While getting all the prints together, I ran across the remains of my husband's old shirt that I have torn up and used for everything from Sophie's Kitty Quilt to my favorite Framed Patchwork Memories. It was still sporting its collar, which had lovely multi-colored stitches at its edge... perfect for a unique fabric flower! It's amazing what you can make when you look ordinary things with just a bit of imagination! My stolen handwork moments added up to a whimsical garden of fabric flowers, and I decided they would fit beautifully on the grapevine wreath I had kicking around crying out for embellishment. 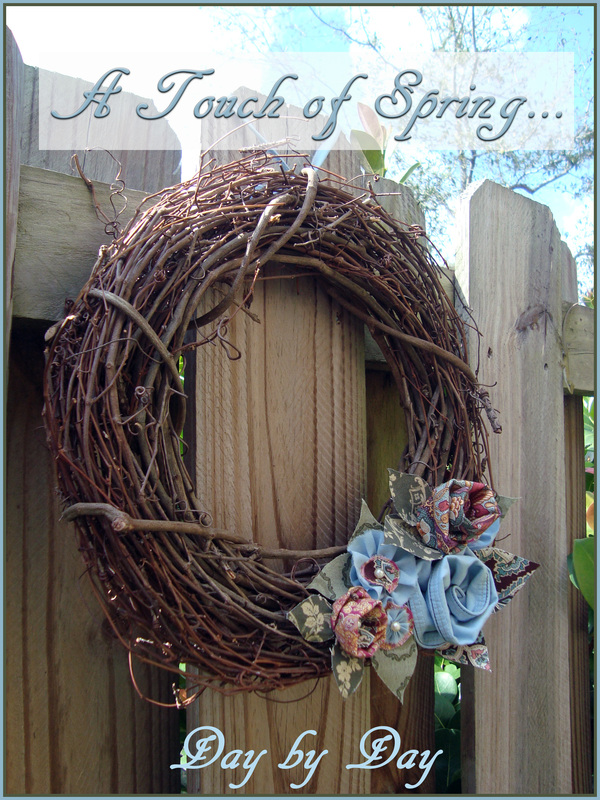 I didn´t realize it when I posted this pic.... but can anyone spot the lizard? I am so pleased with my 'breath of spring' wreath--it makes me happy to see so many of my favorite fabric prints all snuggled together where I can see them every day! If anyone is interested in creating their own fabric flower wreath, you can take a look at my scrap flower tutorial and just let your imagination run wild--make a bunch of the flowers in different sizes and colors, and attach them to your own wreath. A great weekend project to brighten the winter days. Voila--instant spring! Happy Crafting!
I was reminded today of one of my all-time favorite photos--and memories--from my old house back in Canada. Those of you who have been with me for a while will remember that my hometown flooded last year, destroying pretty much all of the properties adjacent to the beautiful river flowing through the center of the village. My mid--1800s home was one of them. The kitty in the photo is my girl Bella... aka 'Bingy'. I rescued her when she was a 6 week-old kitten living rough behind someone's woodpile with her Mum, Aunt, and three siblings. Sadly, one of the kittens died before the rescue, but the rest of her furry family all went to good, loving homes. Miss Bella is one of the nicest kitties I've ever met--always loving and playful, never a scratch or hiss... an absolute sweetheart. She was always a household favorite, and every time my Mum came over, she would call her 'Bella Wella Bing Bang'. With time her nickname became 'Bingy', and the name stuck--somehow it suits her.
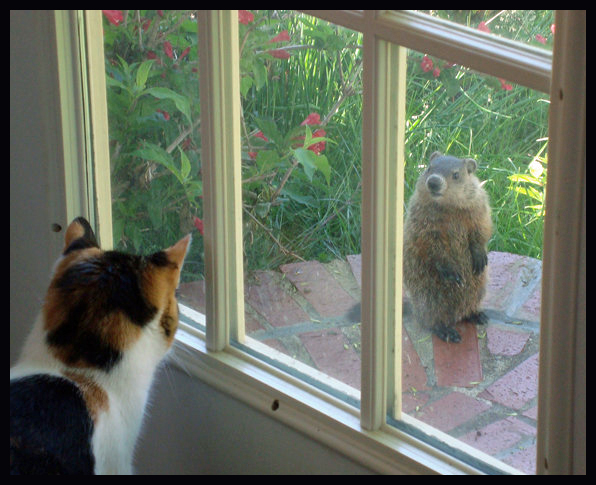
Each year a groundhog family used to take up residence underneath the porch of my house. Groundhogs are rather curious creatures I always found, and they would come up onto the big brick porch steps for a spot of sun and a nose around. At some point they came to realize that there were other furry creatures inside the house... and they were as intrigued by the cats as the kitties were by them.
This particularly handsome little fellow was a young one, and after he and Bingy caught sight of each-other, it was fascination at first sight. Each day, Bingy would roam the porch and spend long periods of time staring out the glass door, waiting for her furry little friend to appear. A few times I was fortunate enough to capture their 'through the glass' interaction, and every time I see this shot, I can't help but smile all day long!
The groundhog came to be called 'Edward'', and I wonder what has become of that family of subterranean dwellers... My beautiful house was contaminated with fuel in last March's flood and sadly it had to be demolished last August as it was no longer safe. So many wonderful memories were made in that house, and so much of myself went into renovating it. I swear, I touched every square inch of it during the years I called it mine, and it's loss was a terrible blow. The basement was filled in, along with their burrows. I hope they managed to rebuild their underground empire...
I am so thankful to be able to look at photos like this one and remember the happy days spent by the river.
Happy memories and definitely one of my favorite things :-)
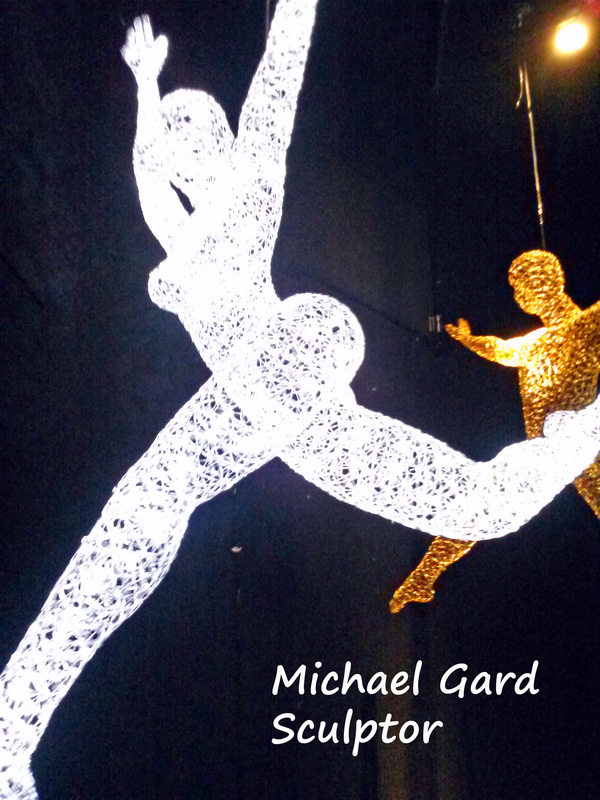
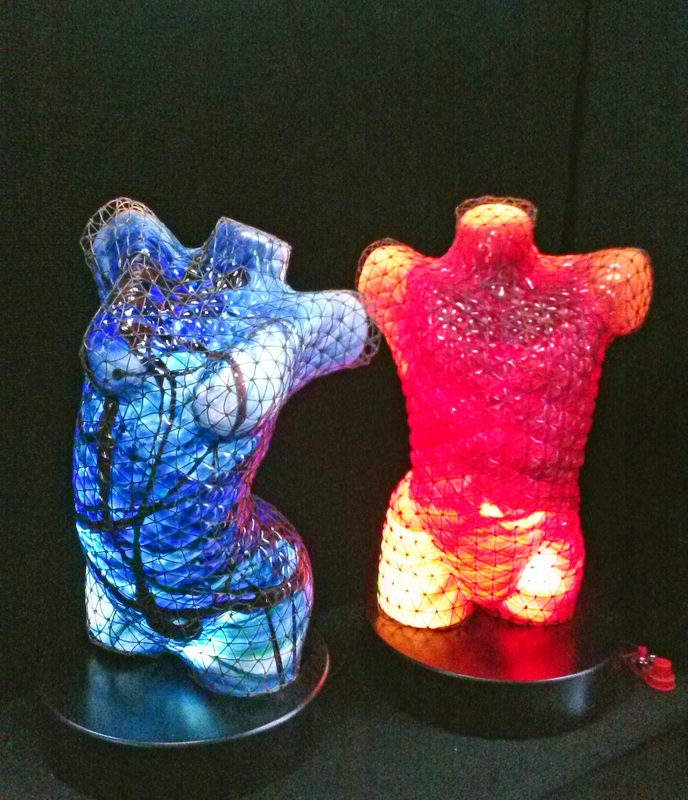
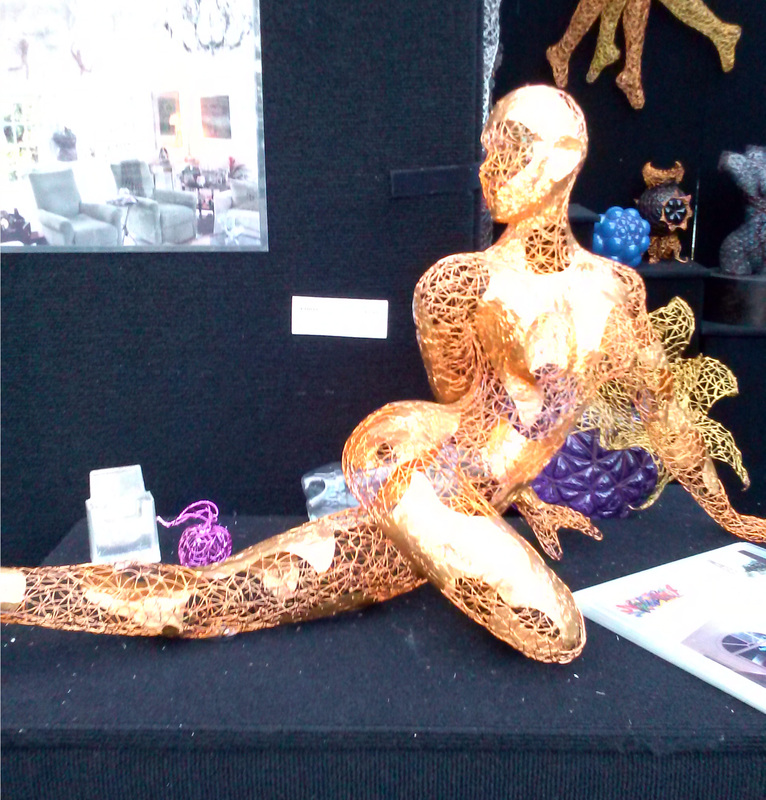
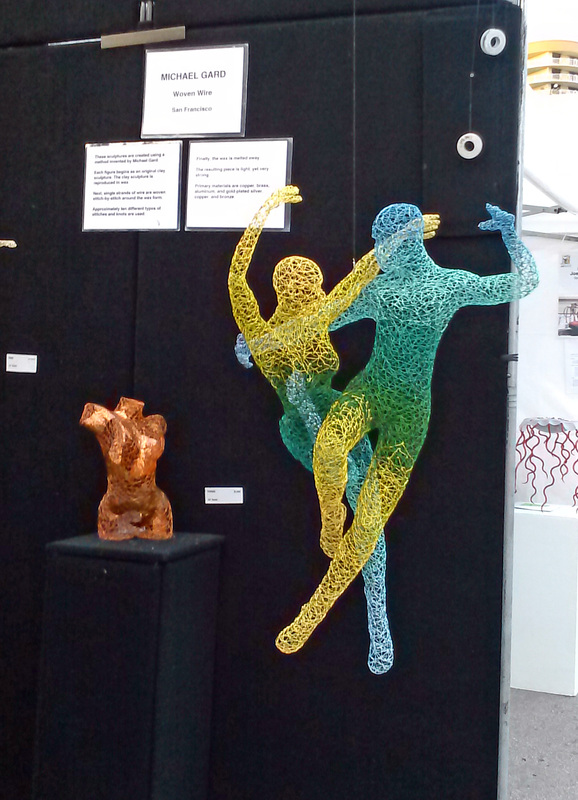
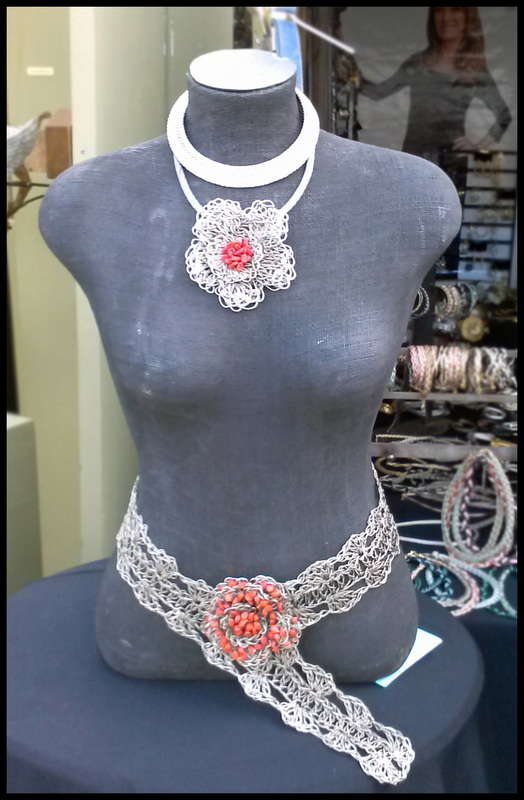
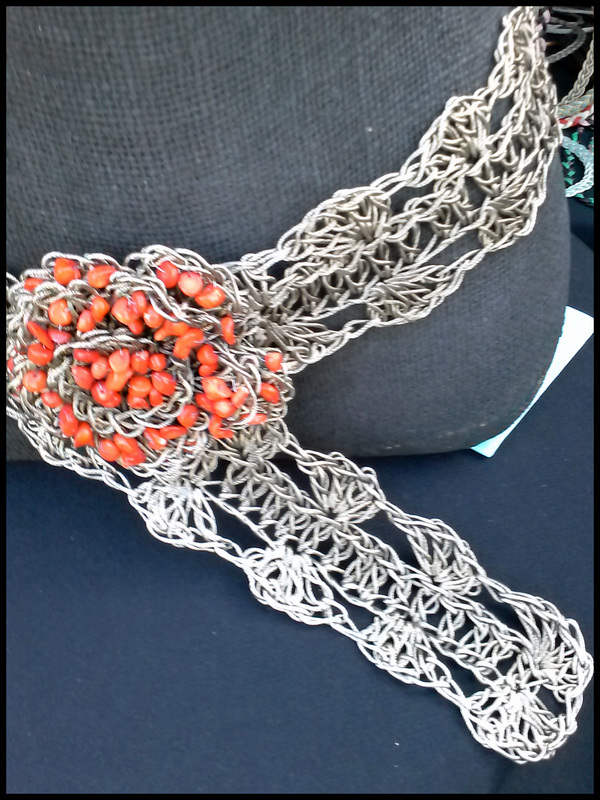
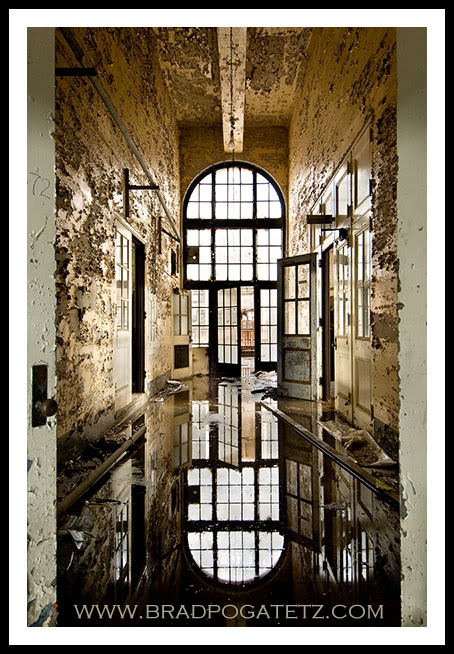
 Romero Britto's fabulous 50th Anniversary commemorative poster. This weekend was the 50th annual Coconut Grove Arts Festival here in Miami. What started out as an homage to Paris's Left Bank open air artists/ventors in 1963 has become the largest of its kind in the US. Whatever your artistic tastes and tendencies, you are sure to find something to please you here among the rambling aisles of sculptors, glass blowers, painters, jewelers, and countless others. There were so many amazing artistic creations to see that it was frankly quite overwhelming. I walked away with a small silver ring set with an Australian Opal made by Chip Arnold. I always like to take home a small souvenir from these fairs, and wearable ones are the best kind! One of the most amazing displays was from San Francisco sculptor Michael Gard. He creates the most intriguing representations of form using an original technique involving a mixture of sculpting and wire work. His explanation at the show: "Each figure begins as an original clay sculpture. The clay sculpture is reproduced in wax. Next, single strands of wire are woven stitch-by-stitch around the wax form. Approximately ten different types of stitches and knots are used. Finally, the wax is melted away. The resulting piece is light, yet very strong. Primary materials are copper, brass, aluminum, and gold-plated silver, copper, and bronze." Fantastic! 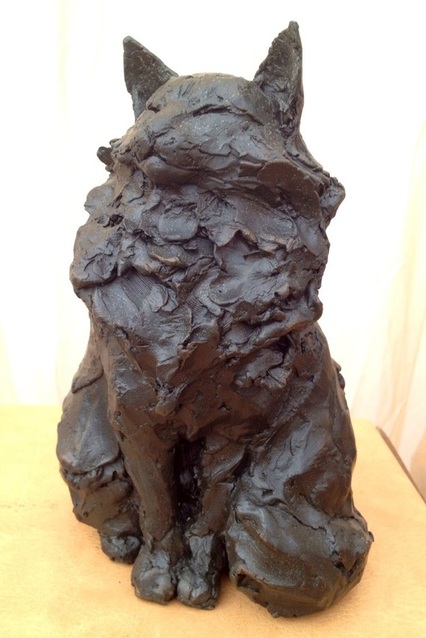 Vicki Banks 'Smug Cat' Bronze California Sculptor Vicki Banks of Vulture Sculpture also had some beautiful, somewhat whimsical bronze pieces on show--my favorite was this fluffy kitty (big surprise), and I was intrigued by her recurring theme of ravens. Her bio states that she spent years in animated film and has worked with Disney, Dreamworks, and Warner Bros. She has now returned to her first love and exhibits her sculptures around the country. 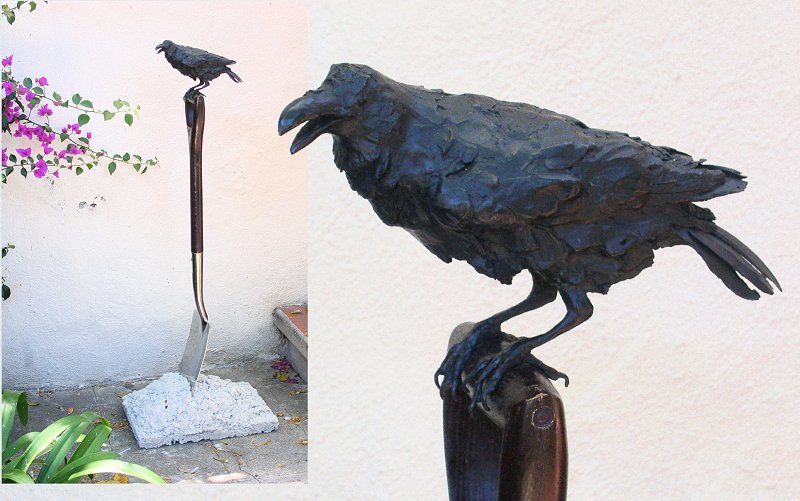 Vicki Banks "Raven on a Spade" Bronze | 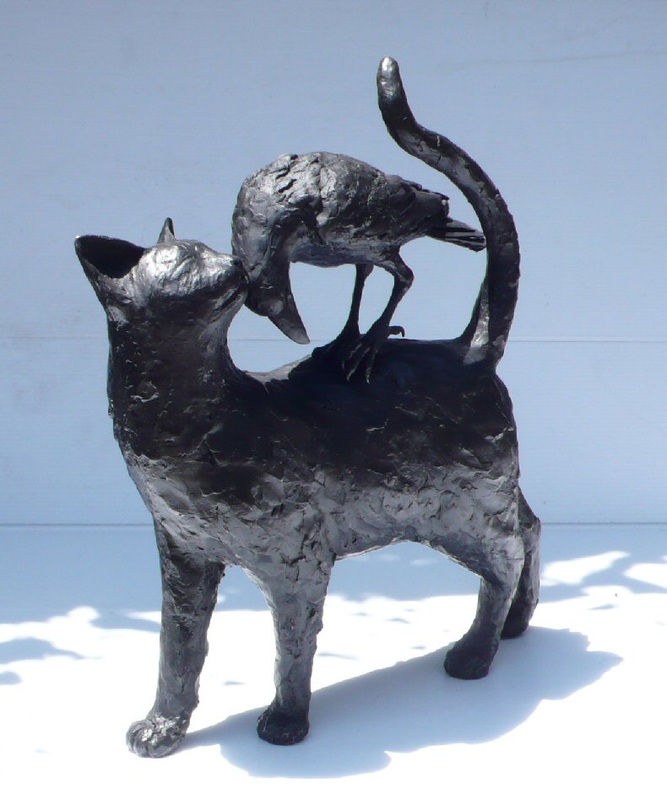 Vicki Banks "Cat & Crow" Bronze | 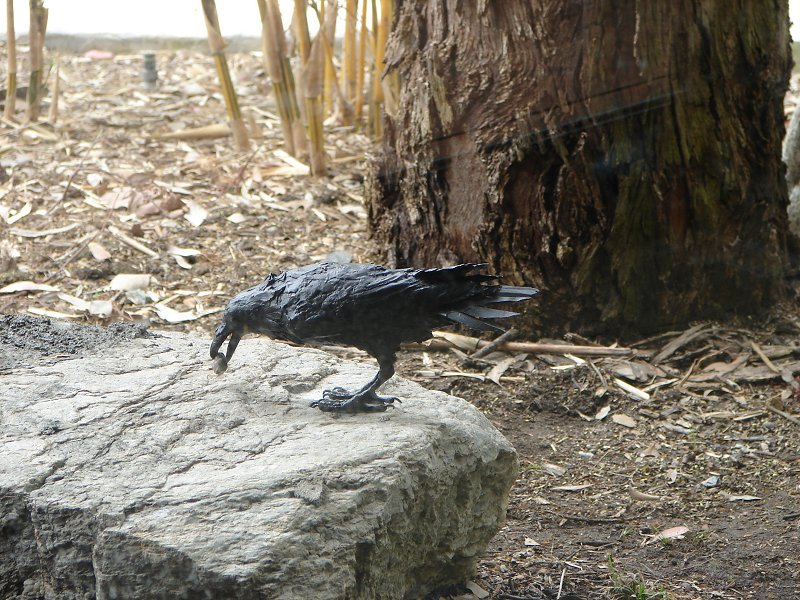 Vicki Banks Raven Installation Bronze | I have a random fondness for ravens, so Banks's pieces were a real treat for me! I'm so sad that I didn't get a card from these artists--their crocheted and woven metal cord pieces were absolutely gorgeous! They're a husband and wife team and there was so much buzz around their booth that I didn't get their details. I'm searching through my festival brochure now trying to figure out their identity... I'll amend the post when I locate them. They've had a few notable celebrities wearing their creations lately, so they're sure to be quite popular. 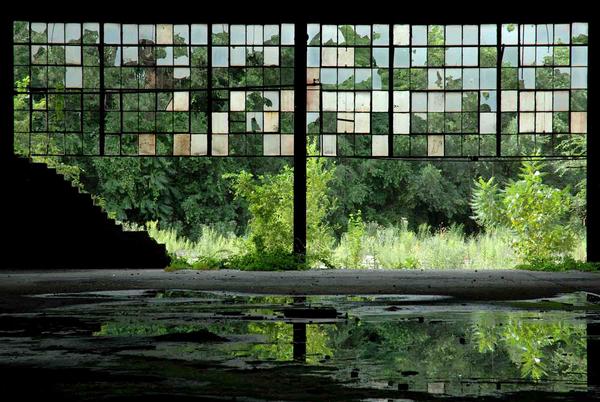 Brad Pogatetz Photography A few artists also really caught my eye but sadly I didn't get any photos of them-- Brad Pogatetz is a young photographer whose shots of abandoned buildings and industrial spaces were truly captavating. There was a lot of interest in his work as well, so I'm hoping he had a very good show! Take a look at the link and browse through his galleries--I love his unique style. These shots are from the internet--they're even more stunning in person. Jewelry Designer Aaron Sault was exhibiting his unique wearable creations, and there were some beautiful pieces--not everyone's style, but I appreciate the raw nature of his look. He has a few items available through his Etsy Shop, but take a look through his online gallery to appreciate the full extent of his talent. With so many talented artists being showcased this year, it's hard to pick only a few to hilight--but just for clarification, I am in no way affiliated with any of the above artists and I am not being compensated for this post. (Unfortunate, because I love these pieces! *Kidding*... well, kind of.)
I hope you've enjoyed this little mini-tour of the 50th Annual Coconut Grove Arts Festival! This week most of my handwork projects are on hold as I work in the digital realm... still preparing the coffee warehouse and retail space for opening means digital art creation and endless days of tweaking/editing/revamping/scrapping/starting over again/perfecting.
Phew!
I hope you're all having a great week!
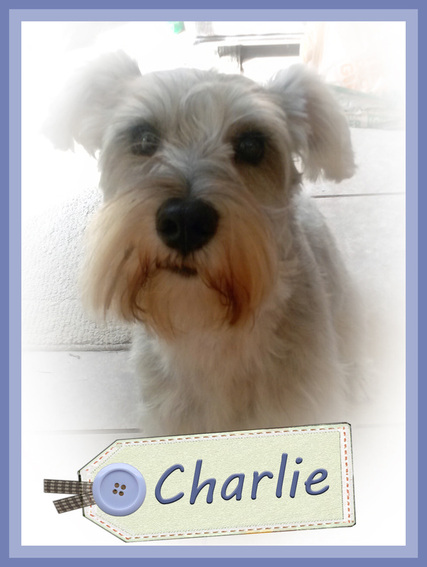
Is there anything that can compare to the love of a dog?
Our most wonderful street find was Charlie Rose, Schnauzer extraordinaire. He is always so happy to see us--turning in circles, tail-wagging, eyes imploring, one paw lifted in enquiry as to when the next adventure outdoors will begin... sharing wholeheartedly both joy and sadness, constant companion and foot-warmer, the shadow beneath my chair and the ferocious barker when the doorbell rings (even the one in the pizza commercial on TV--it's hilarious).
Charlie and I spent the day together yesterday doing general canine maintenance--he is such a good boy and lets me brush his teeth without (much) protest, lets me work out the tangles in his super-fine fur and clip the increasingly unruly fluffy fringe around his ears. He stands quietly while I shampoo him with a very unmanly mango-scented doggie cleanser, and doesn't put up too much of a fight as I brush and blow-dry his coat.
Pitbulls and Parolees was on TV in the background during this whole process, and seeing those poor animals who need homes makes me so thankful that it was us who found Charlie--a frightened, dirty little scrap of a dog running madly around the parking lot of a huge mall near our house. If we hadn't managed to coerce him to come to us with meat hastily-purchased from the foodcourt, what would have become of him? So much character in such a beautiful animal... so much love and loyalty to give. Such a shame that his story is an all too common one--homeless, unidentified pets fending for themselves on the streets.
The take-home message? Follow the advice of the wonderful Bob Barker and 'have your pets spayed or neutered'. Give a shelter animal a home by adopting, not buying a companion. Be responsible and tag/chip your furry friends so if they are lost they can be brought back home quickly. The life of an animal is just as precious as that of a human... they are neither objects nor toys. They give love unconditionally and they are faithful forever friends.
I am so thankful that Charlie found us on that dark night over two years ago... he has been a constant and loyal companion through many difficult as well as wonderful times, and I would not trade him for anything in the world.
We love you, Charlie Rose! Dogs are our link to paradise.
They don't know evil or jealousy or discontent.
To sit with a dog on a hillside on a glorious afternoon
is to be back in Eden, where doing nothing was not boring--it was peace.
~Milan Kundera~
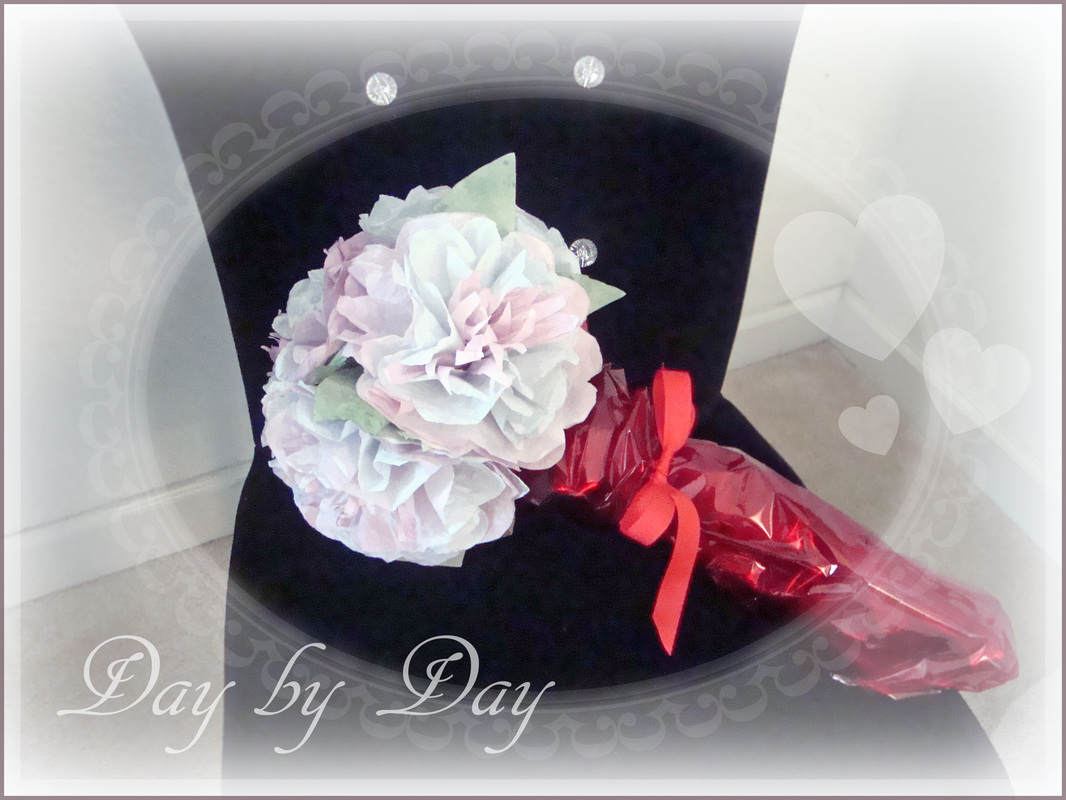
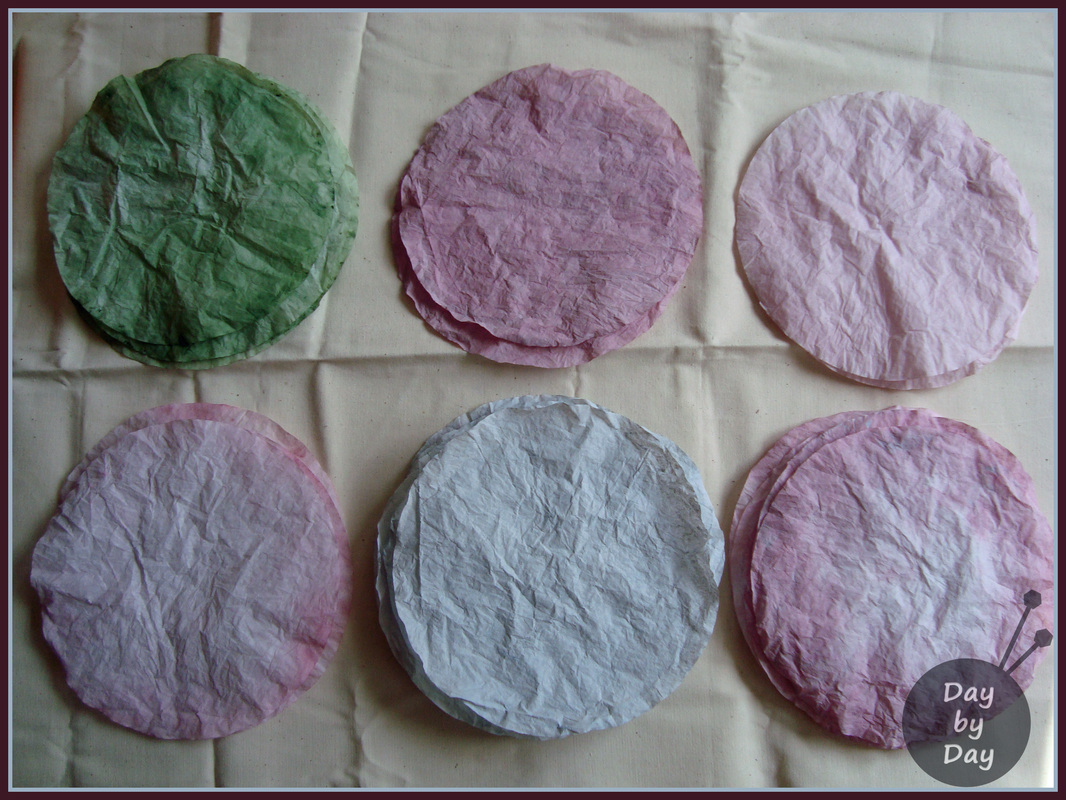
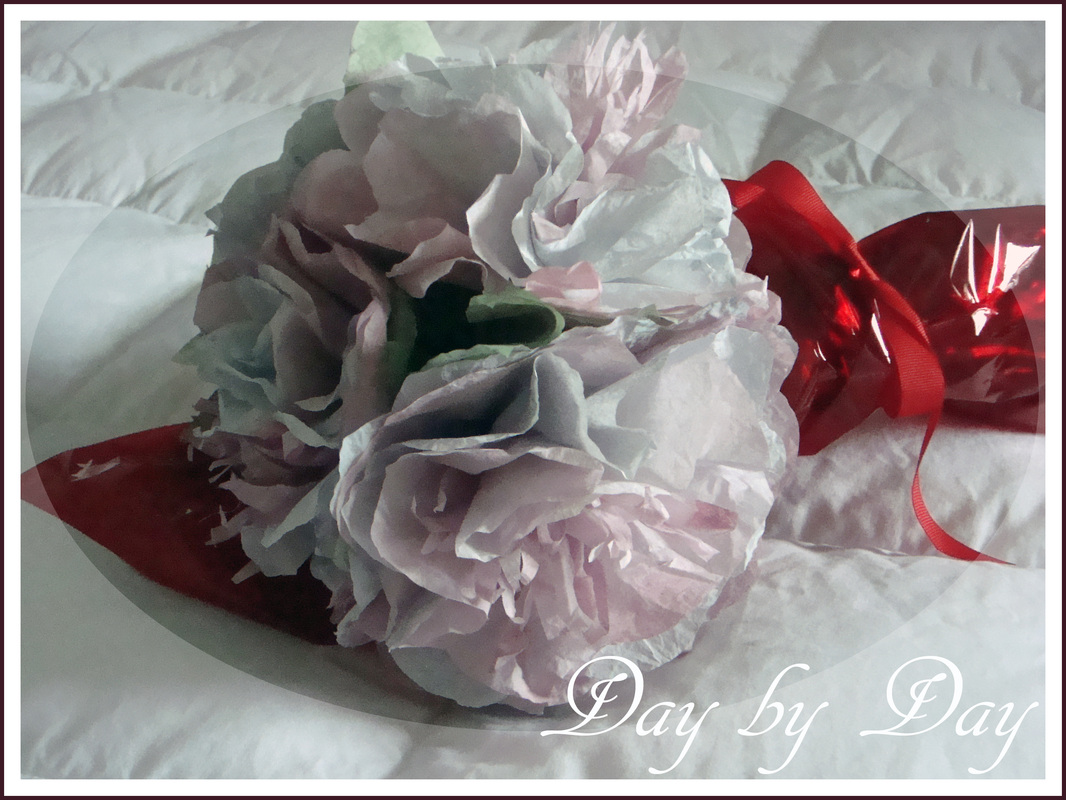
This year I got creative for Valentine's Day and decided to jump on the coffee filter flowers bandwagon... Mr J is an artisanal coffee roaster, and what could be more fitting for him than a beautiful bouquet of handmade flowers created from something so relevant to his very existence? It's so easy to make these... you just need lots of time and patience as dying the coffee filters is a bit messy, but the end result is really worth the effort! I won't bore you with the exact details of creation--suffice it to say that you can use your imagination and use whatever colors your heart desires... if you're a tutorial kind of person, Aunt Peaches makes some fantastical creations and has a great step-by-step tutorial. I didn't make my flowers exactly the way she does, but they'll turn out well regardless of your exact method--these are pretty fail-proof. You'll need to dye 6 coffee filters as 'petals' for each flower, and one green filter for 'foliage' .
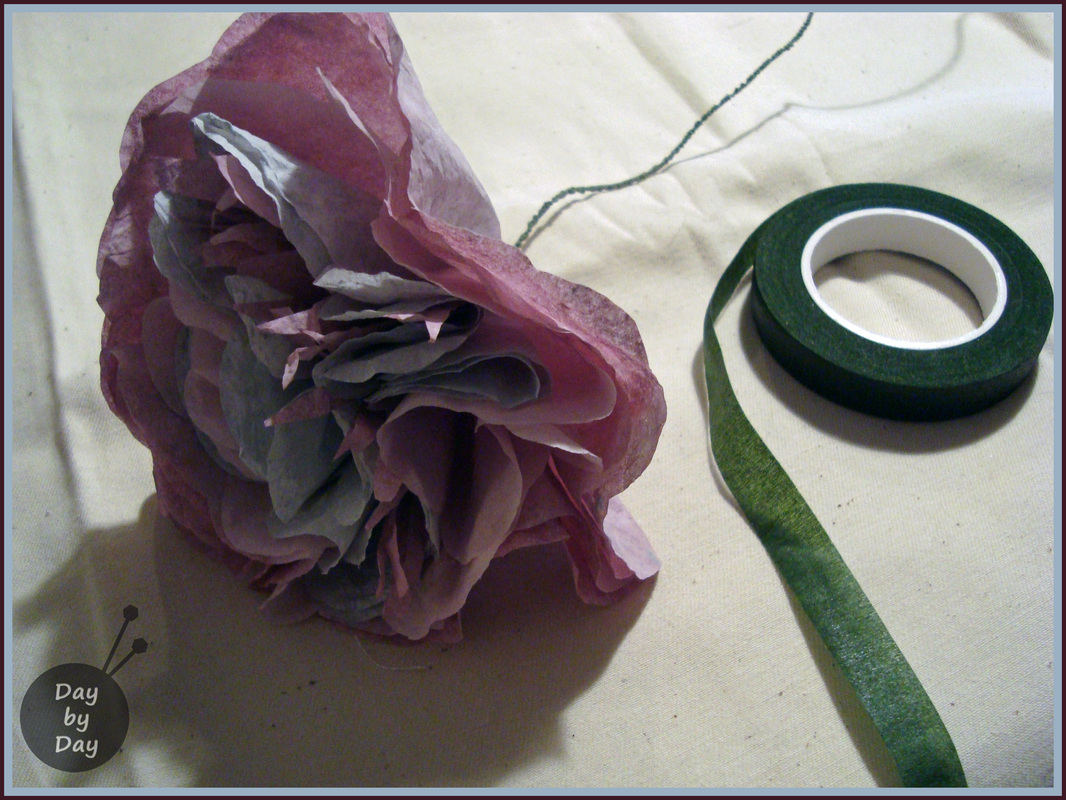
Cutting and assembly is entirely up to you--I did a spiky, darker filter as the center and layered the 'petal' colors for variation.
I finished the flowers off with a green filter that I cut to resemble 3 leaves, and pushed a floral wire through the filters, wrapping them all up with floral tape at the base.
I ended up taking the scraps from the green 'leaf' coffee filters and cutting out some extra large leaf shapes, grouping them in threes, and wrapping them with floral tape to another piece of wire to add extra 'foliage' filler to the bouquet.
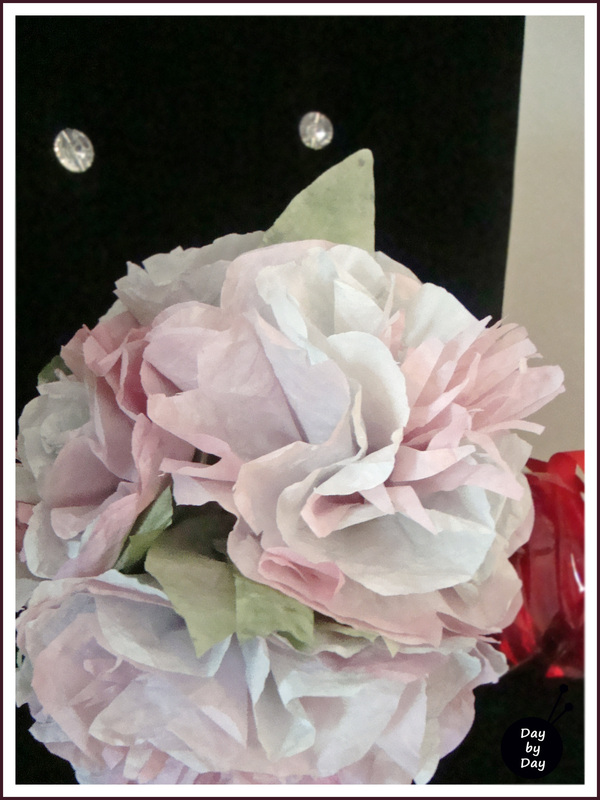
Using superior kindergarden crafts skills, I twisted the floral wire 'stems' together and inserted them into an empty paper towel roll for stability, then wrapped it up into a 'bouquet' using red floral wrap. When it was wrapped and secured with a bit of red grosgrain ribbon you couldn't even see the paper towel roll lurking beneath the floral wrap, and it turned out to look quite realistic. My husband was surprised and delighted with his coffee filter bouquet, and I suspect I'll be making more for the opening of his new coffee roasting warehouse & shop.
Yay for gradeschool crafts!
I hope you all had a wonderful Valentine's Day!
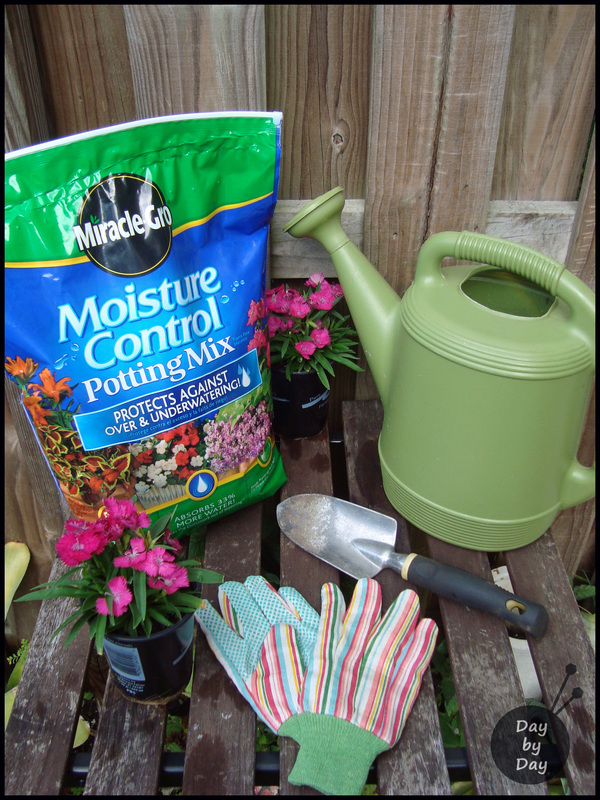
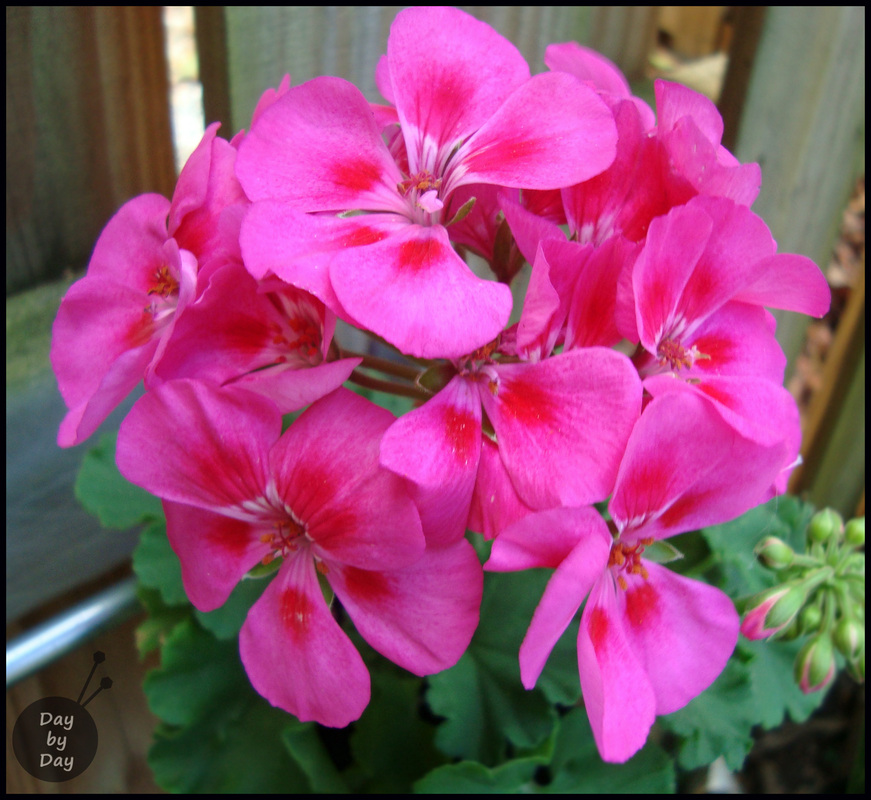
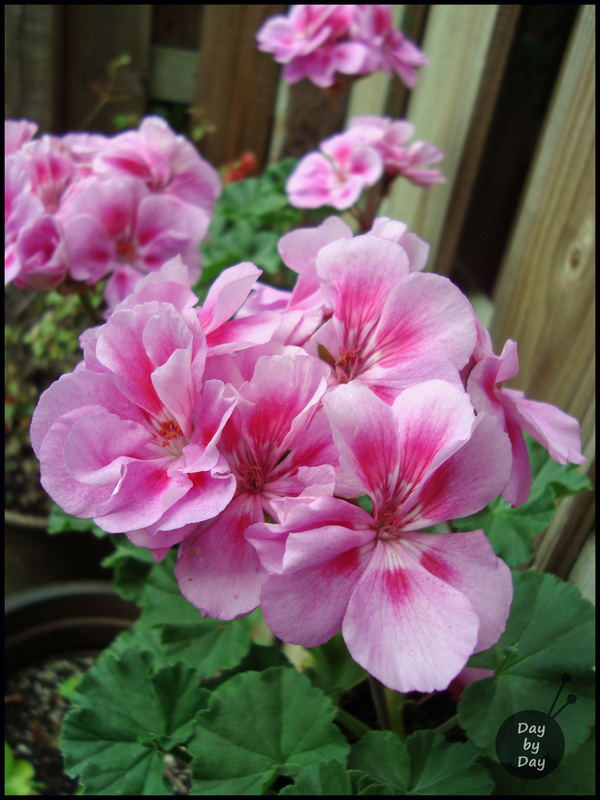
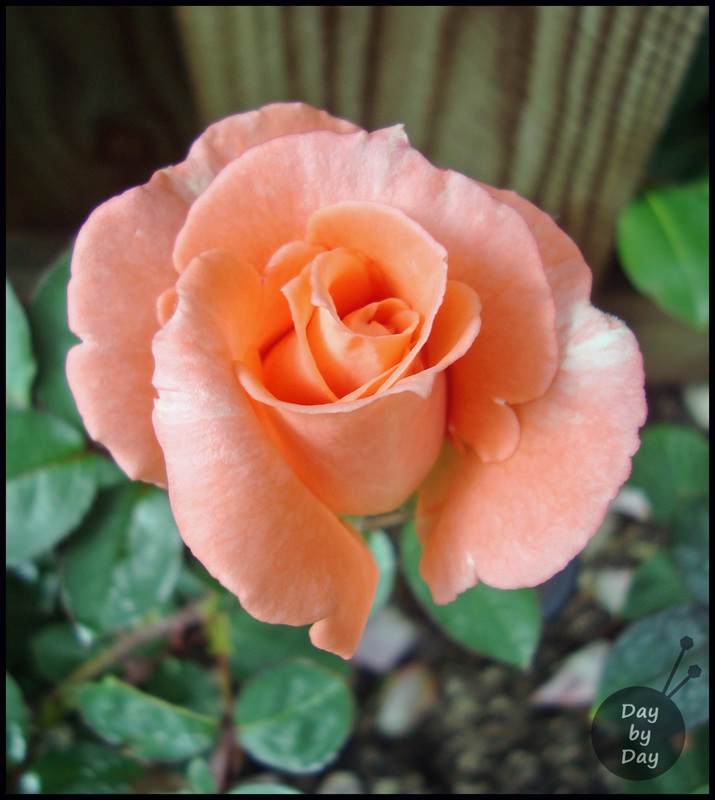
There's nothing like colorful flowers to brighten your day--each morning as I stumble downstairs to the kitchen in desperate search of coffee, I always throw open the big curtains to expose the tall windows lining the whole back of our house. Our garden lies just beyond those windows, abloom in glorious color even during the winter months. Yay, Florida! A few more happy pink flowers are going into planters today, and they are in good company with the established players... I absolutely love flowers... when they are alive and growing outside. I have issues with cut flowers in vases inside the house--unfortunately my allergies don't allow me the luxury of indoor bouquets very often.
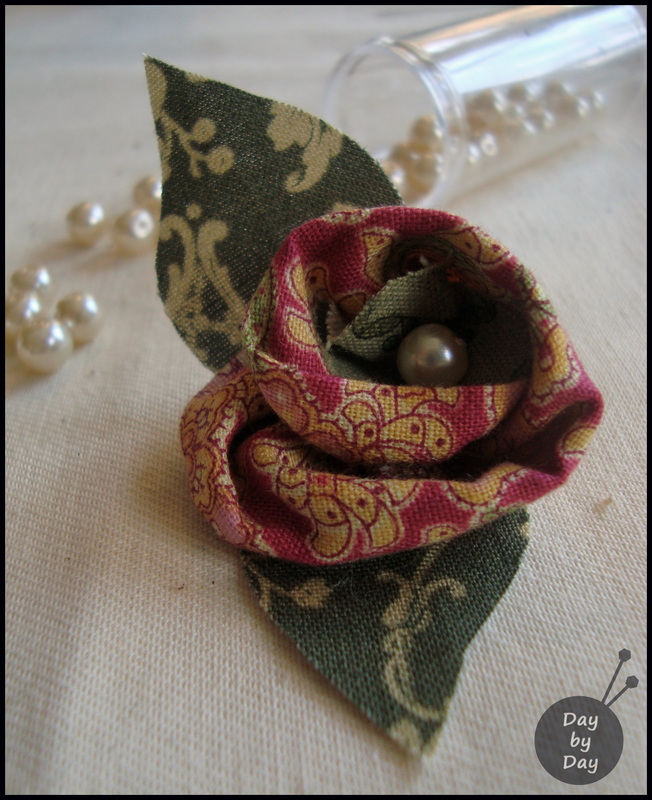
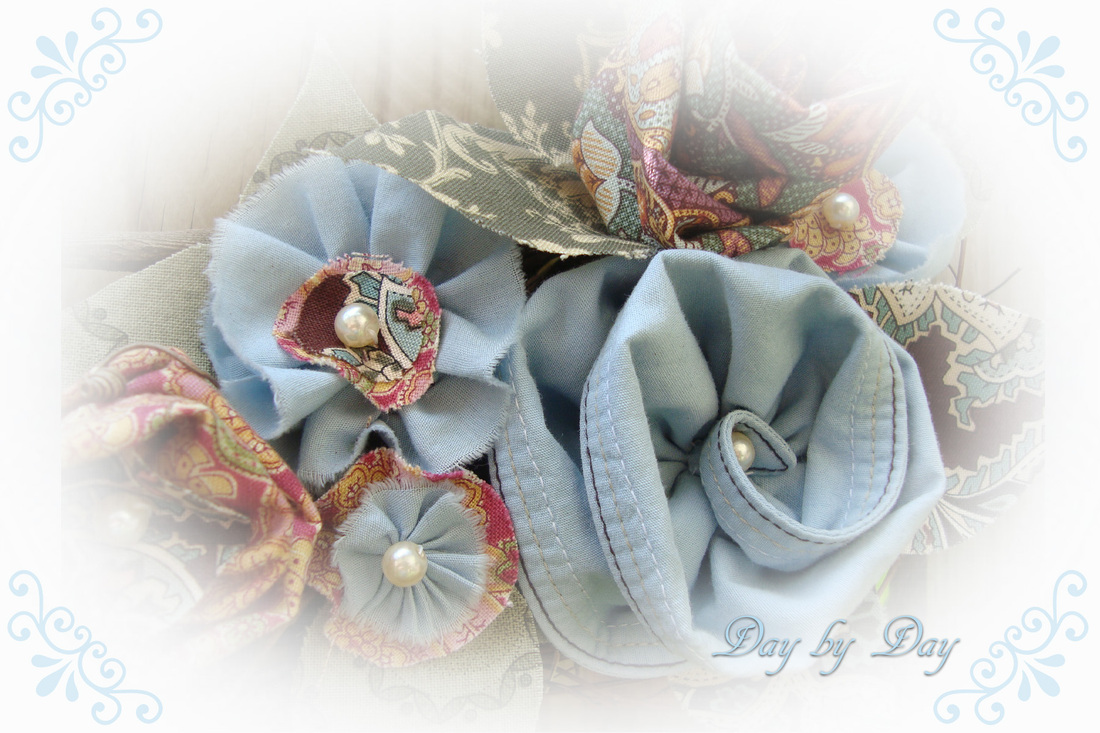
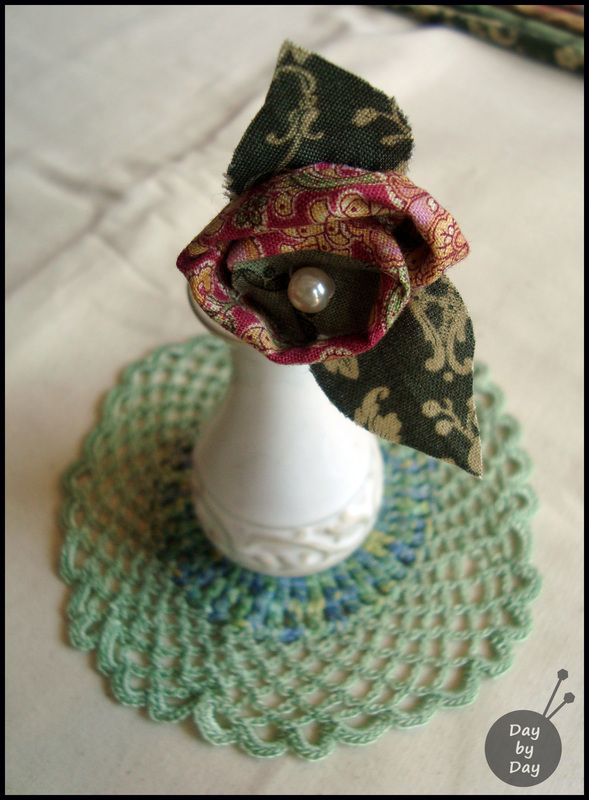
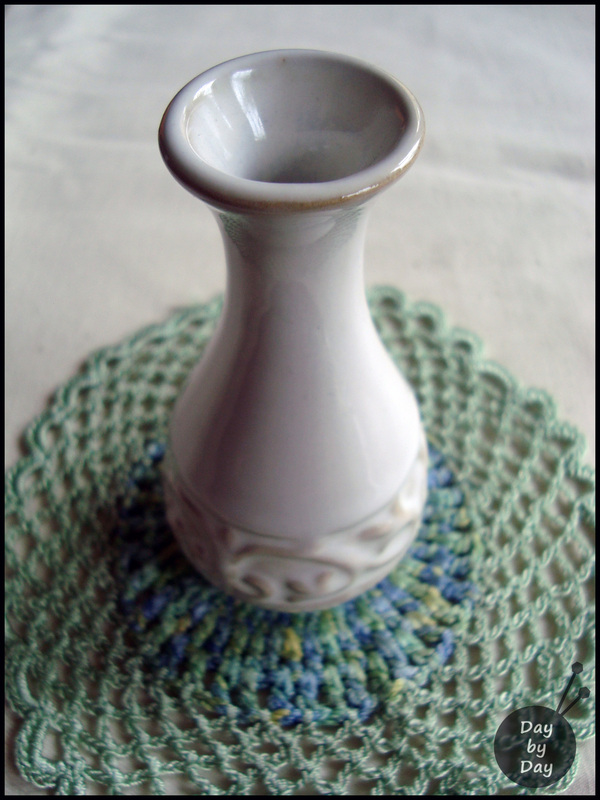
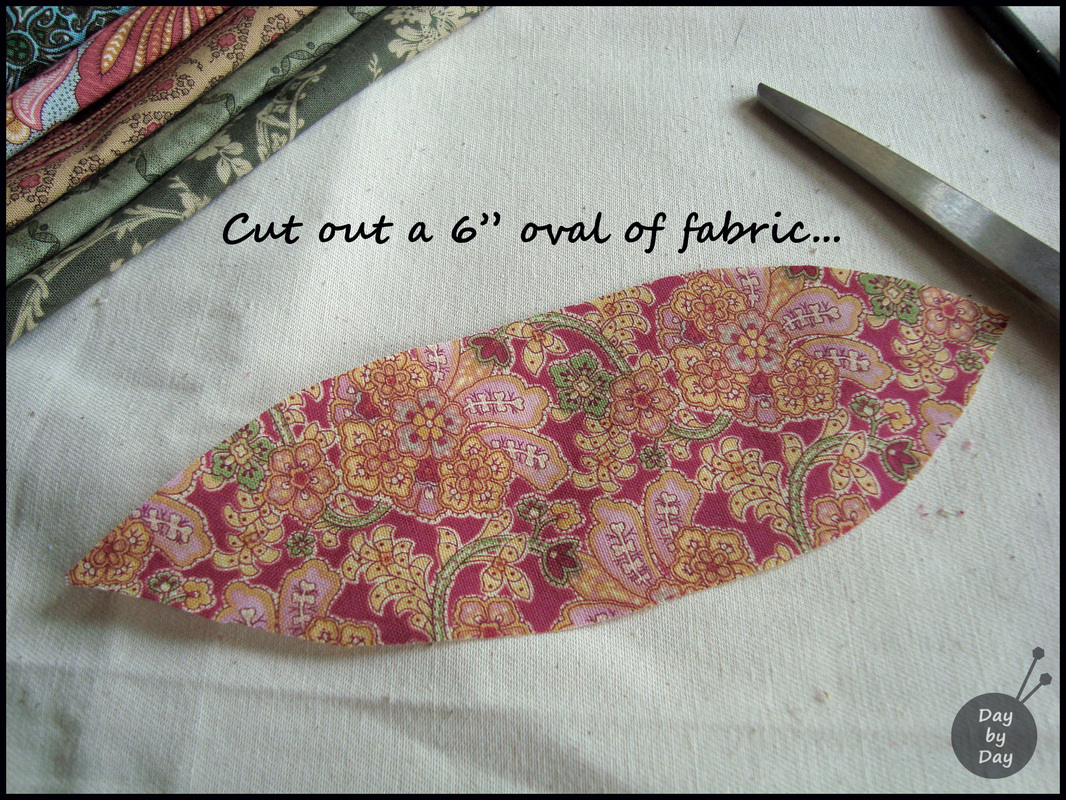
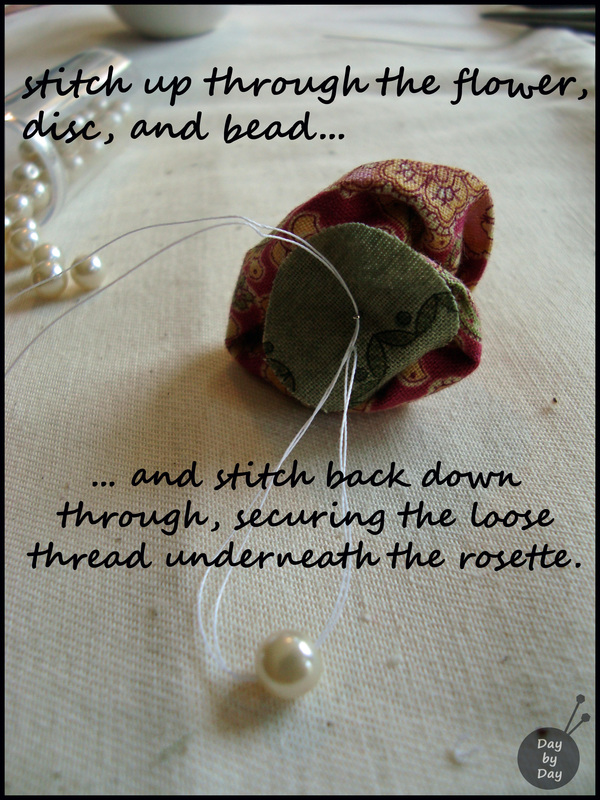
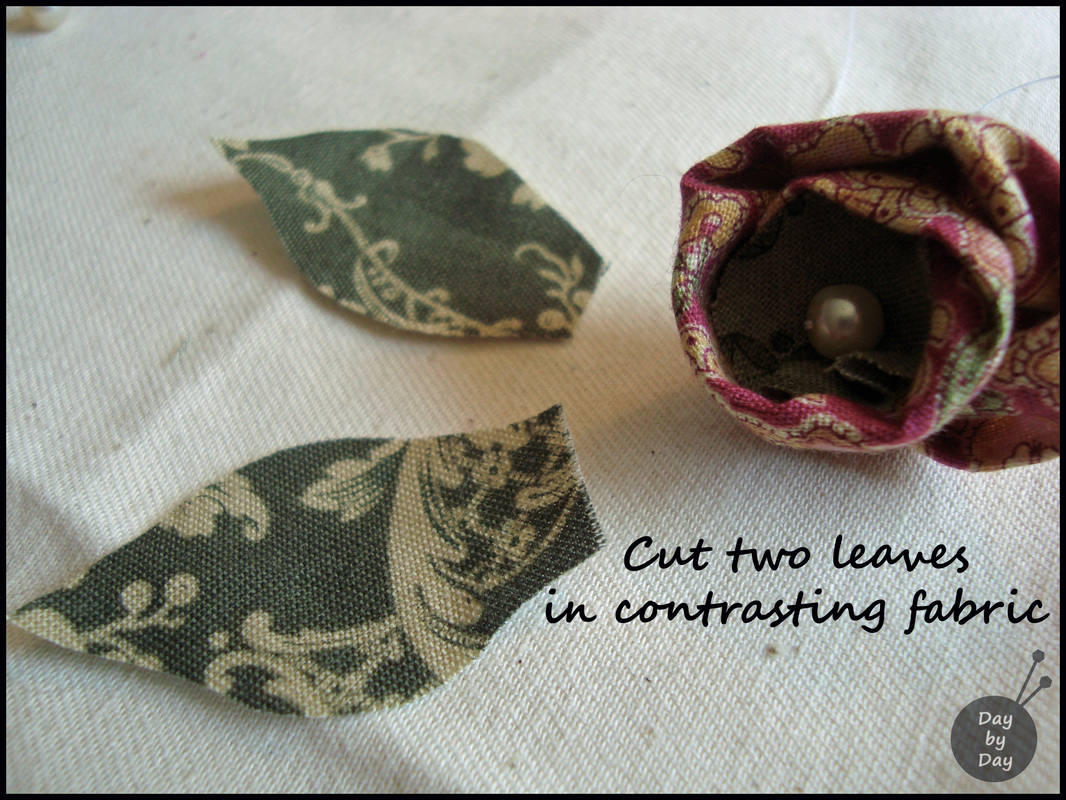
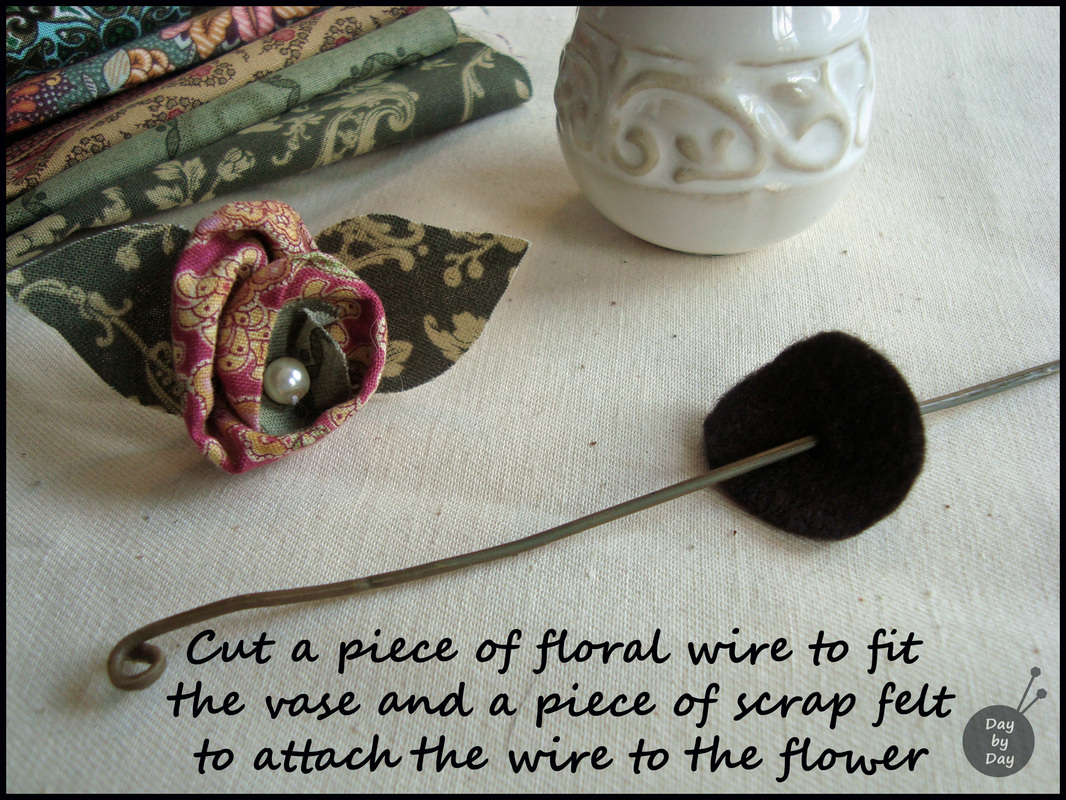
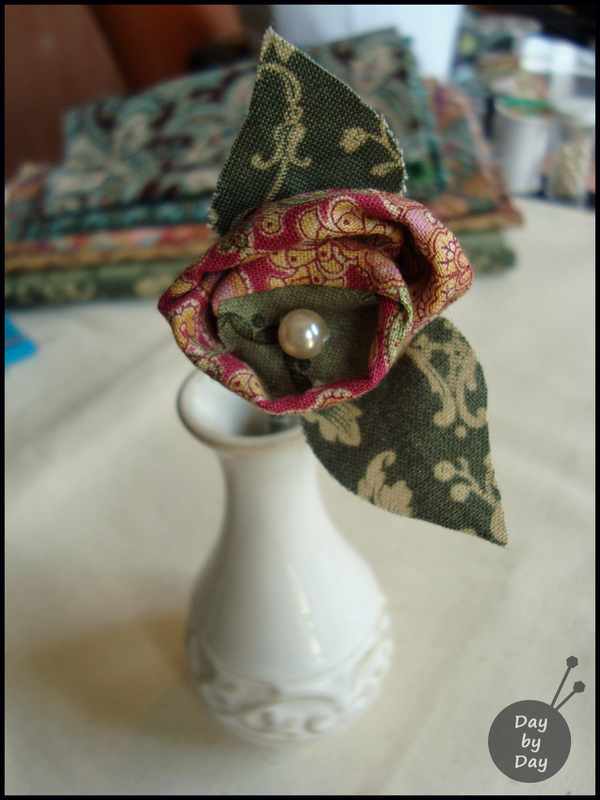
Sad, because I found the most adorable little vase recently... The little crocheted doilie it rests on is one of my absolute favorites--I found it at a charity shop in Edinburgh. The thrift shops in the UK are amazing--I miss them so much! I always found such interesting items--and a lot of crafting supplies and books as well. Oh to spend the afternoon in Morningside browsing... sigh. I decided that a fabric flower would be perfect for the vase, and went to my scrap fabric stash. This little project takes more patience than materials, and you just need a few scraps of fabric, a bead (I used a pearl), a scrap of felt, and a piece of floral wire (I confess that I pilfered one from a dollar store flower I had kicking around in my craft room).
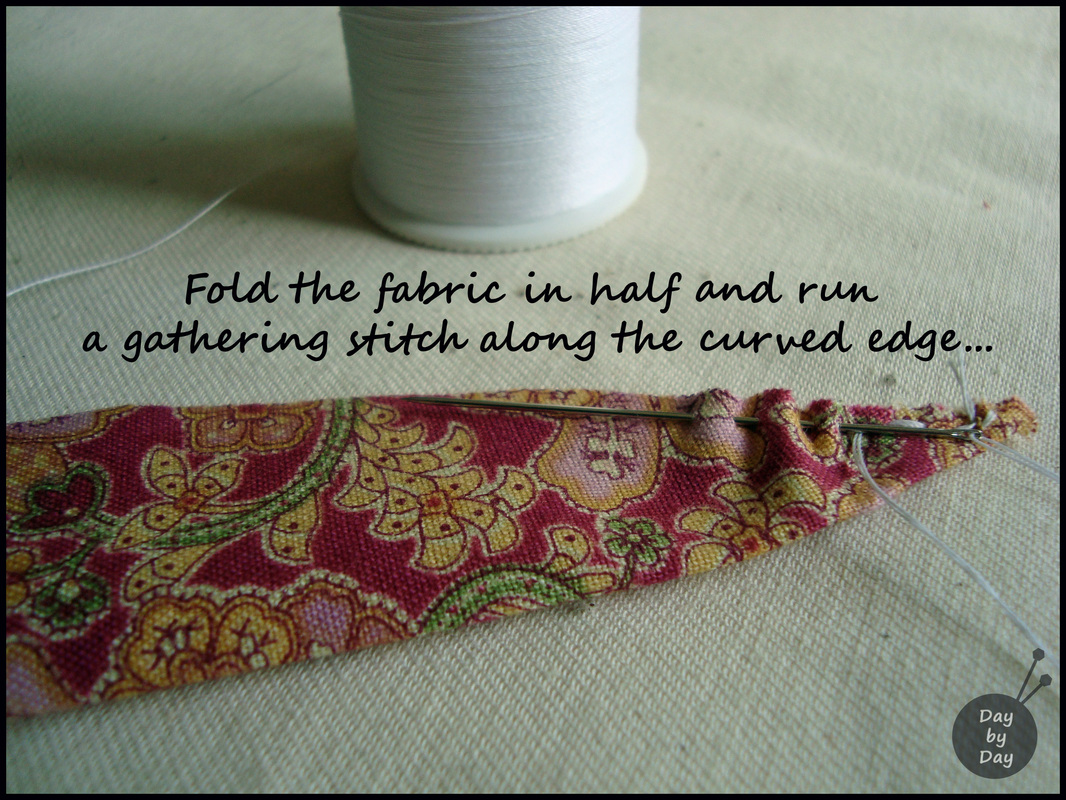
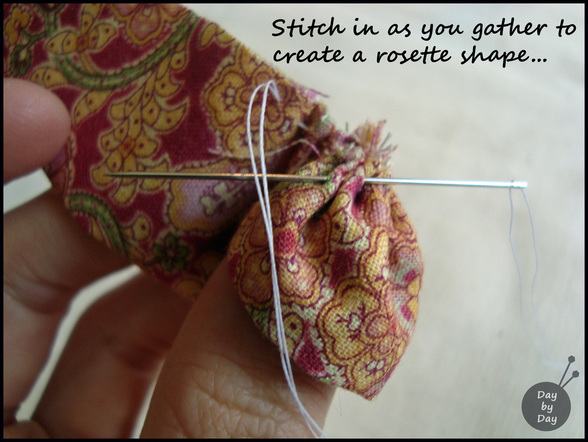
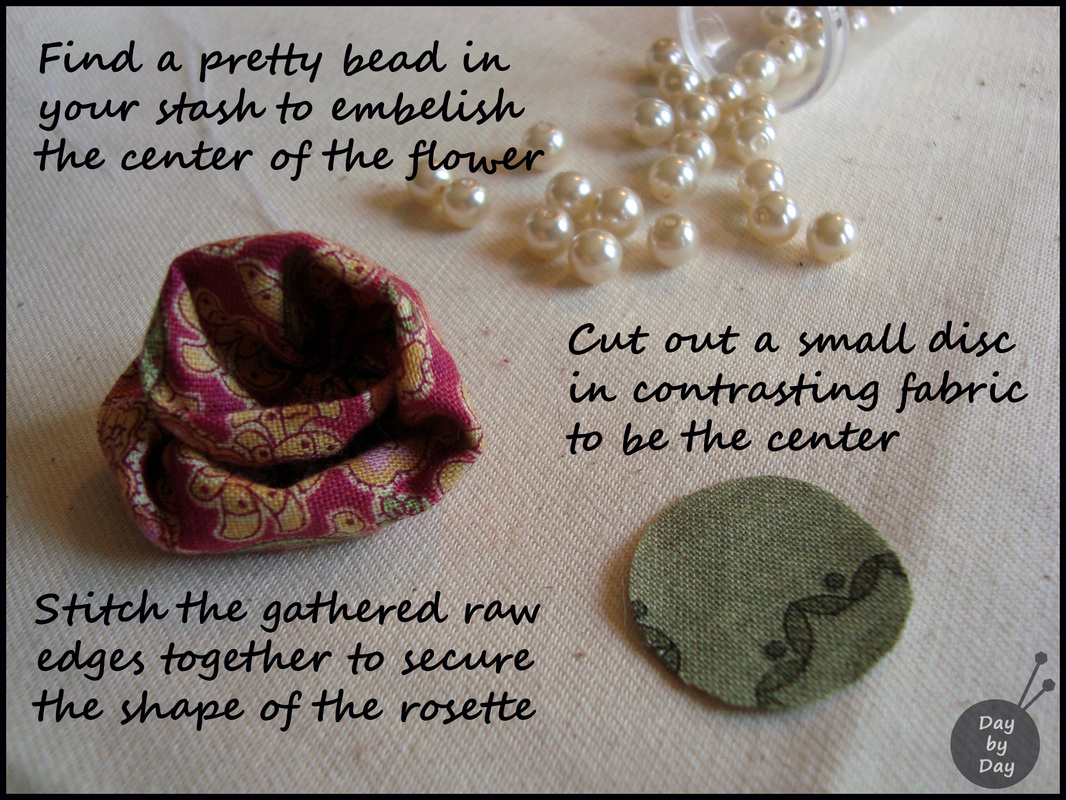
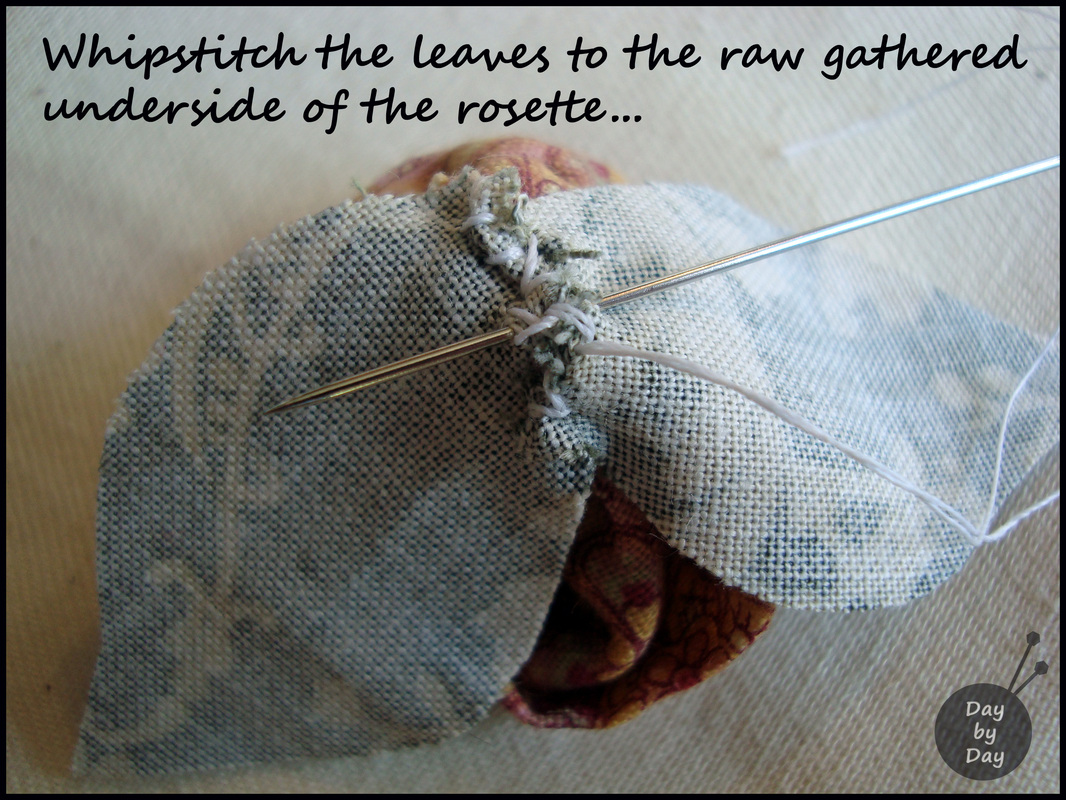
Here's how to make a cute little patchwork flower to brighten your day: Here I should point out that the disc of felt is large enough so that it will cover the raw edges underneath your flower. Cut it out and poke a hole in the center of the felt using the floral wire. Doing this will make it easy to insert the fabric-wrapped wire through the felt after the next step. You can secure the ends of the scrap fabric with a dab of hot glue.
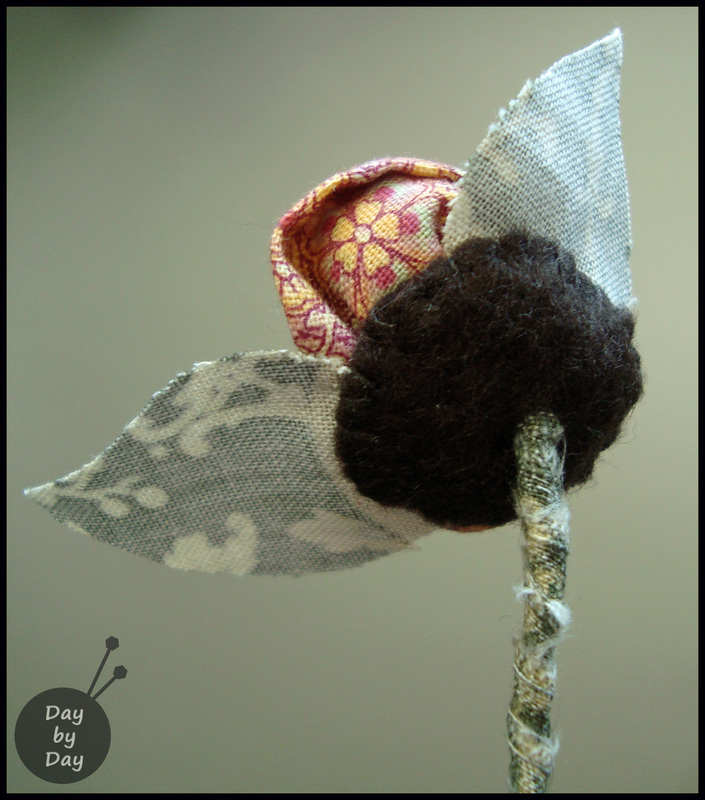
Make a twist at one end of the wire to stop it from going through the felt disc.
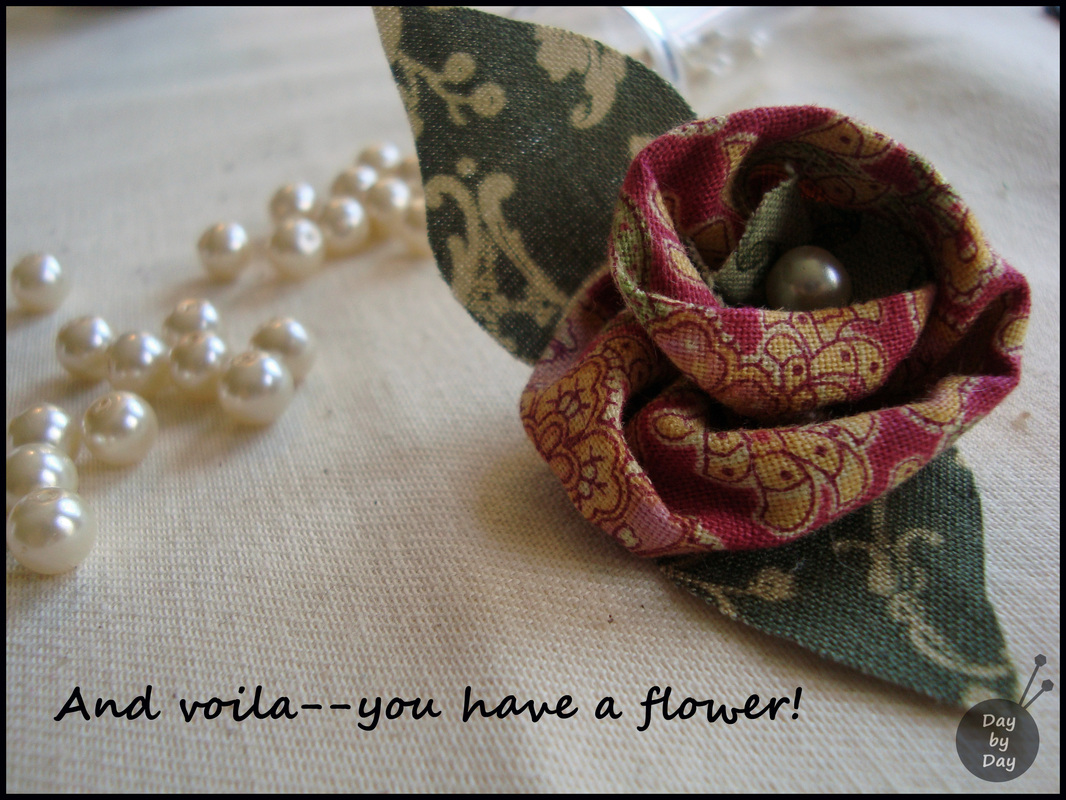
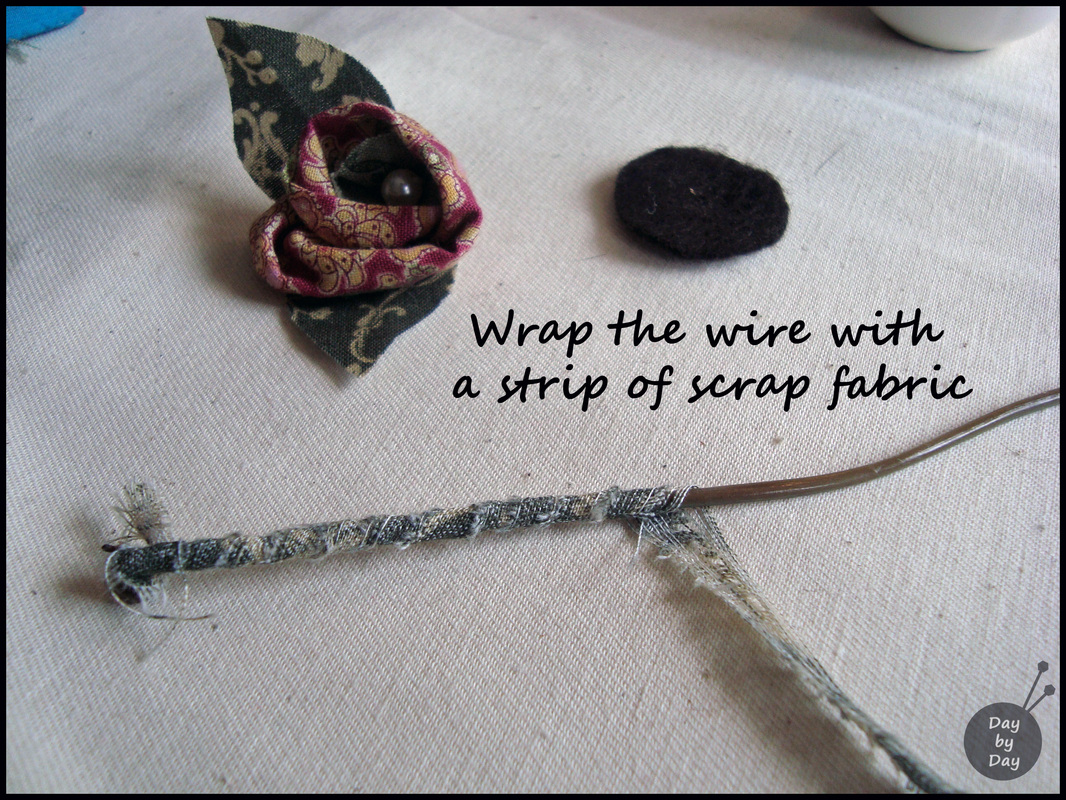
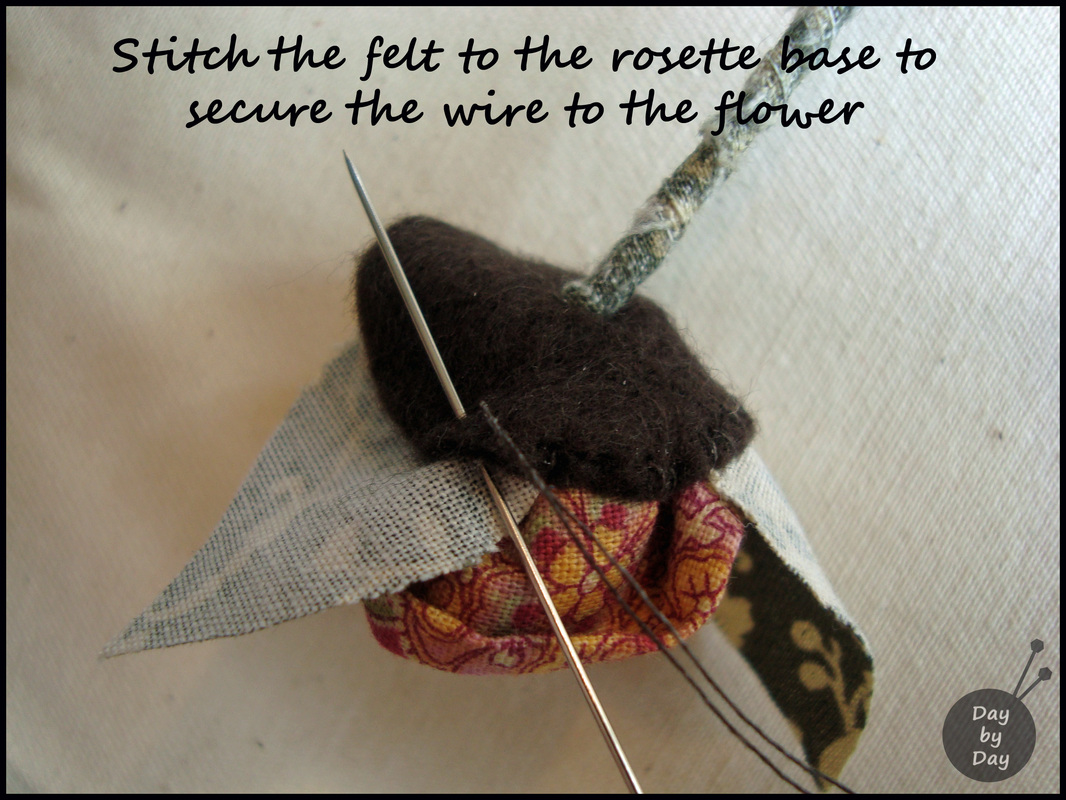
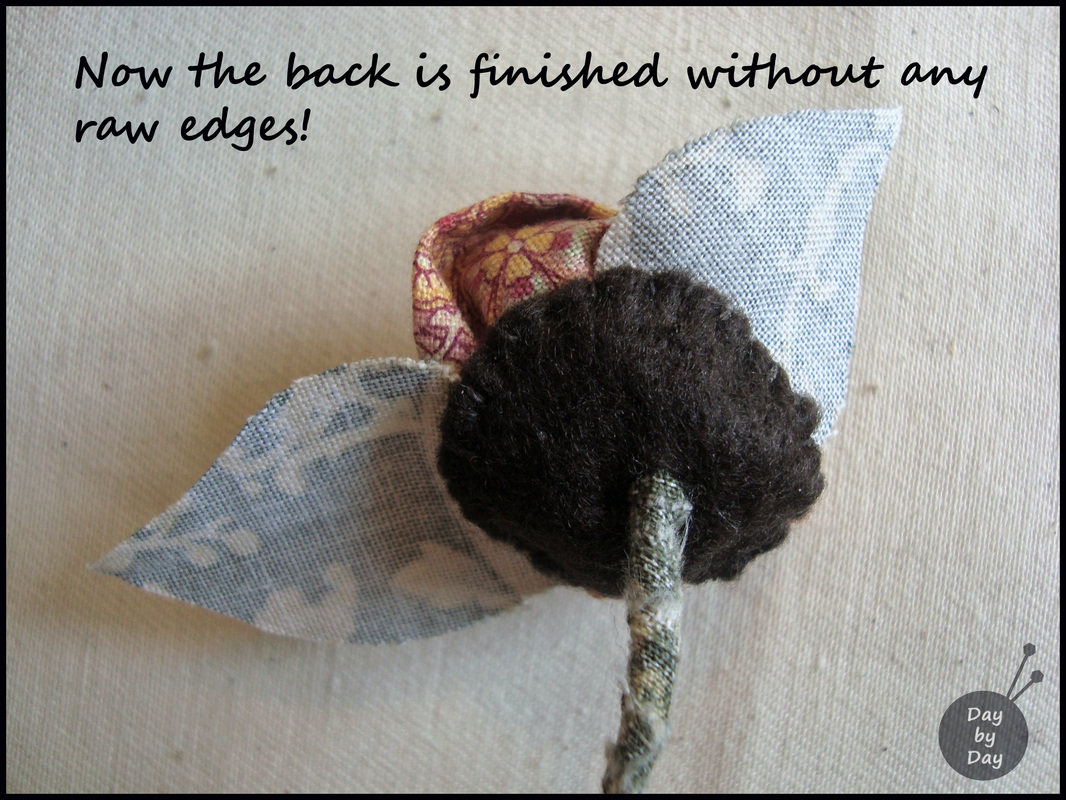
Carefully insert the fabric-wrapped wire into the hole in the felt disc and ease it through until you can hold the end of the fabric against the wire so it will not slide along as you pull the felt disc toward the end of the wire with the twist. This will be the flower end. What a great way to use up tiny little scraps of favorite fabrics! I think I'll make a few more and have a lovely little patchwork bouquet... The best part? No need for Allegra! I'm away to stitch a whole bouquet... happy Friday, everyone! Flowers... are a proud assertion that
a ray of beauty outvalues all the utilities of the world.
Ralph Waldo Emerson
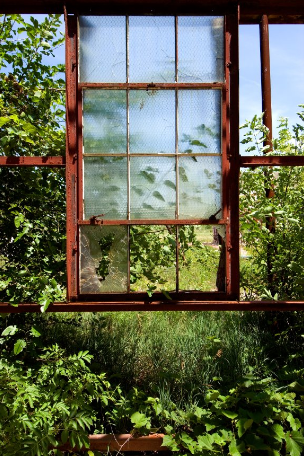
Green Coffee Utopia!
All has been quiet on the posting front here this week... not for lack of activity, but because the projects currently in the works are neither quick nor particularly pretty when photographed!
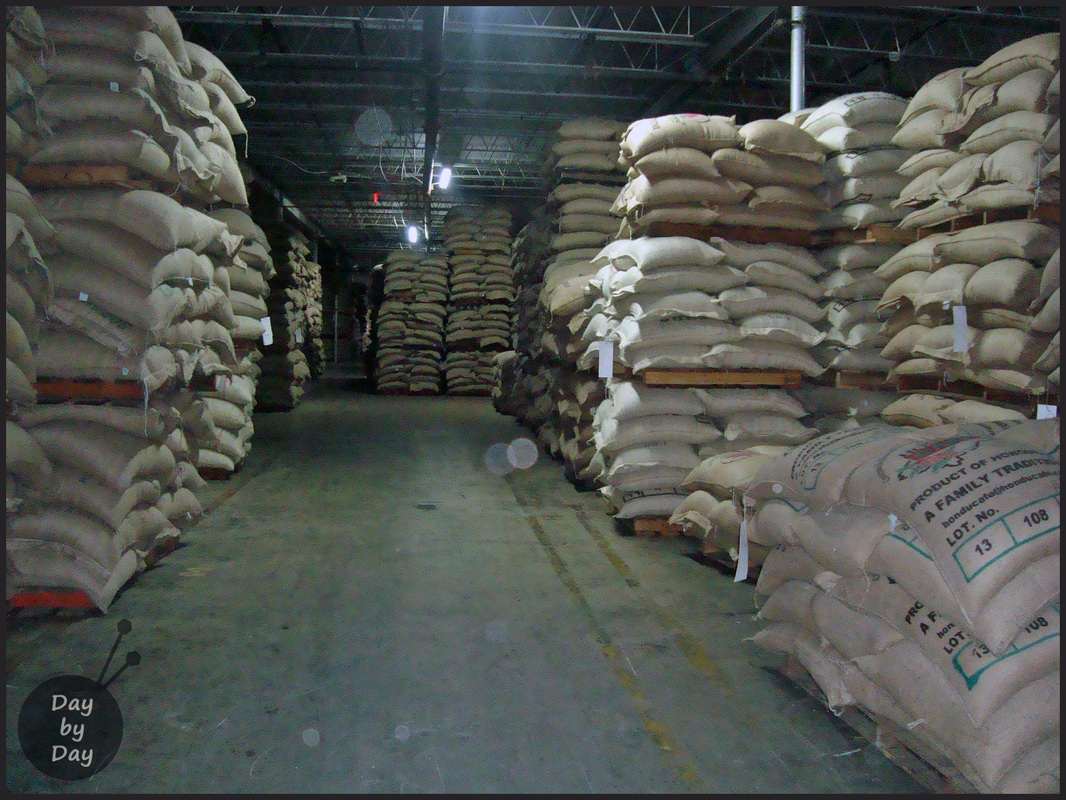
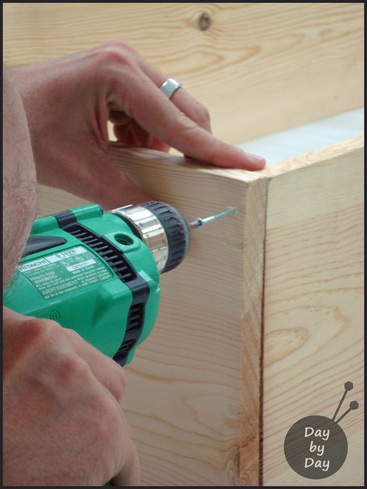
My husband is an artisanal coffee roaster, and we have been in a flurry of activity recently while getting his new warehouse/roasting space/shop space ready for opening. His mad carpentry skills and extreme attention to detail have been put to good use and we have become very friendly with the lumber and paint staff at our local Home Depot... a big shout out to all the experts who have answered our questions so nicely and patiently :-)
A few days ago we went to pick up his green coffee bean order at the warehouse you see in the photo above. I had never been in a coffee warehouse before, and it was absolutely incredible. From where I was standing when I took that shot there was another section behind me that was equal to or larger than the space you see in the photo. Stacks and stacks of green coffee from Honduras, Equador, Costa Rica, and Colombia.
Pure heaven!
Walking into that space was like wandering into a barn filled with drying hay--the green coffee beans give off a very earthy, green smell that is reminscent of a barn--in the best possible way. It was just incredible.
Mr J hard at work...
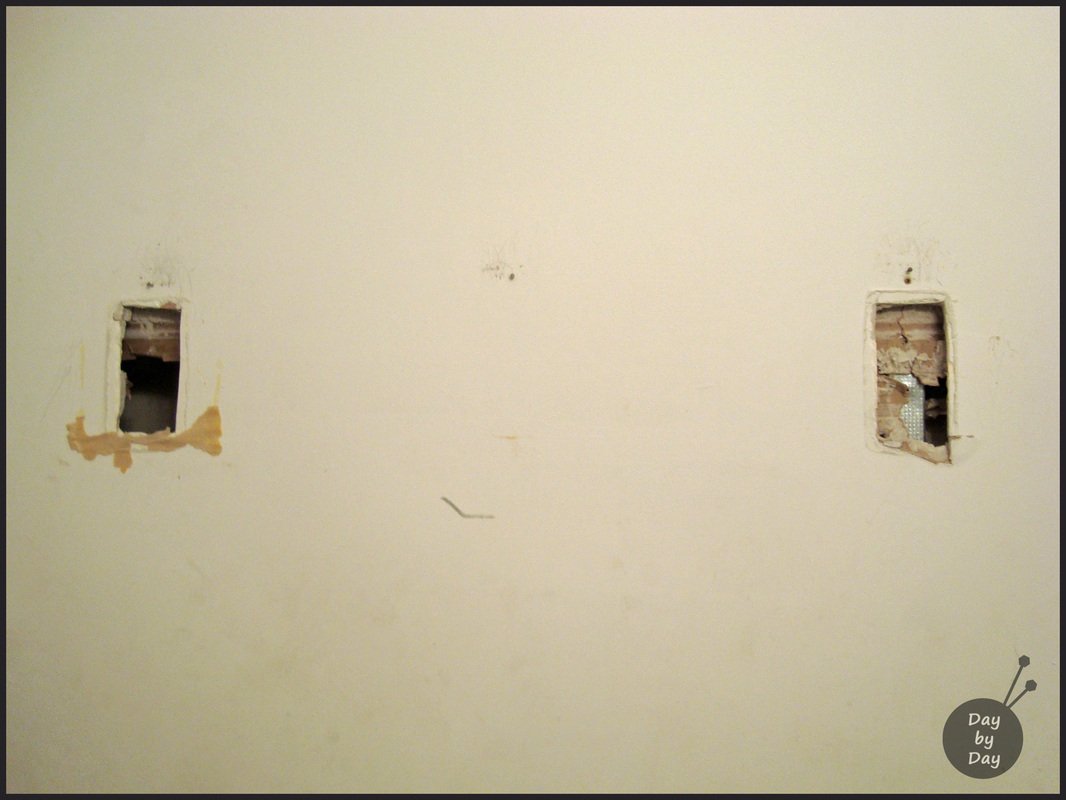
While my husband is busy building cabinets and a tasting table, I have put my quasi-carpentry skills to work and repaired two sections of drywall in the upstairs guest bathroom. Exciting, non?
To clarify--there used to be a ceramic and perspex towel rail that was permanently attached into the drywall. At some point it was taken out of the wall (that was long before my time), and instead of repairing the drywall, several prints were hung strategically over the openings.
Men. I recently decided to paint and do a bit of reno in the bathroom, and did the repair myself.
It's really not hard--measure the openings to see how big a piece of drywall you need, then cut the piece you're going to be inserting as the patch. Put it up to the wall and trace the shape onto the wall so you can cut away the wall and the patch will fit perfectly.
Here I have to apologize as I completely forgot to take photos as I worked along on the repair... oops.
Take a piece of scrap wood (it came in handy that Mr J was doing a lot of woodwork at the warehouse while I was doing this repair) and ease it into the wall behind the opening. Screw it into place above and below the opening. This will create a brace for the patch to rest against and a wooden surface to which you can screw the patch.
Once the patch piece of drywall is screwed into place, gently sand around the seam to remove any rough spots. Use drywall compound (you can get a little pot of it for repairs) and essentially 'crack-fill' the space where the patch and the wall join. Be liberal and try to smooth it out as well as you can, but keep in mind that you will have to allow 24 hours between applications for the drywall compound to fully dry.
Once it is dry, gently sand to smooth everything out, and if it needs a bit more compound, keep applying, letting it set up for 24 hours, and sanding it until you have the desired smoothness. I ended up doing this three times to make sure it was going to be invisible. Taking the extra time really was worth the end result.
Once it is ready and painted, it should 'disappear' into the wall and you'll never know there was a repair!

The finished result! Smooth, beautiful wall :-)
I'm so pleased with the end result--the wall is beautiful and smooth, and you would never know there had been a repair! Success! Apologies for the weird lighting in the above photo--the wall color is the most beautiful grayish-blue from Behr called 'soft denim', but it doesn't read well in the photo. It reminds me of a winter day at the seaside, and I can't wait to see how it looks when the room is all finished. I've now moved on to the ceiling and trim, and have the wood to build a display shelf that is going up on that wall. I'll share the finished result when it's ready... eventually. If anyone is interested, here is a great Build dot Com video tutorial--the only difference in their method and mine is that I didn't use tape, and I used premixed drywall compound. I didn't watch a tutorial before I did my repair--I kind of wish I had, and I would have known to use the quick-set joint compound. Oh well, I'll know for next time! There's another one of those towel rails in the downstairs bathroom that I want to eliminate! I'm working on another little project and will have something much prettier to share soon... I promise! How is everyone's week going? What are you working on at the moment?
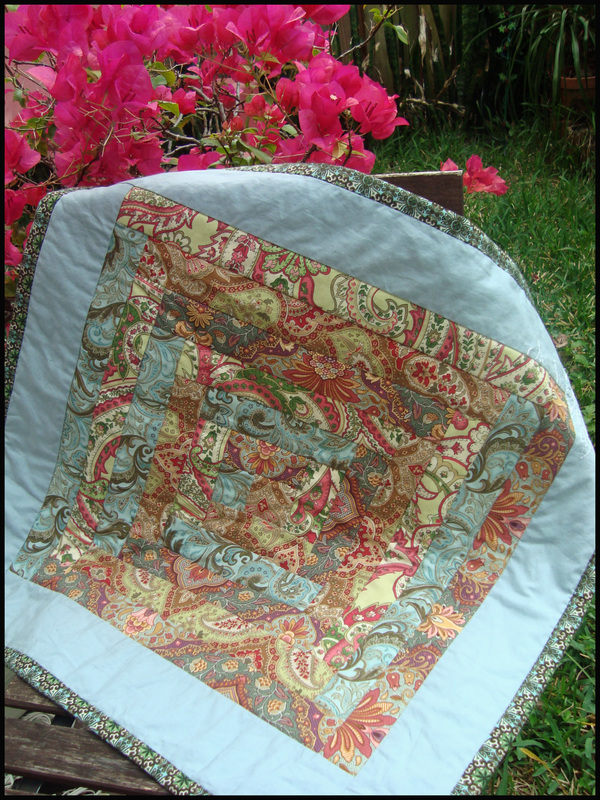
Confession: I am a fabric hoarder.
Well, not technically a 'hoarder' because I have no problem entering and walking through my house... but I have a massive fabric stash (a situation which I'm sure more than a few of you have in common with me?).
I have fabric from all sorts of sewing endeavours that I put away to do something with later... and some pieces are so very special to me. There are certain favorite pieces that I periodically take out and look at, wondering how I should use them. Then after much deliberation I end up putting them away because I like them too much to put them into just a 'so-so' project.
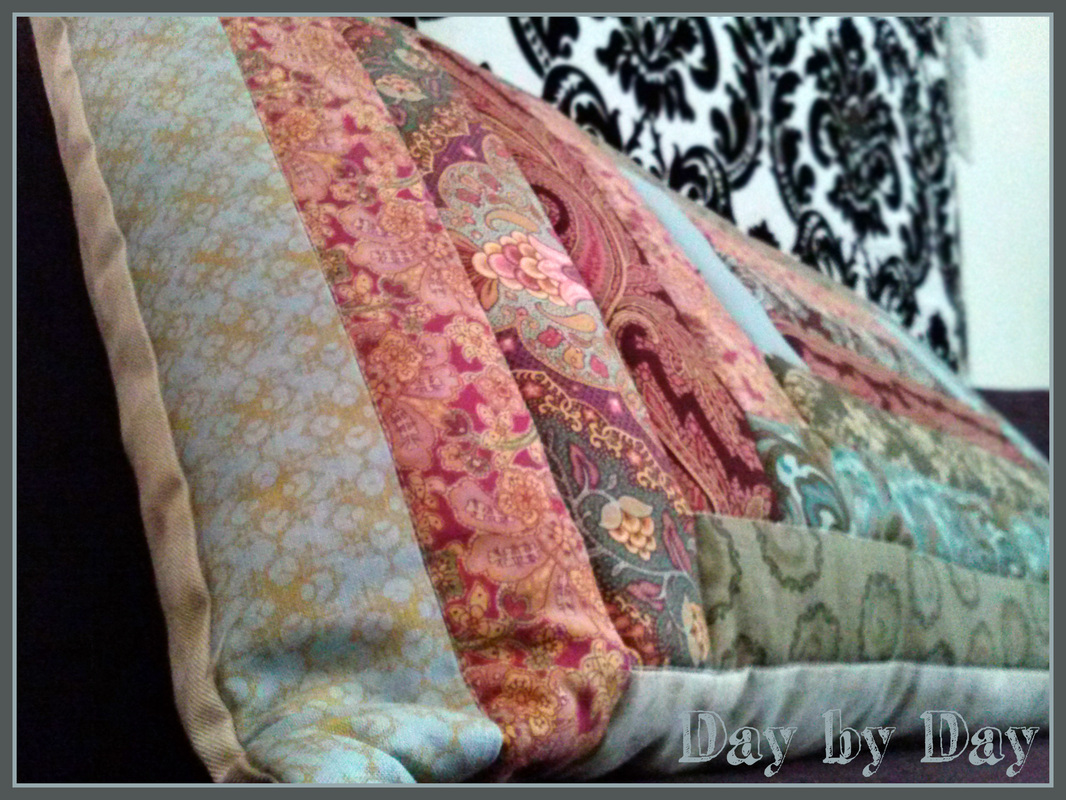
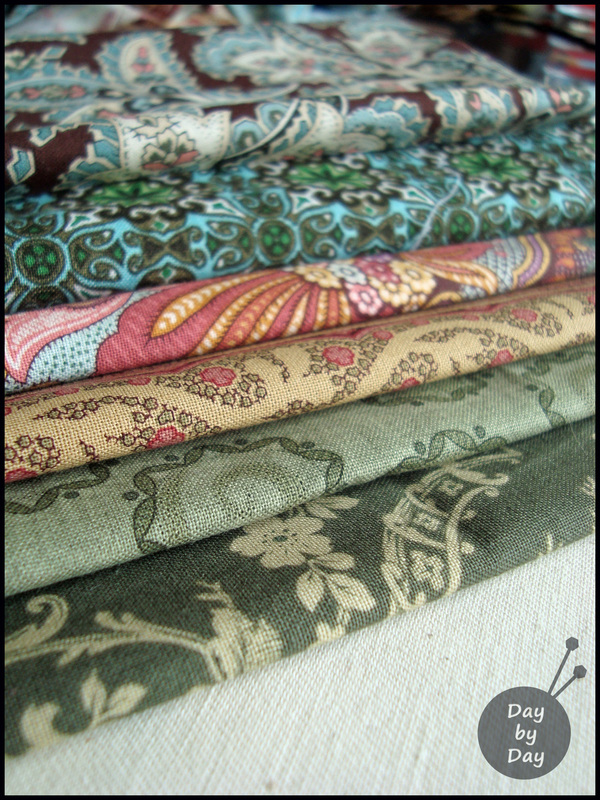
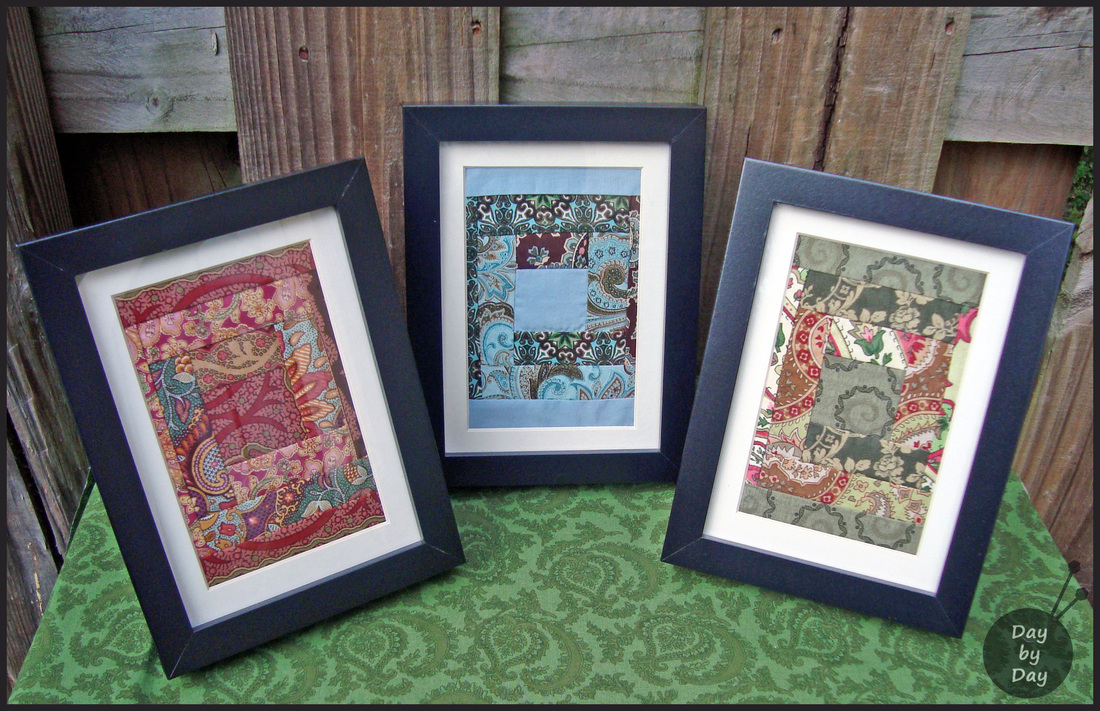
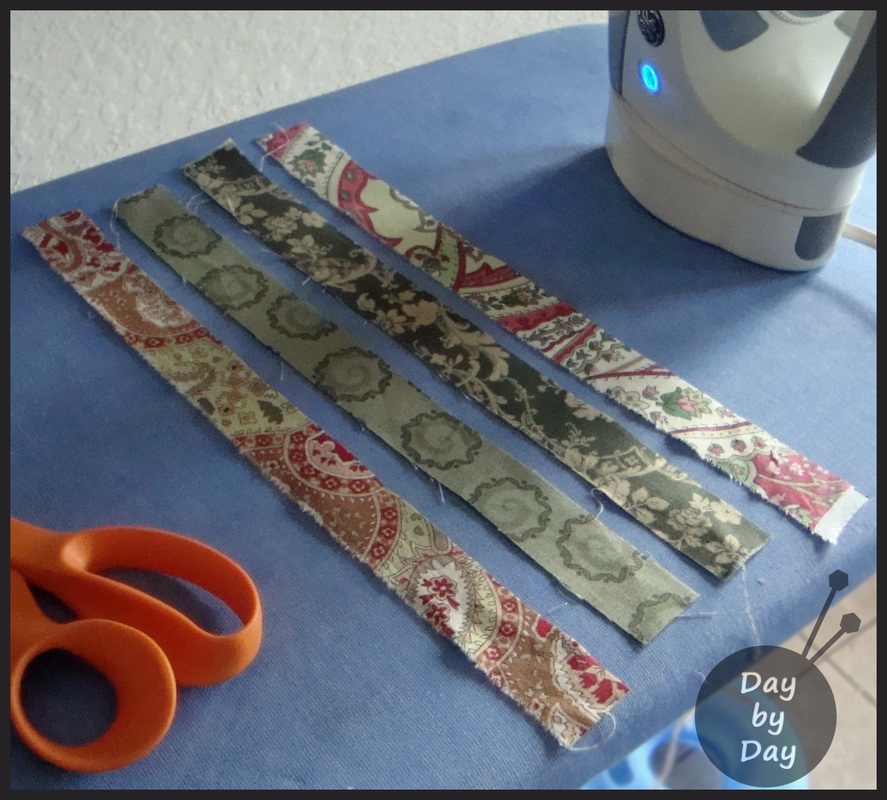
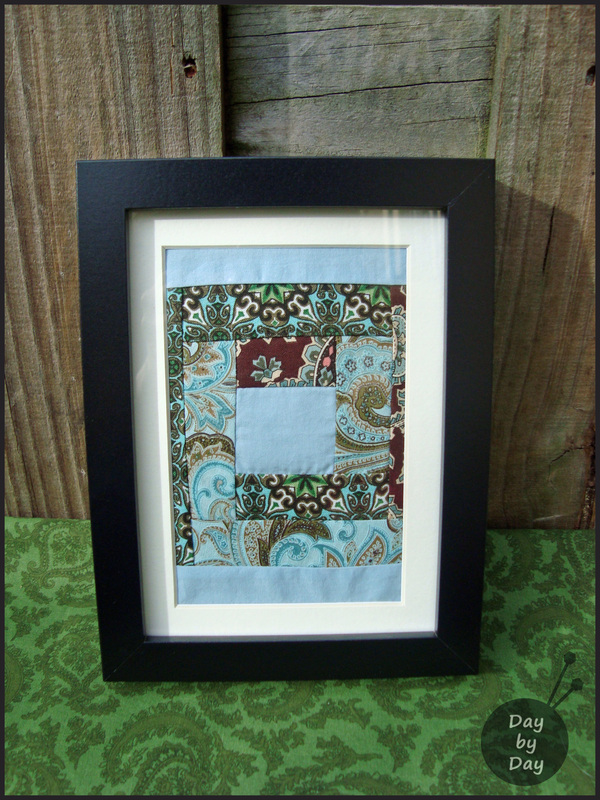
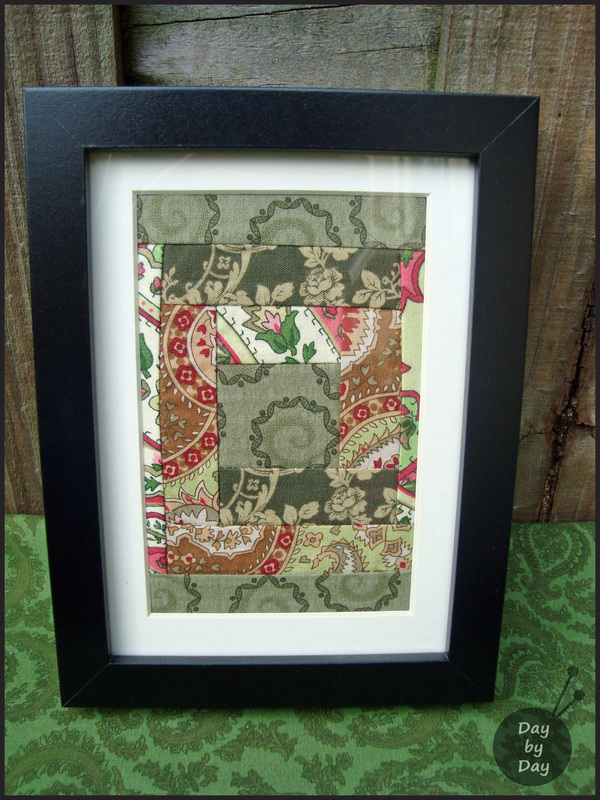
So, the other day I took out my pieces again... and decided to make something pretty that I could look at and enjoy all the time! I started out with 1 inch strips like these, and started adding them onto a 'base' block measuring 4.2cm x 4.8cm.
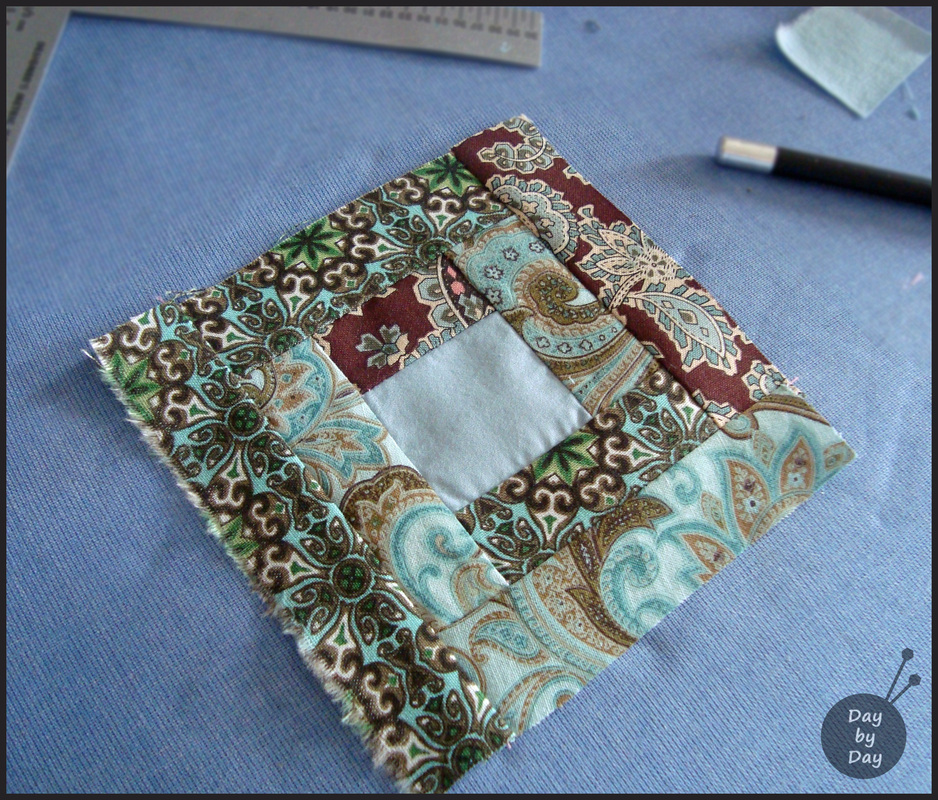
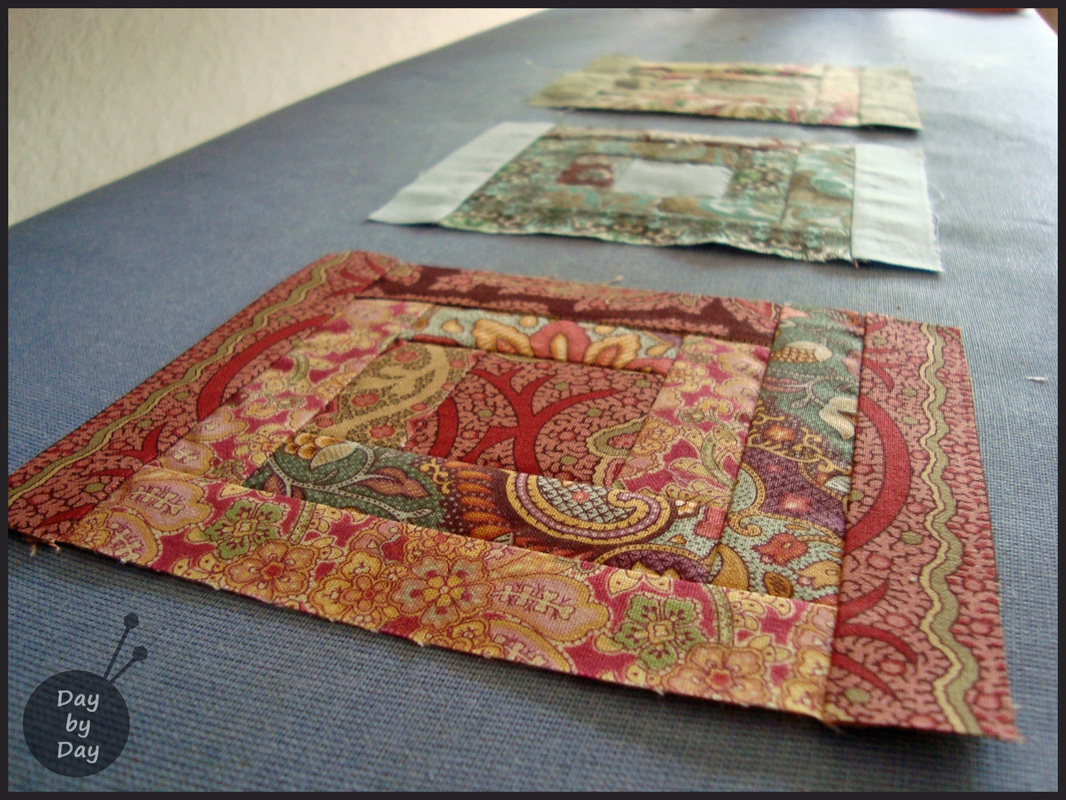
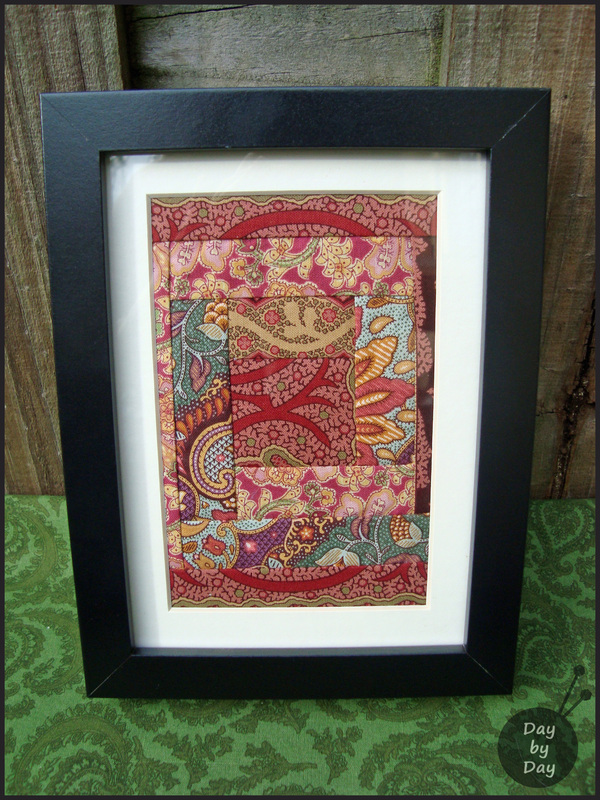
(...yes, that is a kitty ball-in-a-donught toy in the background... that's how we roll here!) And before long I had 12cm x 12cm squares. See that dark brown and blue paisley print fabric? It's my all time favorite! I assembled three color themes: pinks, blues, and greens. I had three RIBBA frames from IKEA kicking around, so I added strips to the top and bottom of my modified log cabin blocks to allow them to (kind of) fit into the matted openings. Overall I'm delighted with the results. There is left-over fabric in these from everything from clothing for myself to shirts for my husband, and even Sophie's little kitty hidey hole. And some much-coveted fabric that I saved from my sewing room in Canada after the flood. The darker greens in the above shot are a couple of those pieces. I love the fact that I can look at these and recognize all of the different patterns and it brings back memories of many happy projects, and the happy times associated with them. They are now living in the downstairs bathroom (which accounts for the weird lighting in the above photo), and I smile every time I look at them. As Martha would say... these are a 'favorite thing'!
|


 RSS Feed